Sharding and scaling guide
ObjectRocket sharded instances implement standard MongoDB sharding into an easy-to-use service. The ObjectRocket system automatically provisions all standard components on demand. The MongoDB balancer keeps data between shards at an even level. For more information about the MongoDB sharding architecture, review MongoDB’s official sharding introduction.
Shard keys
You should begin by defining keys for how to split data among the shards. The two ways to achieve this on the ObjectRocket platform are described next.
Manual shard key definition
Choosing the proper shard key is critical to performance and scalability. MongoDB has written a great primer. You can also contact ObjectRocket DBAs for help.
To define shard keys in the ObjectRocket Control Panel, use the following steps:
Log into the ObjectRocket UI.
Navigate to the instance.
Select the database and collection.
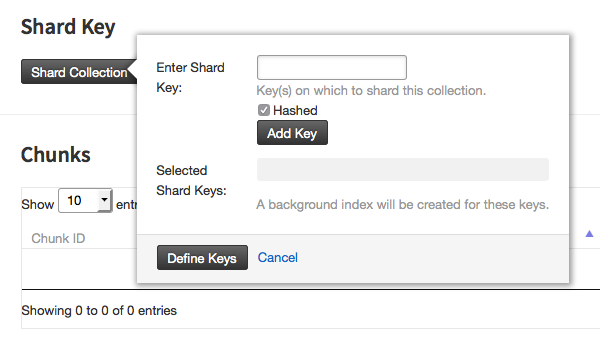
Select the Shard Key tab.
Click Add Shard Key to define the key.

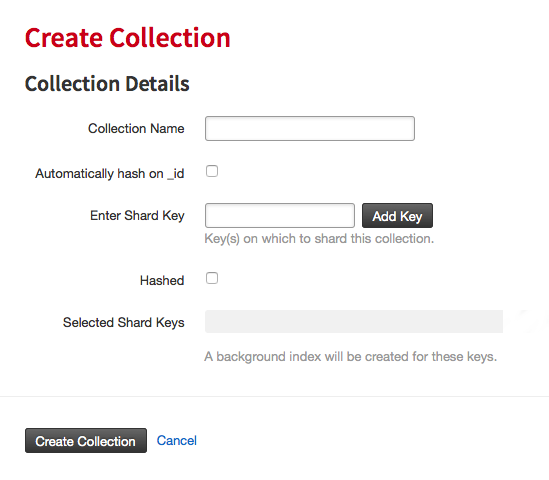
You can also define a shard key when you make new collections.

Automated shard key definition with AutoKey
ObjectRocket’s AutoKey feature can help automate the creation of shard keys. Autokey watches every collection in a MongoDB instance, and creates and applies the shard key when the criteria is met.
This setting gives true set-and-forget sharding capabilities. The potential downside is a hashed shard key on _id might not be optimal in every case.
To enable AutoKey, use the following steps:
Turn the AutoKey switch in the settings to ON.
AutoKey then checks all collections periodically and adds shard keys if the following are true:
The collection has more than 256 MB of data.
The collection doesn’t already have a shard key.
Scaling
ObjectRocket built the MongoDB platform with scalability and performance in mind. This means every instance can be easily scaled.
Sharded instances
Sharded instances can scale horizontally by adding an extra shard. The balancer then moves some existing data to this new shard, giving more compute and storage to the cluster.
You can seamlessly add shards to an instance at any time.
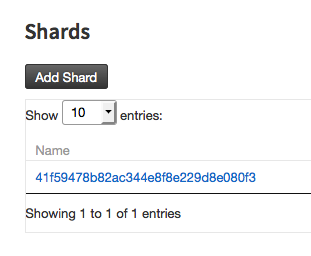
To add a shard, select the Add Shard button on the Instance Details page.
This adds a shard in the current plan size of the instance. If you don’t want to manually add shards, you can enable RocketScale ® .

Replica set instances
All replica set instances allow for automatic scaling in increments of 5 GB. From the Instance Settings page, you can request an email whenever the space usage reaches a certain percentage. This email notification lets you review your instance before the system automatically adds more space.
RocketScale
RocketScale ® is a unqiue ObjectRocket agent that automatically scales sharded instances as they grow.
RocketScale watches each MongoDB instance. When the instance exceeds the threshold on the settings page, RocketScale adds a shard to the instance.
RocketScale bases its threshold on total percentage of storage consumed on the cluster. The current storage usage is viewable on the Instance Details page by selecting the instance name on the Instances page.
For example, a 20 GB plan that has 2 shards for a total available storage space of 40 GB with the Rocketscale threshold set to 75%, adds a new shard when the storage usage reaches 30 GB.
You can turn off RocketScale by setting it to zero or removing any value from the field on the Settings page.
Balancer
Sharded clusters rely on the cluster’s balancer to keep data even across all shards. The balancer is OFF by default. The balancer needs to be turned ON after additional shards are added. From the settings section on the Instance Details page, you can also define daily windows when the balancer can run. It’s not recommended to turn the balancer off. Turn it off can affect the ability of the system to scale correctly. Instead, utilize the balancer window to balance during off-peak hours.
The Instance Details page in the control panel shows the current balance of the cluster as a percentage of the total.
The balancer status is also viewable on the Instance Settings page. The possible states are Stopped or Running.