Heroku MongoDB Migration - Manual
Overview
The following is a step by step flow to help you migrate your existing Heroku mLab MongoDB instance over to ObjectRocket leveraging the mongodump and mongorestore utilities available in MongoDB. If at any time you have any questions or need help, just contact our Support Team.
Before You Get Started
Before you get started with the ObjectRocket MongoDB Migration Tool, you will need to do a few things in the mLab control panel.
Gather Information on mLab MongoDB Instances
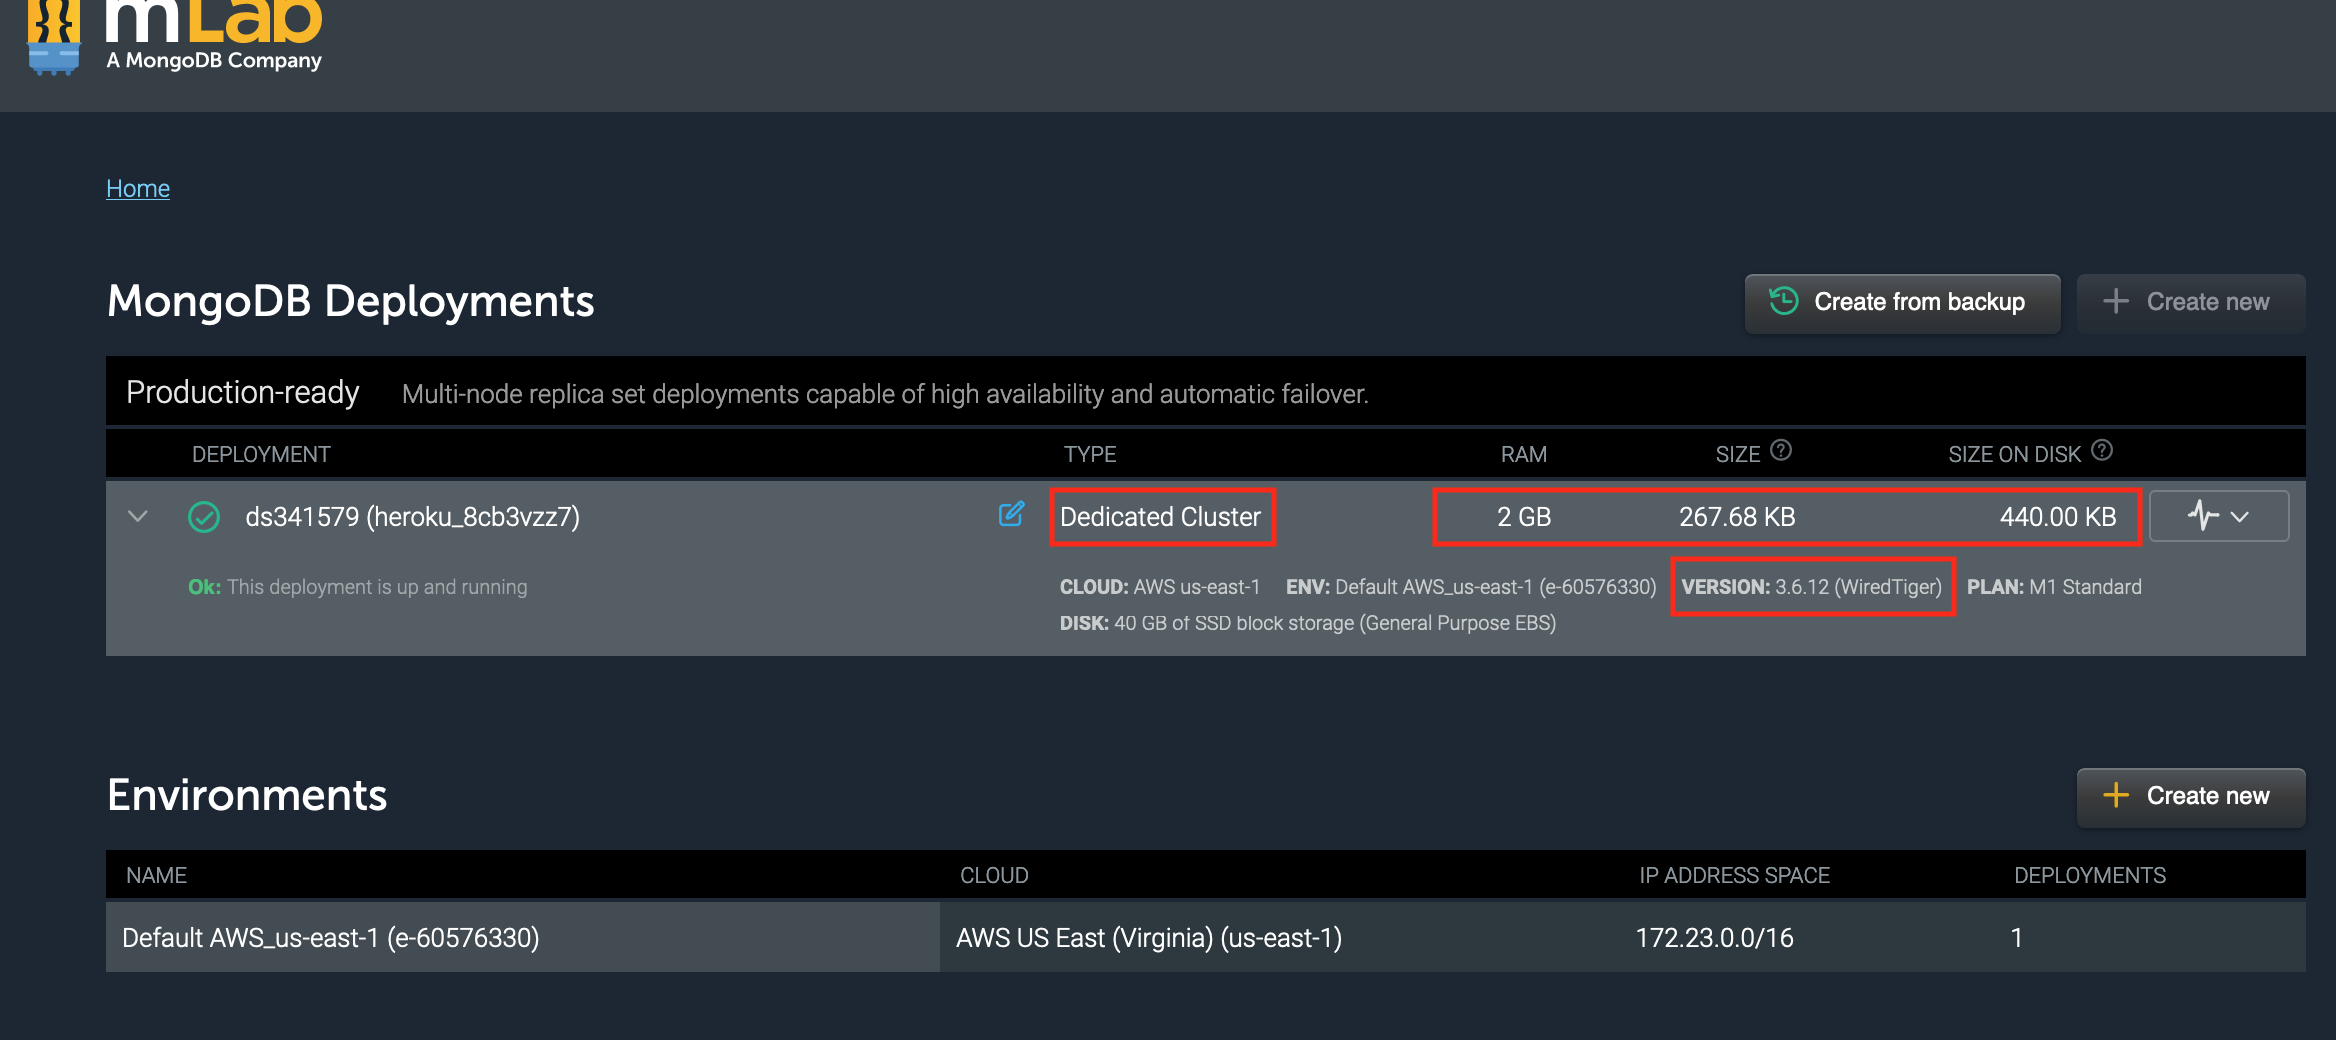
You will need to capture some basic pieces of information about your existing Heroku mLab MongoDB instance. The migration tool will ask you for an mLab URI, mLab MongoDB version, and mLab MongoDB size. You can find all of this information in the mLab control panel.
From the Heroku dashboard, select the app where your mLab add-on(s) exist, then from the Overview tab, click on the mLab MongoDB link. This will use SSO to take you to the mLab control panel.
Once you’re in the mLab control panel, navigate to the Home section via the link in the upper left. Expand the deployment info by clicking on the arrow and you will see the type, version, current size and RAM of the MongoDB instance that you are running.

Note
Only one ObjectRocket MongoDB instance can exist within a single Heroku application. If you are migrating multiple different mLab MongoDB instances in a single Heroku app to ObjectRocket, you can do either of the following options:
Migrate each mLab instance to a different database within your ObjectRocket MongoDB instance.
Migrate each mLab instance to a different ObjectRocket MongoDB instance residing in separate Heroku apps.
Provision ObjectRocket MongoDB Instance and Setup
Provision the corresponding Heroku ObjectRocket MongoDB instance by running the following CLI command:
Version 6.0 Example
$ heroku addons:create ormongo:5-wt --version 6.0
Most recent mLab instances are on version 6.0 with MMAPv1 as the storage engine for Shared Cluster and Sandbox, and WiredTiger as the storage engine for the dedicated clusters. If you have something else, you can also specify other storage engines and versions via the CLI.
ObjectRocket MongoDB Version Flag Options
6.0
7.0
Other versions available by contacting ObjectRocket Support
It is very important that the same version is selected in order for the migration to be successful. Also, ensure that you are selecting a size from the ObjectRocket offering that can accommodate your current MongoDB instance size.
Note
NOTE! Heroku will automatically select the appropriate region for the ObjectRocket MongoDB instance based upon the region where your Heroku app resides.
ObjectRocket MongoDB Plan Sizes
ObjectRocket Plan |
Plan API Value |
Price |
|---|---|---|
2GB mmap |
2-mmap |
$46 |
2GB WiredTiger |
2-wt |
$46 |
5GB mmap |
5-mmap |
$95 |
5GB WiredTiger |
5-wt |
$95 |
10GB mmap |
10-mmap |
$163 |
10GB WiredTiger |
10-wt |
$163 |
20GB mmap |
20-mmap |
$278 |
20GB WiredTiger |
20-wt |
$278 |
50GB mmap |
50-mmap |
$646 |
50GB WiredTiger |
50-wt |
$646 |
100GB mmap |
100-mmap |
$1,290 |
100GB WiredTiger |
100-wt |
$1,290 |
150GB WiredTiger |
150-wt |
$1,475 |
250GB WiredTiger |
250-wt |
$2,375 |
500GB WiredTiger |
500-wt |
$4,375 |
750GB WiredTiger |
750-wt |
$6,125 |
Note
NOTE! If you need a larger size, just contact our Support Team and we’ll customize one for you.
Once you have successfully created your ObjectRocket MongoDB instance, you will need to get it configured correctly and ready for migration.
Any users that exist on the mLab MongoDB instance will need to be added to the new ObjectRocket MongoDB instance. As a reminder, you will need to add users via the ObjectRocket control panel.
Open the ObjectRocket Control Panel with the following CLI command:
$ heroku addons:open ormongo
The ObjectRocket Control Panel will open to the Instance Details page.
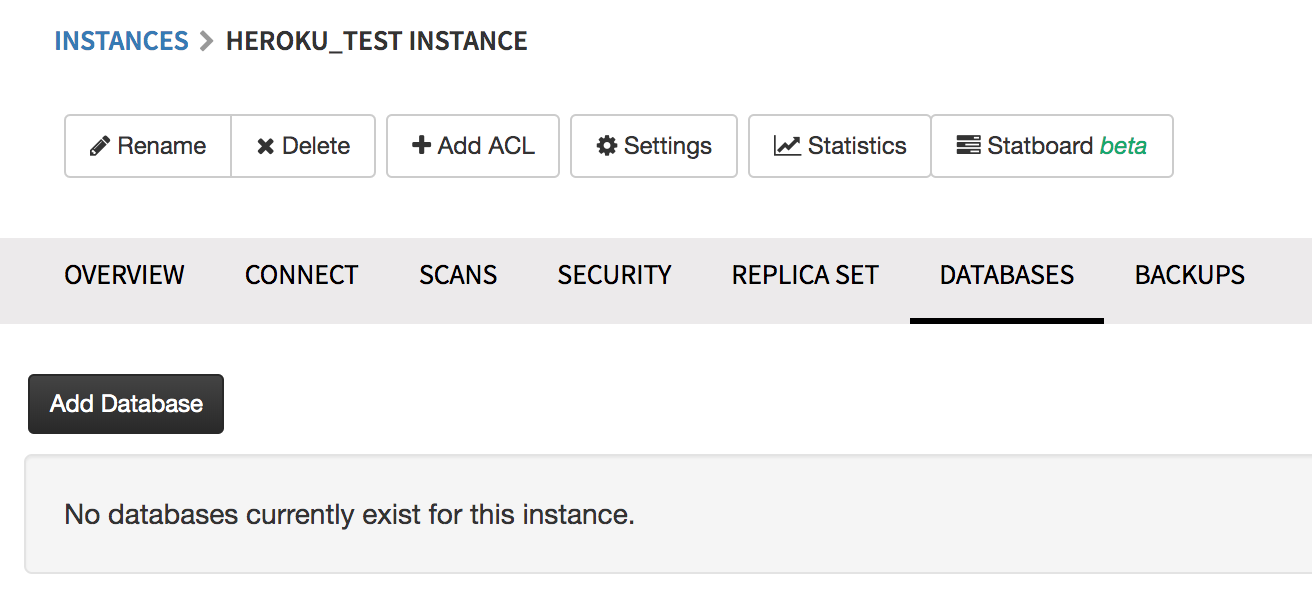
Select the DATABASES tab

Click the Add Database button

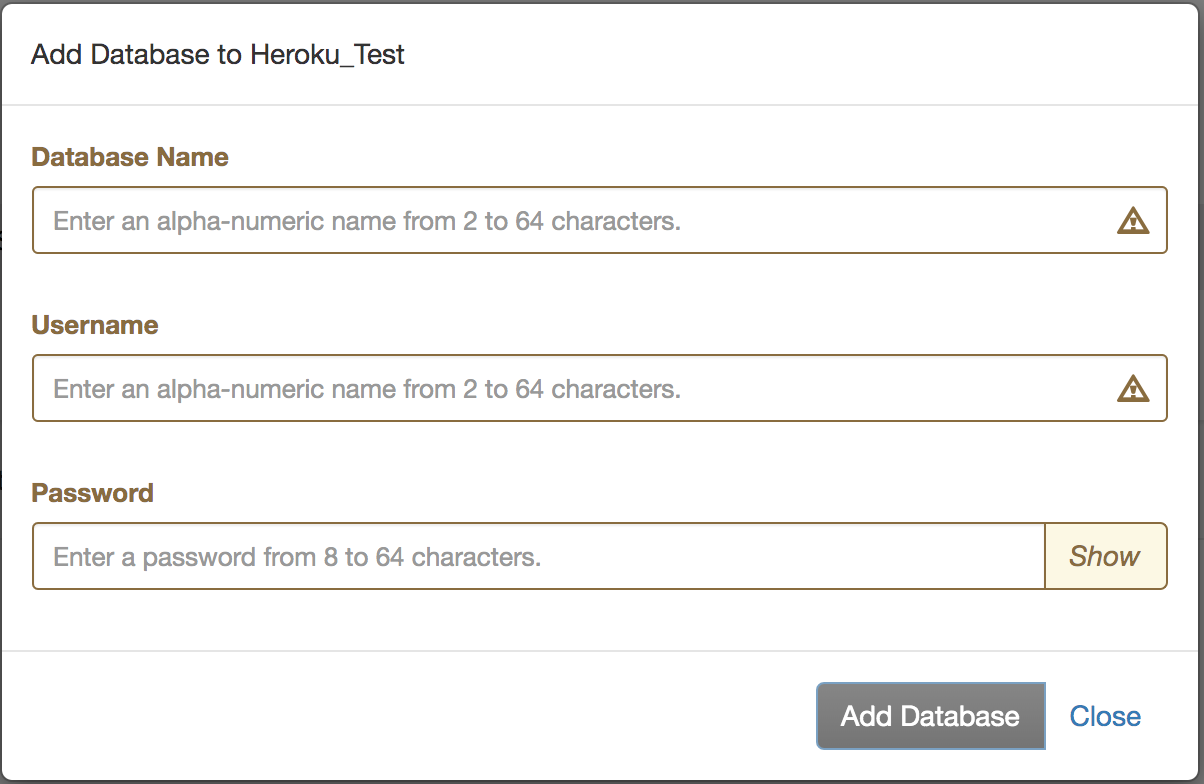
Name your database and provide a Username and Password. Click the Add Database button

Note
NOTE! In order to complete the migration, it is only necessary to set up an initial user for the database that is on the existing mLab MongoDB instance. Additional application users for the database can be added after database creation.
As a reminder, it is also necessary to locally replicate the config variables so your development environment can operate against the ObjectRocket MongoDB instance.
Migrate the Instance
Follow these steps to begin the migration process
Stop your application
You will need to temporarily stop your application and any process that is writing to your mLab MongoDB instance. Once you are finished with the migration, you will need to restart your application.
Obtain a mongodump
The next step will be to get a copy of the data that you have on your existing mLab MongoDB instance. You will be leveraging the mongodump utility that is available as part of MongoDB. Read through the documentation to review any potential impacts to your MongoDB instance during the mongodump process.
We recommend that you leverage a MongoDB package version that corresponds with the version of MongoDB that you are running. For example, if your mLab MongoDB instance is version 6.0, make sure that the package you use to run mongodump is MongoDB 6.0.
Perform a mongodump on your existing Heroku mLab MongoDB instance by running a command similar to the following from the system command line. Your values will differ.
mongodump --host ds123456-a0.mlab.com:12345 -d heroku_12345678 -u username -p password --out /path/migration/dump
This will create a database backup in the directory specified.
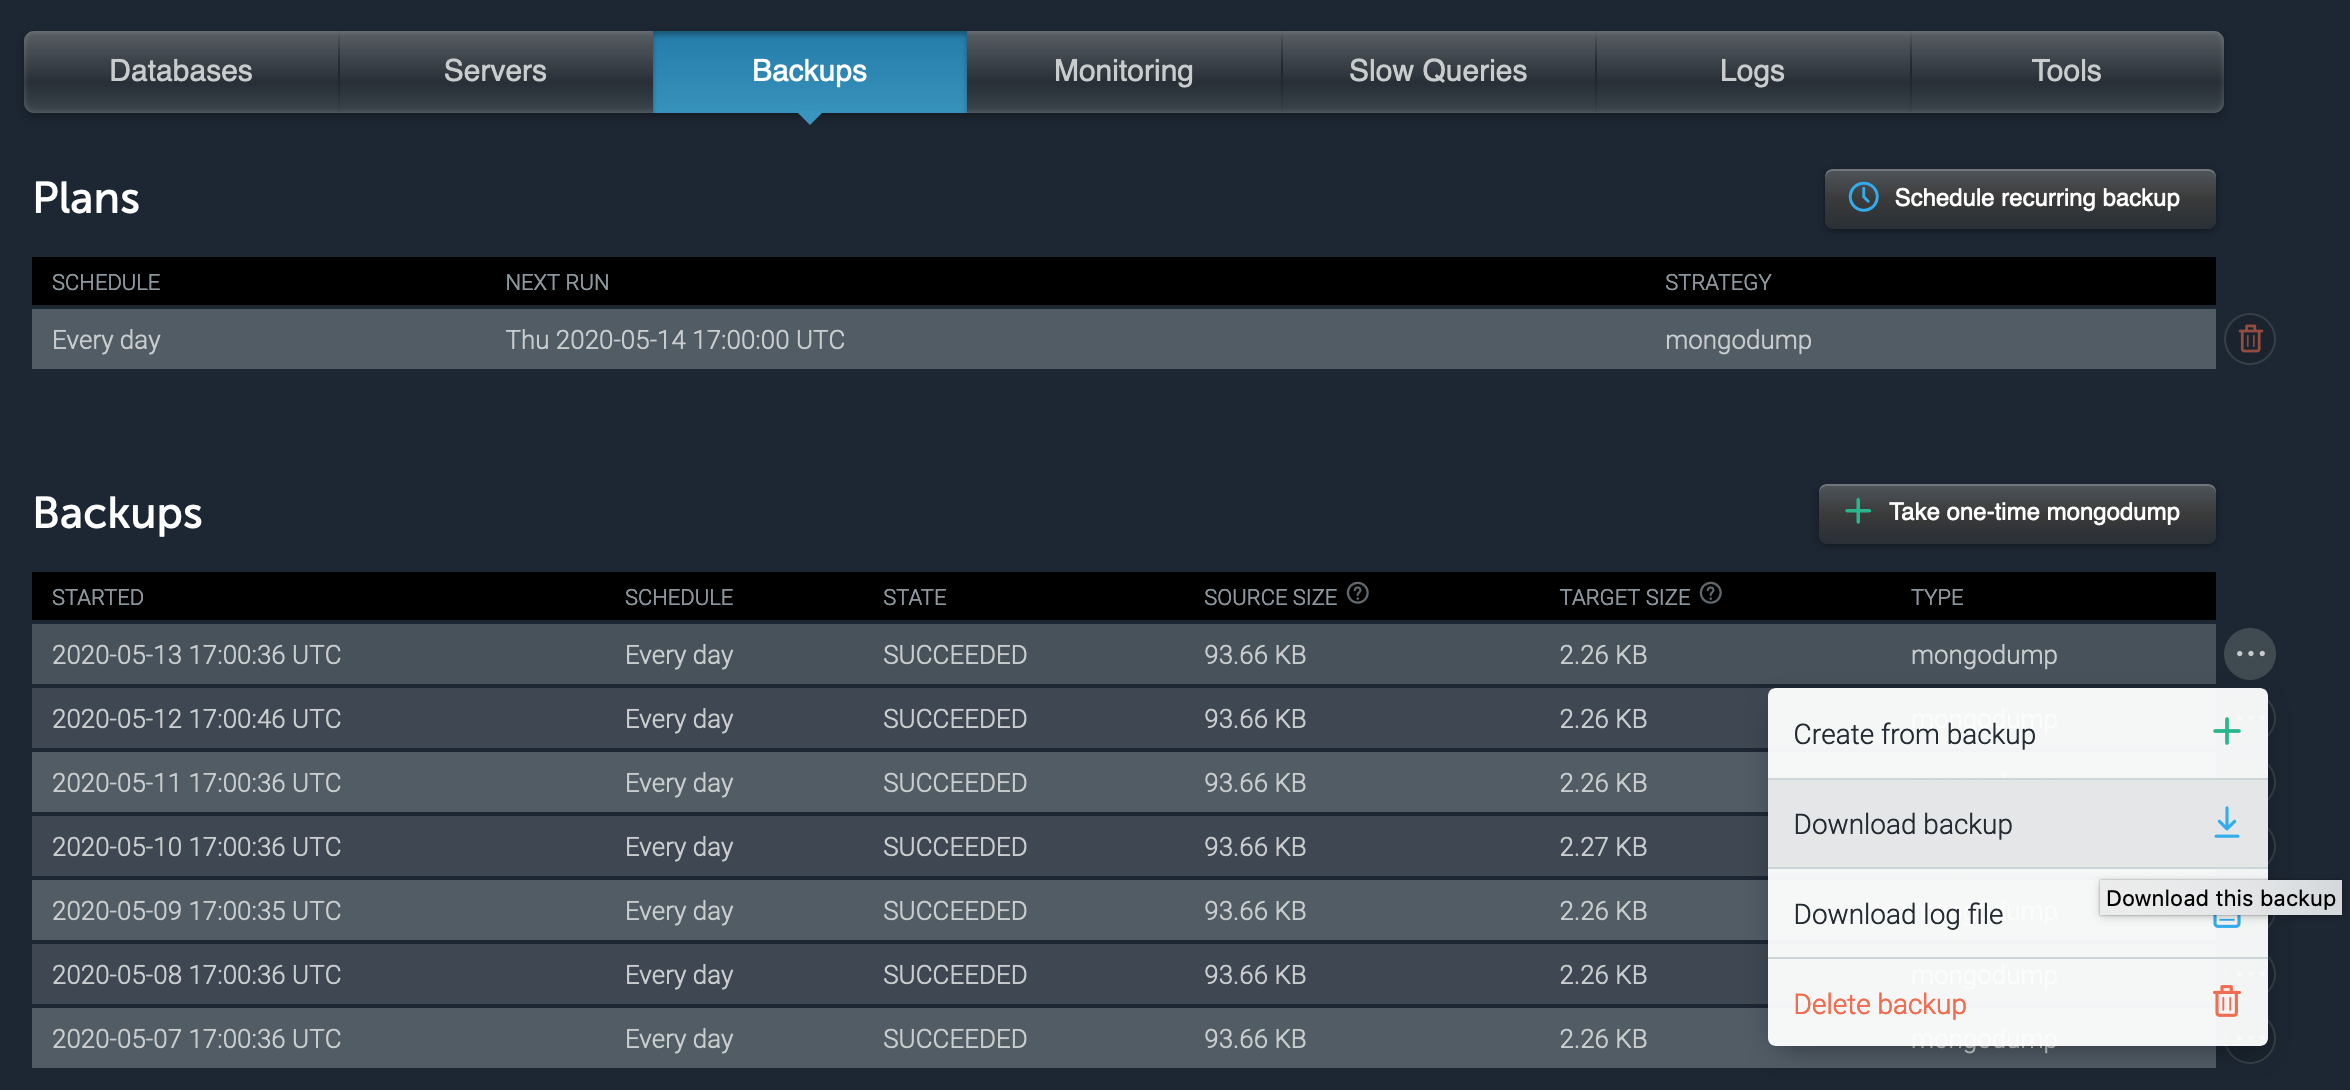
As an alternative, some instance types in mLab allow you to take a mongodump and download the file via the UI, by navigating to the Backups tab.

Run a mongorestore
This step will involve writing the data that you just created with mongodump to your new ObjectRocket MongoDB instance. For this step you will be leveraging the mongorestore utility that is part of MongoDB. Read through the documentation to review any potential impacts to your MongoDB instance during the mongorestore process.
We recommend that you leverage a MongoDB package version that corresponds with the version of MongoDB that you are running. For example, if your ObjectRocket MongoDB instance is version 6.0, make sure that the package you use to run mongorestore is MongoDB 6.0.
Perform a mongorestore of the resulting mongodump on your new ObjectRocket MongoDB instance by running a command similar to the following from the system command line. Your values will differ.
mongorestore --host "d0b2233b28111afc85cce7d5d28c8103/iad2-c7-2.mongo.objectrocket.com:45678,iad2-c7-1.mongo.objectrocket.com:45678,iad2-c7-0.mongo.objectrocket.com:45678" --authenticationDatabase app123456789 -u username -p password /path/migration/dump
Note
Note! To reduce application downtime to as low as possible, you have the option to tail the oplog as part of the migration. By recording the most recent oplog operation before starting the mongodump and mongorestore, you can then apply operations from that point forward until you are ready to cut-over your application. Tailing the oplog reduces downtime by keeping the destination nearly in sync with the source until the application is stopped for the final cut-over. It’s recommended you refer to MongoDB Tailable Cursors documentation and your language’s libraries that support this type of process.
We expect that this extra option will rarely be needed and that most migration downtimes will be minimal. This step would only be needed for larger MongoDB migrations with very limited tolerance for any downtime. If you feel that you need this optional step and need help, feel free to contact our Support Team <mailto:support@objectrocket.com>.
Change Connection Strings
Replace the old mLab MongoDB instance connection string in your application to the new ObjectRocket MongoDB instance connection string. If you had any other processes connected to the mLab MongoDB instance, you will need to change those connection strings over as well.
For Parse Users
If your heroku application runs the parse community server, update your parse server to use your new ObjectRocket database by setting either the DATABASE_URI or MONGODB_URI config var in your heroku app’s settings. Set the config var to be the value of the ORMONGO_RS_URL config var.
If your ObjectRocket database is using the mmap storage engine or if you don’t meet the retryable-writes prerequisites outlined here then you need to append &retryWrites=false to the end of your connection string.
Your connection string should look similar to mongodb://username:password@<host-1>,<host-2>,<host-3>/?replicaSet=<replSetID> or mongodb://username:password@<host-1>,<host-2>,<host-3>/?replicaSet=<replSetID>&retryWrites=false.
Restart your application
Restart your application and any other processes that you stopped previously.
Destroy mLab MongoDB instance
Verify that your application is working as expected with the new ObjectRocket MongoDB instance. Once this is done, get rid of your mLab MongoDB instance. You can do this with the following command from the CLI:
$ heroku addons:destroy mLab
Note
Note! You might want to take a recent backup and download the backup file via the mLab Control Panel before you destroy your mLab MongoDB instance.