Heroku MongoDB Migration Tool - Automated
Overview
The following is an overview of the ObjectRocket Automated MongoDB Migration Tool to help you migrate your existing Heroku mLab MongoDB instance over to ObjectRocket’s DBaaS platform. It was built to automate much of the process, giving users the ability to migrate without any downtime on their application.
We are leveraging native capabilities that exist in MongoDB to make a copy of your existing data and write it to a point-in-time in the new ObjectRocket MongoDB instance. The migration tool’s user interface (UI) will take you through the steps necessary to complete the migration.
For dedicated and shared mLab plans there should be no downtime on the part of your application during migration, and only a brief downtime (due to the small size) for sandbox instances that are migrated to ObjectRocket. For dedicated and shared plans, all of the writes that occur during the migration will be captured on the new ObjectRocket MongoDB instance, before the migration is declared complete.
Note
Read through this entire documentation before you get started.
Warning
This migration tool can only be leveraged for migrations involving MongoDB version 3.0 and later. Any migration for MongoDB versions prior to 3.0 should leverage the MongoDB Migration - Manual approach. If at any time you have any questions or need help, just contact our Support Team.
Before You Get Started
Before you get started with the ObjectRocket MongoDB Migration Tool, you will need to do a few things in the mLab control panel.
Gather Information on Heroku Application
You will need to verify the Heroku application name when using the migration tool.
Login to the Heroku Control Panel
Verify the name of the application that has the mLab MongoDB instance.
Note this information and keep it in a place that you can access during the migration.
Note
Only one ObjectRocket MongoDB instance can exist within a single Heroku application. If you are migrating multiple different mLab MongoDB instances in a single Heroku app to ObjectRocket, you can do either of the following options:
Migrate each mLab instance to a different database within your ObjectRocket MongoDB instance.
Migrate each mLab instance to a different ObjectRocket MongoDB instance residing in separate Heroku apps.
Gather Information on mLab MongoDB Instances
You will need to capture some basic pieces of information about your existing Heroku mLab MongoDB instance. The migration tool will ask you for an mLab URI, mLab MongoDB storage engine, and mLab MongoDB size. You can find all of this information in the mLab control panel.
From the Heroku dashboard, select the app where your mLab add-on(s) exist, then from the Overview tab, note the mLab instance and plan (e.g. sandbox, Shared Cluster 1GB, Dedicated Cluster M1) in the Installed add-ons section, then click on the mLab MongoDB link. This will use SSO to take you to the mLab control panel.
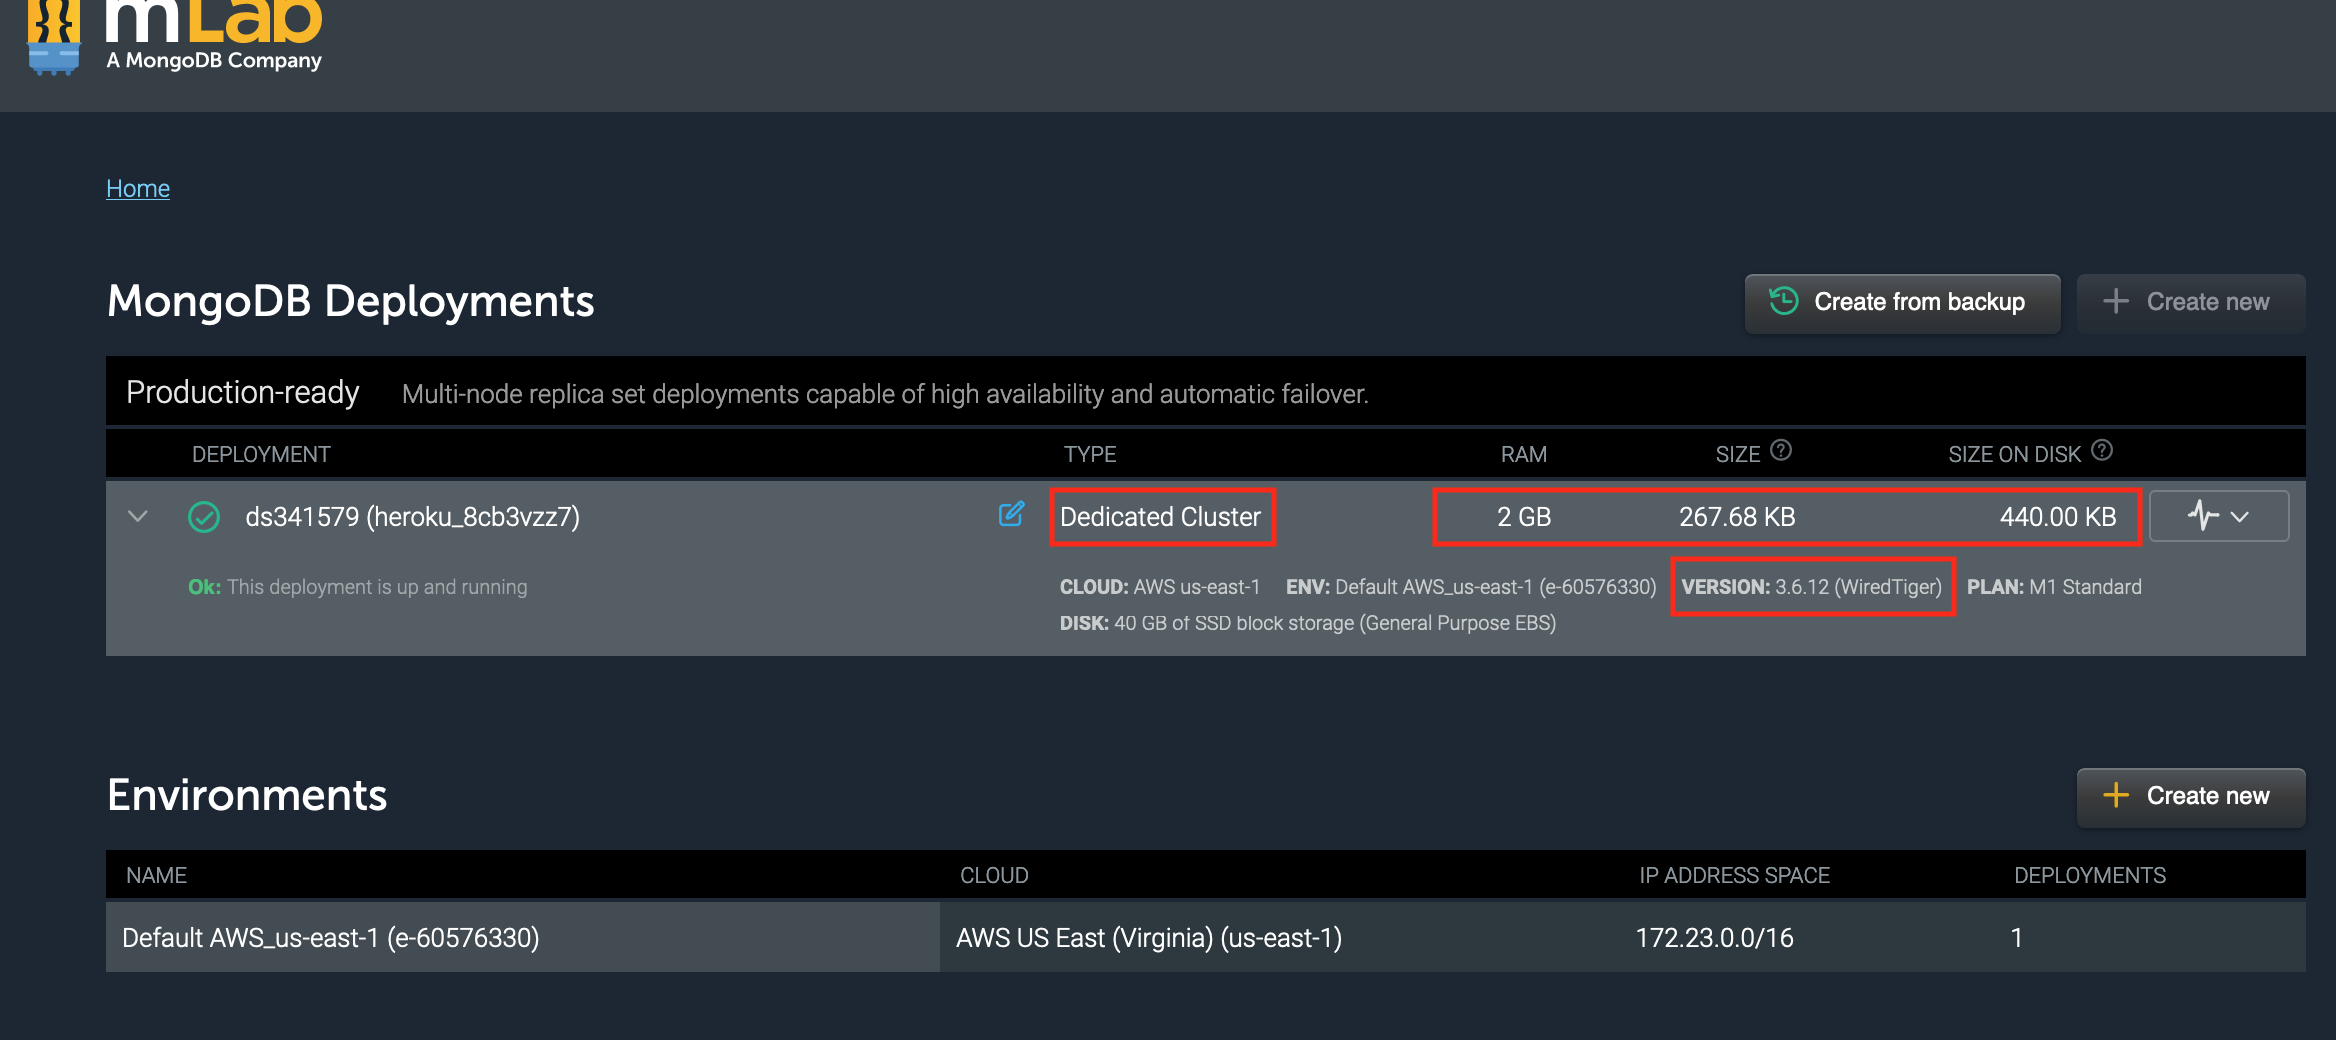
Once you’re in the mLab control panel, navigate to the Home section via the link in the upper left. Expand the deployment info by clicking on the arrow and you can then record:
Type
Version / Storage engine
Current size and RAM
Note this information and keep it in a place that you can access during the migration.
Based on the Type specified above, proceed to the appropriate section below to gather the MongoDB URI and credentials needed to connect to your instance.
For Dedicated Cluster instances
If you’re using a dedicated cluster instance, you just need to provide a single admin URI that we can use to migrate all of your existing databases
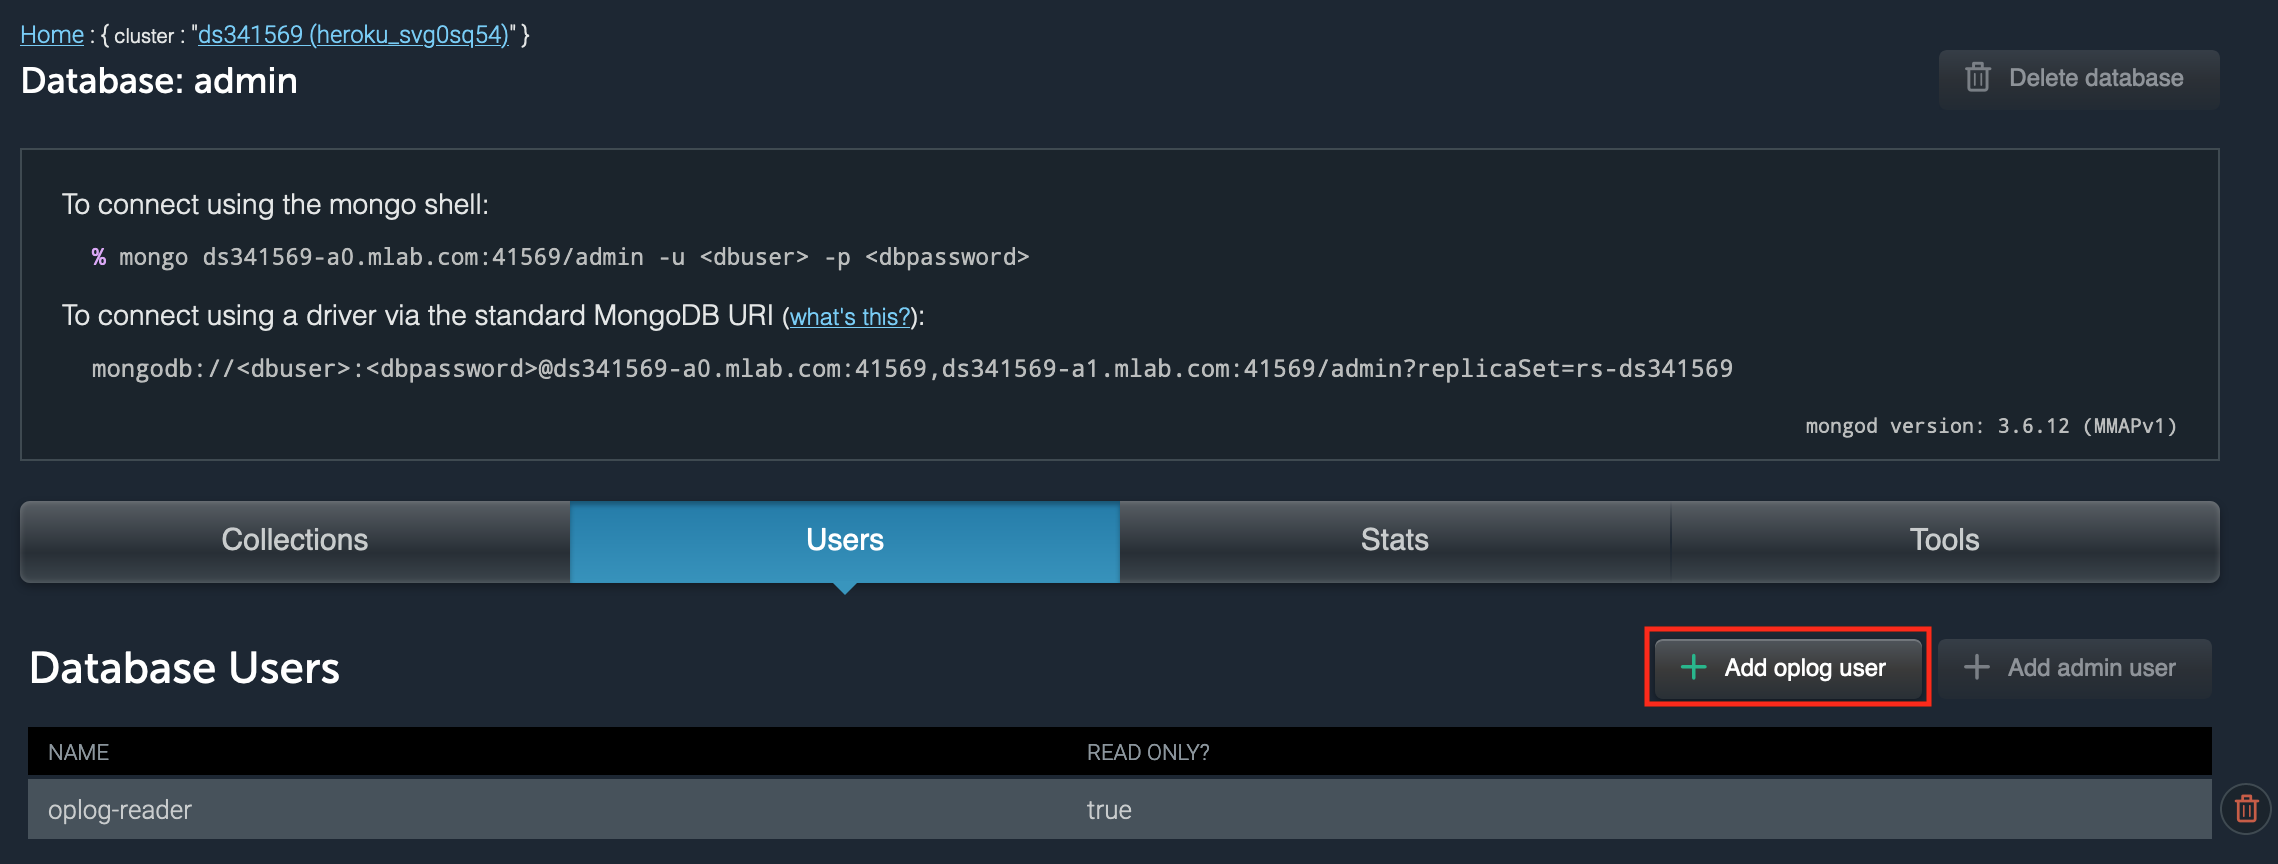
From the Home screen, click on the Dedicated Cluster deployment, then click on the admin row under System Databases
From the Users tab, select “Add admin user” to add a new admin user and save the username and password to provide to the migration tool later.
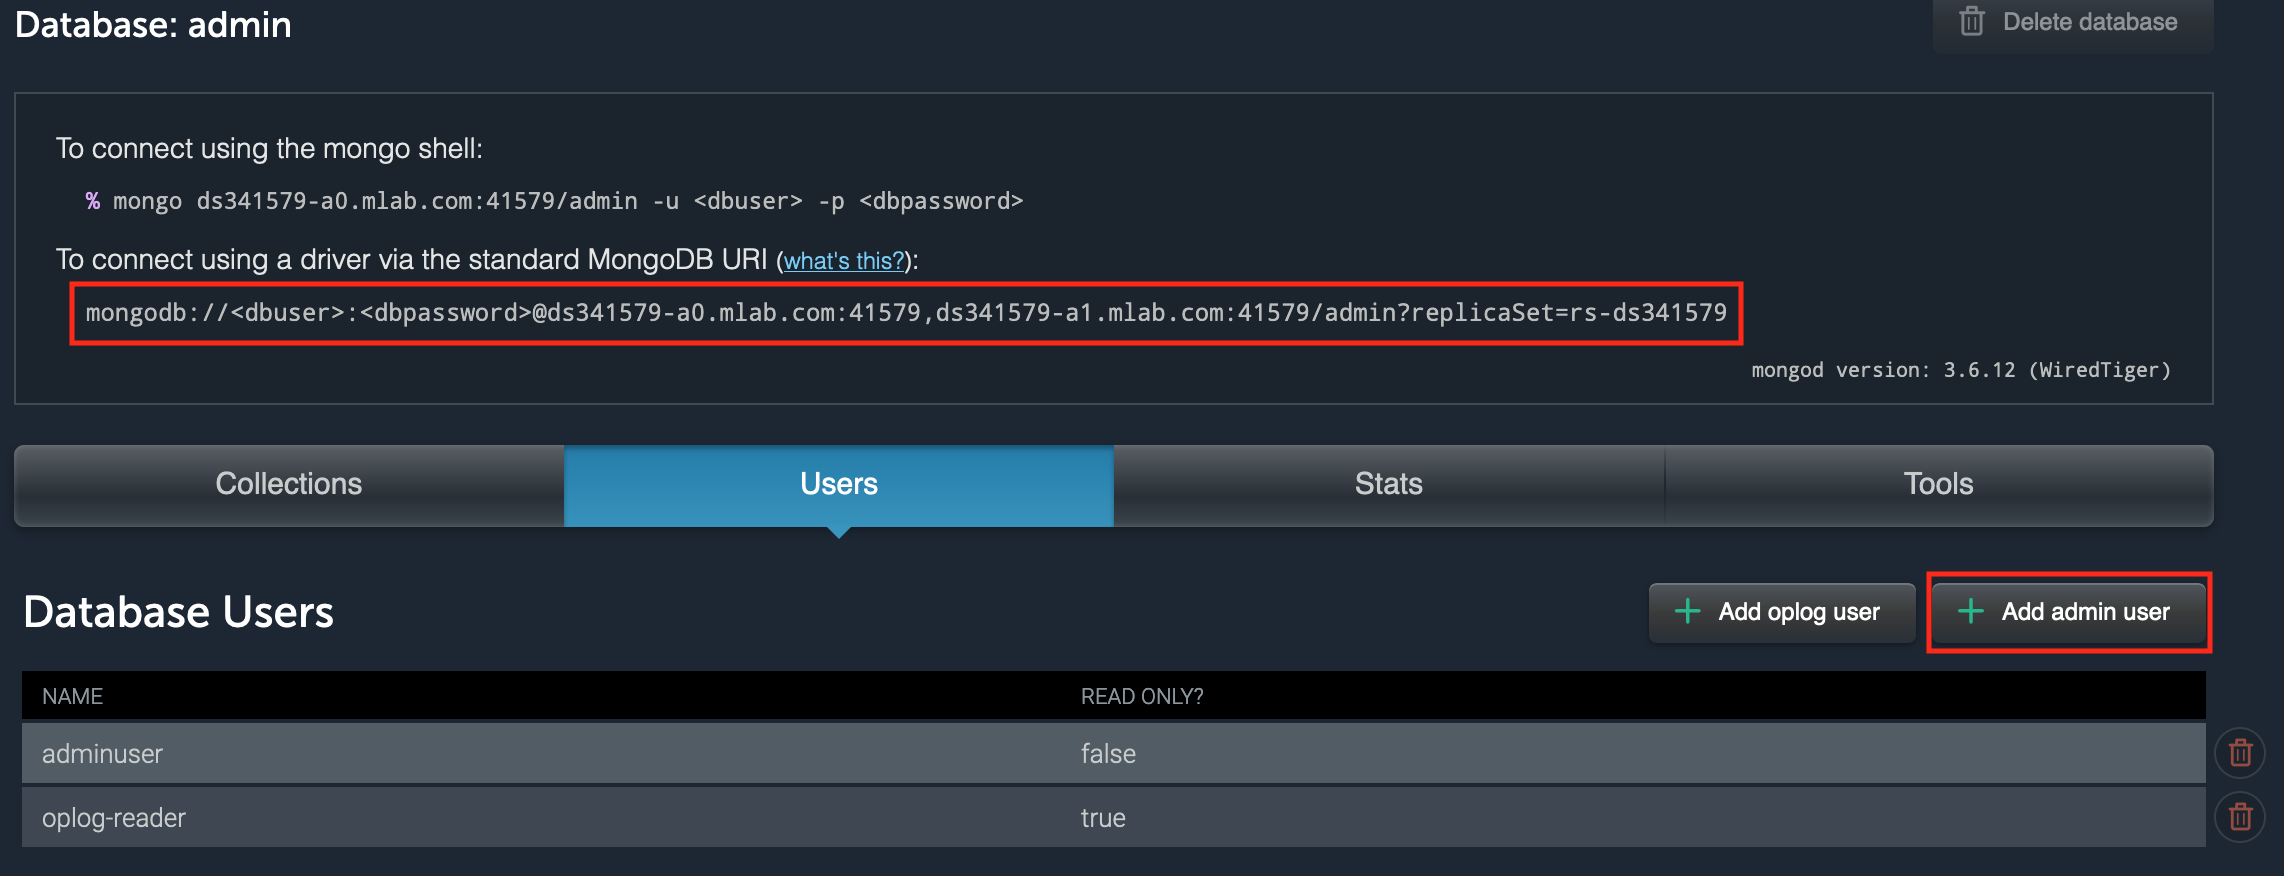
From this screen, also record the URI (without admin at the end) to use later in the process.
Go back to the main page for your cluster/deployment, and click on the Networking tab. Ensure that your Network Access Mode is set to PUBLIC or DUAL ACCESS.
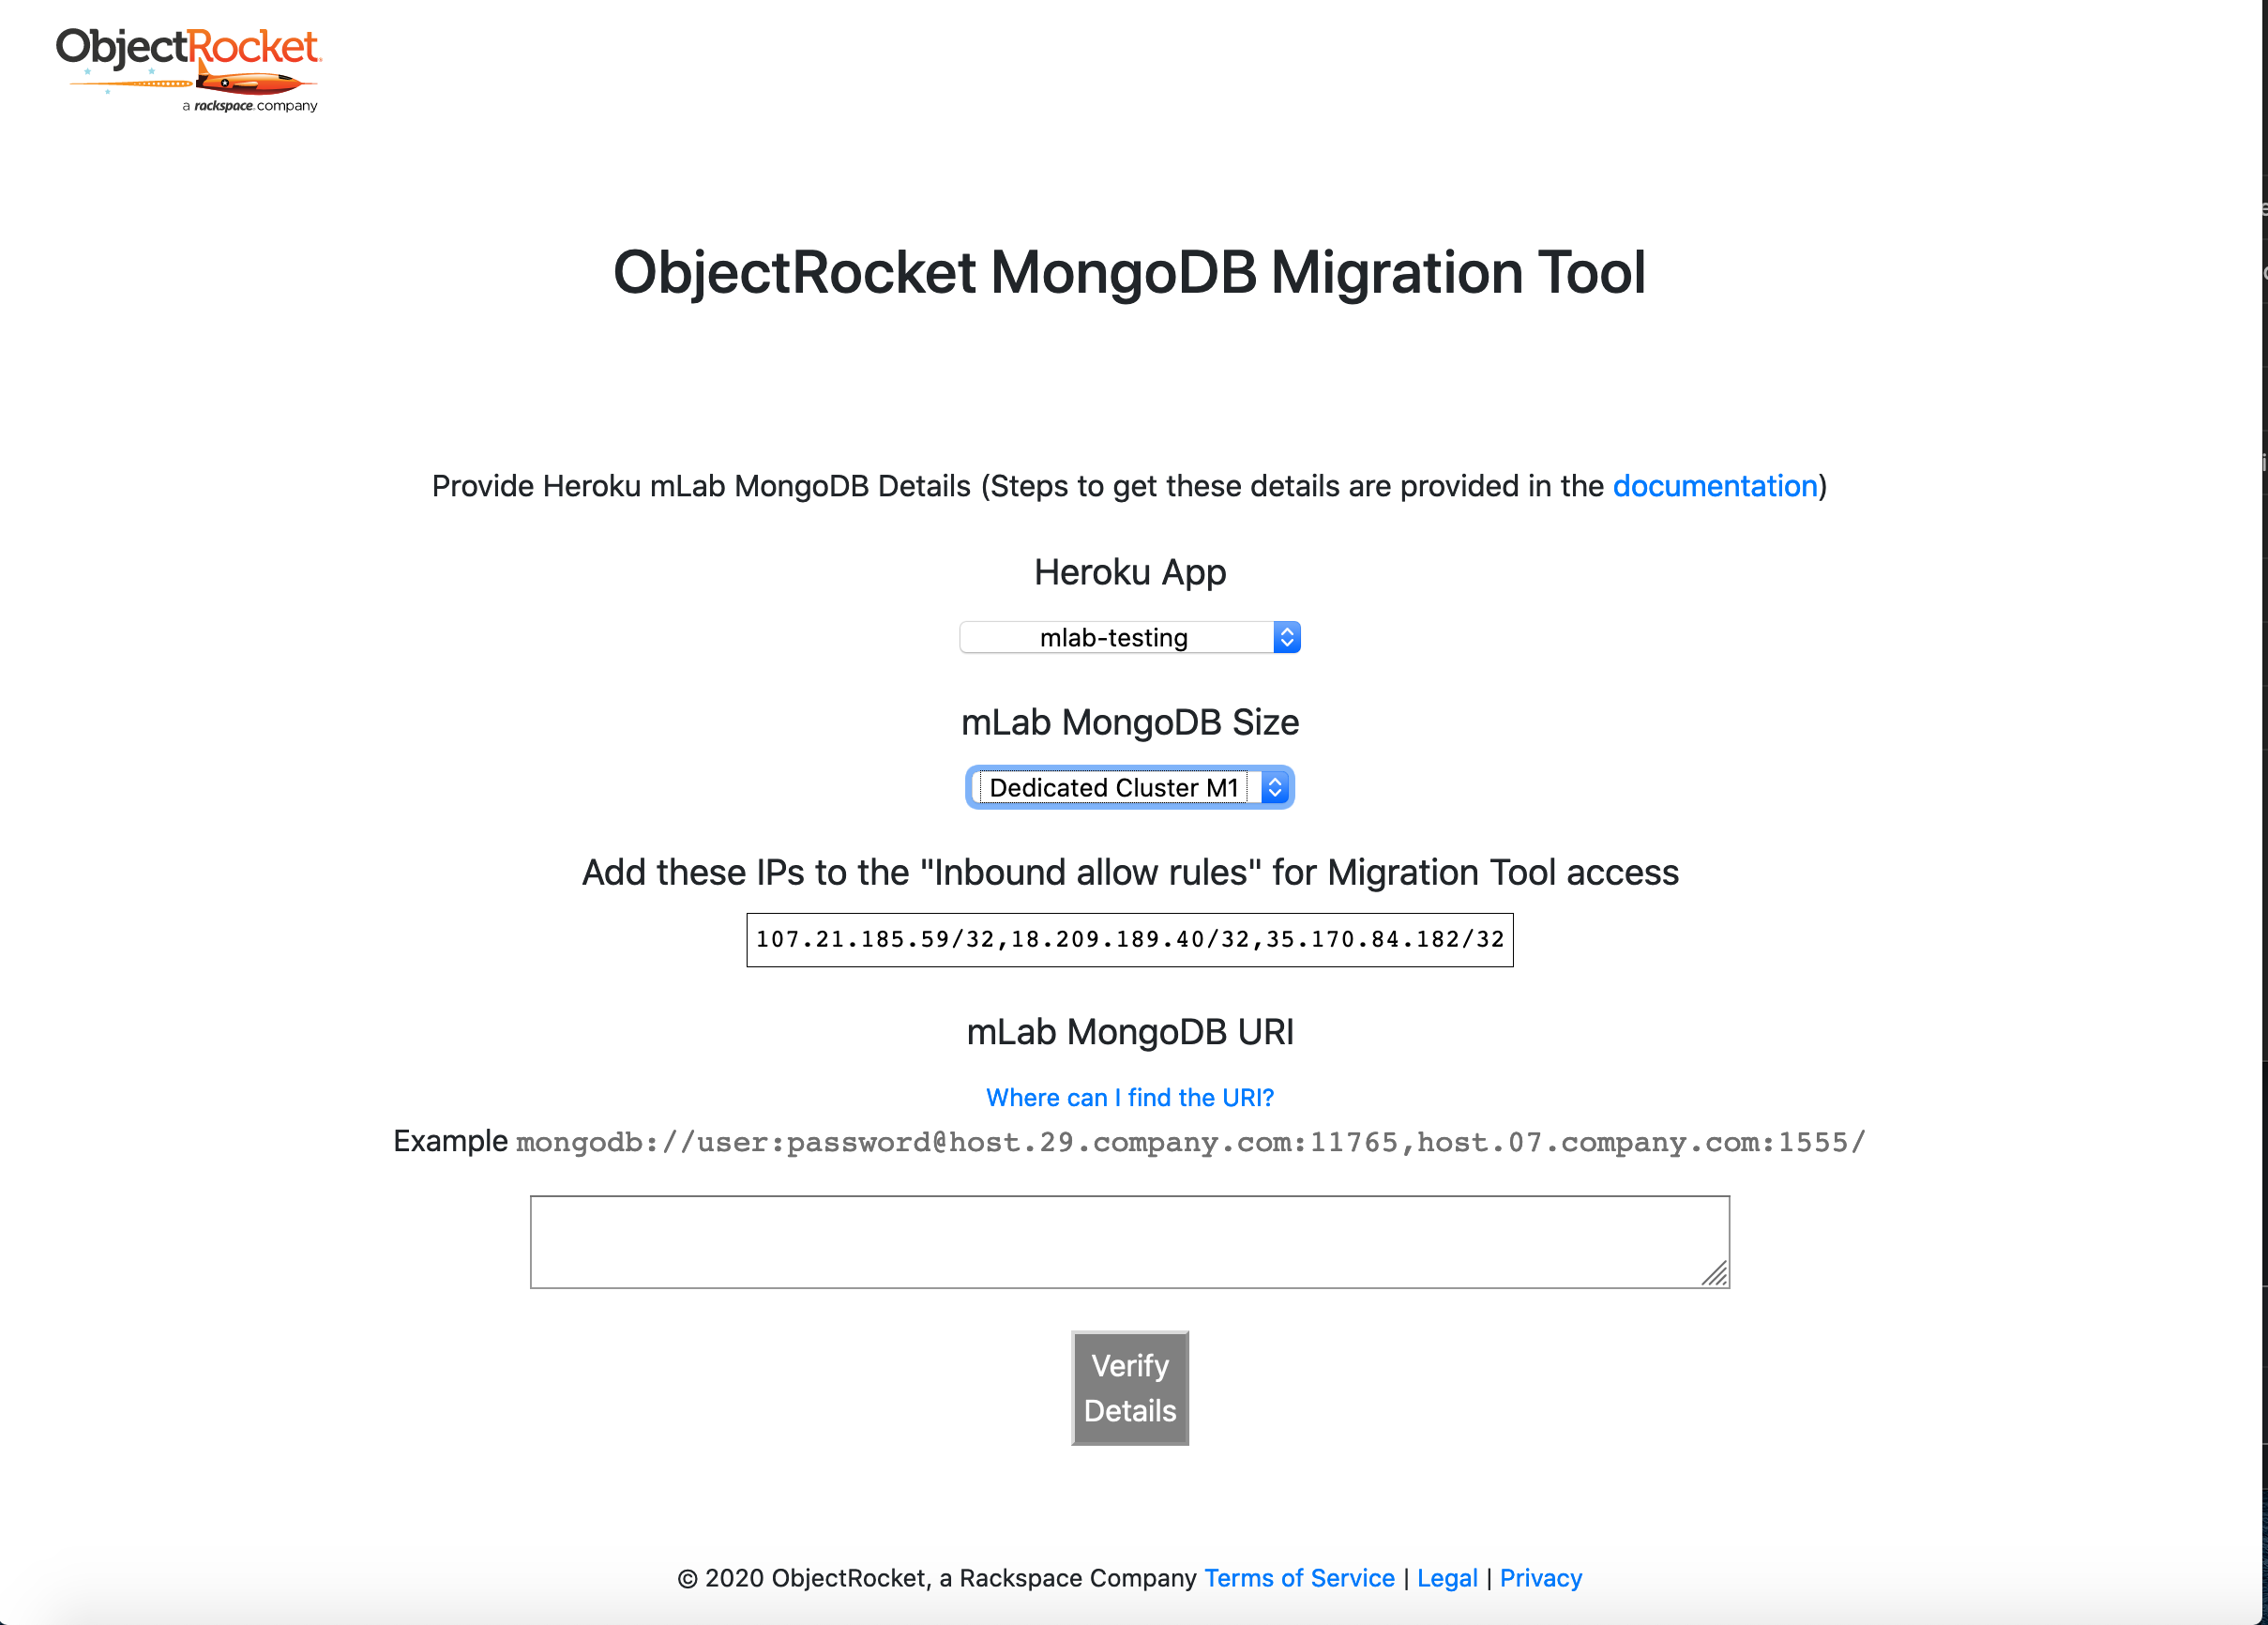
In the Inbound allow rules, ensure you’re allowing all public internet traffic. If not, Click the Allow all public internet traffic button so that our migration tool can access your instance. If you’d prefer to only allow specific IPs from our service, we’ll provide the exact IPs you need to allow in the migration tool.
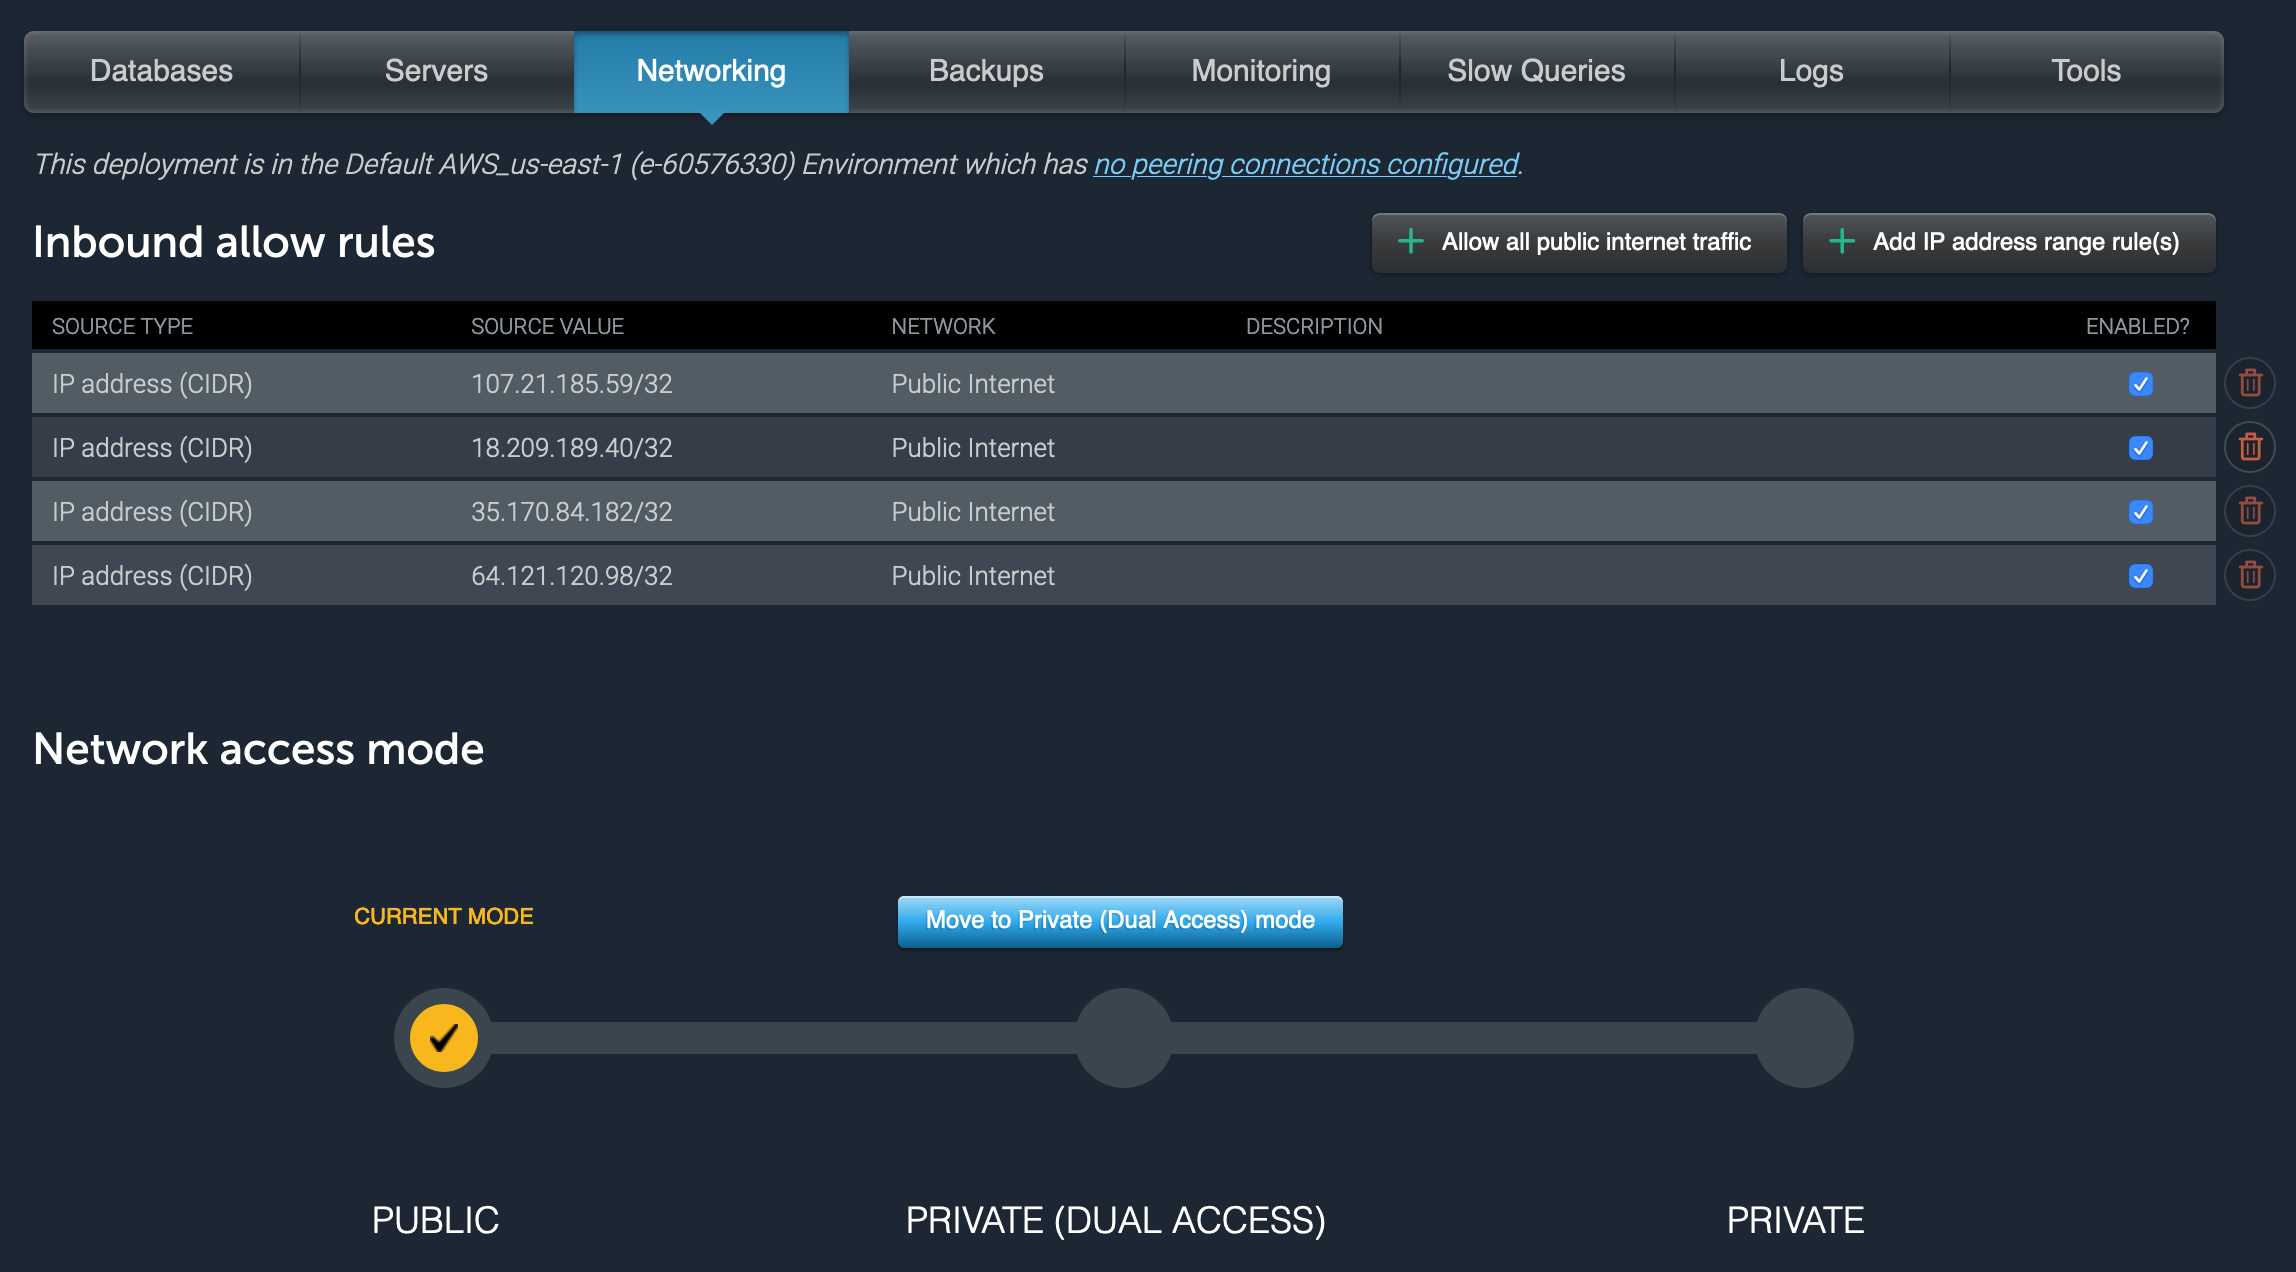
At this point you’re ready to move on to the section titled “Migrate the Instance”
For Sandbox instances
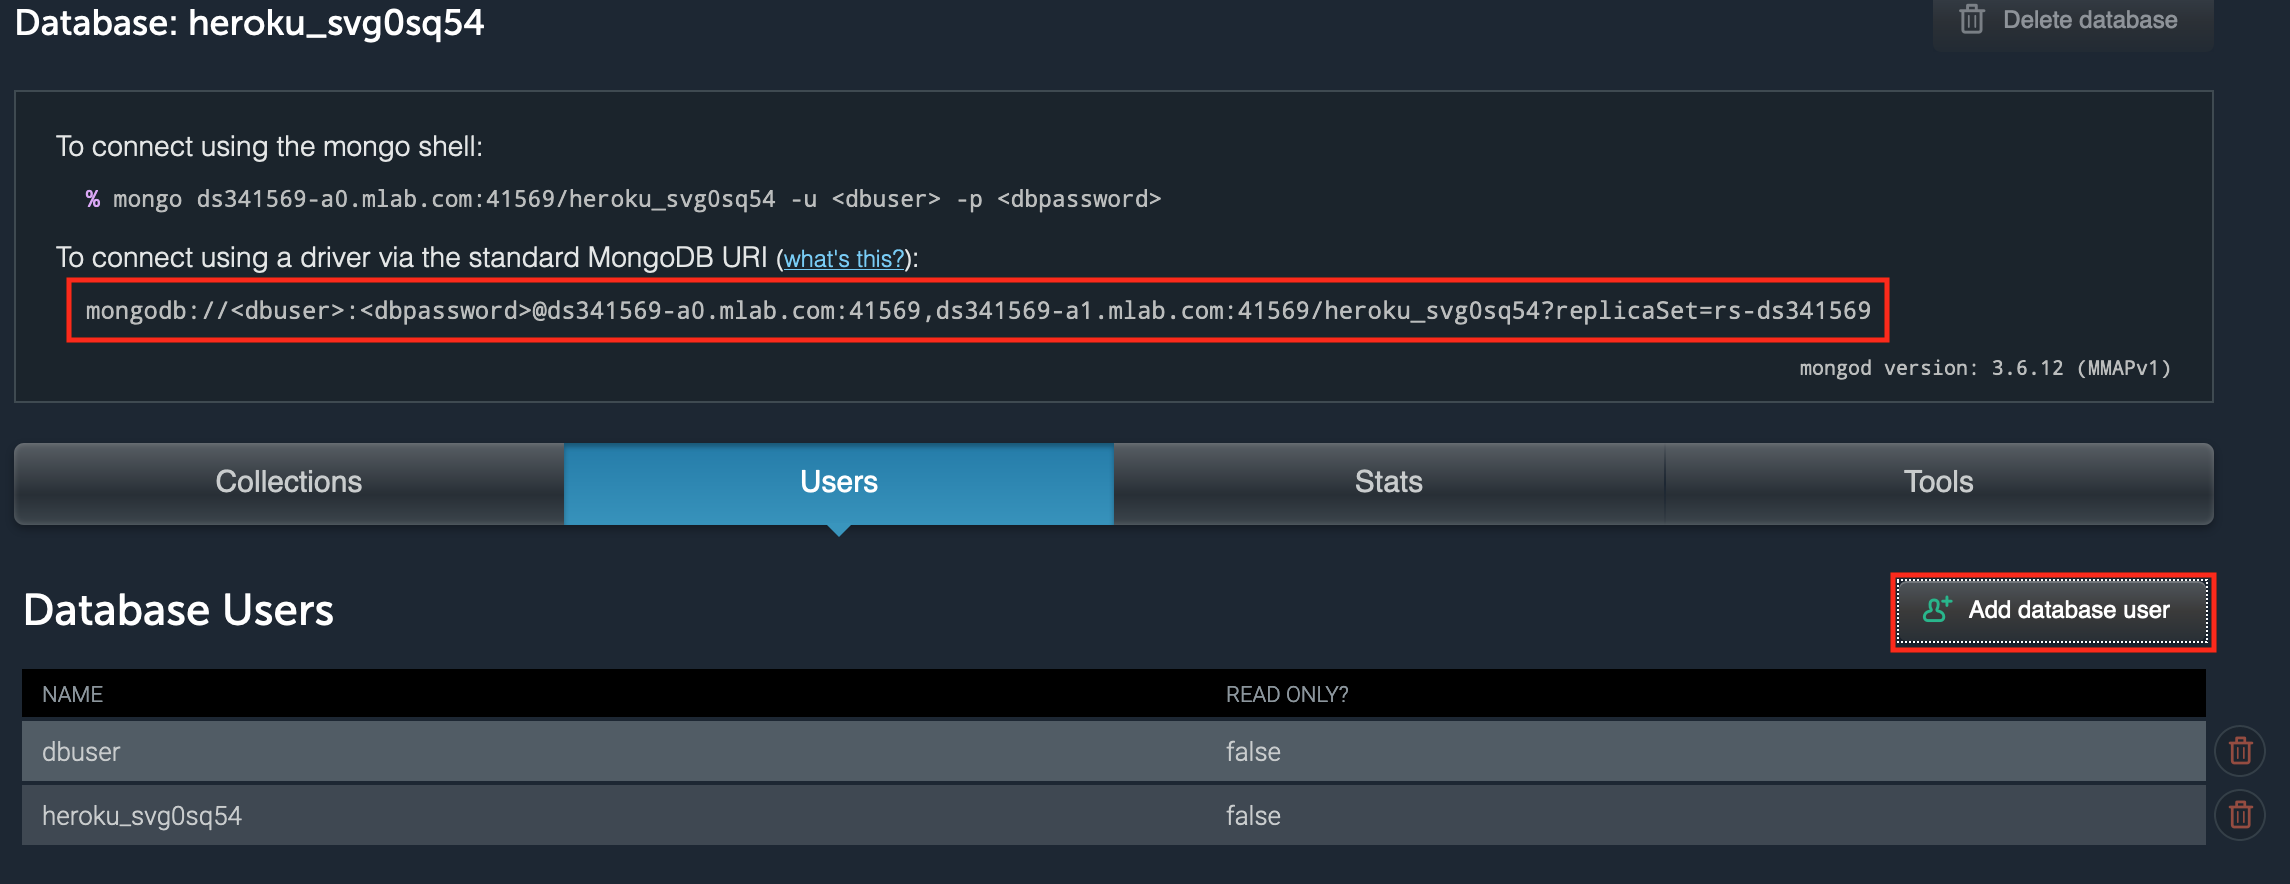
If you’re using a sandbox instance, you will just need to gather the MongoDB URI to your database, by following the steps below.
From the Home screen, click on the deployment, then click on the database listed under Databases
From the Users tab, either record the credentials of an existing user or select “Add database user” to add a new user and save the username and password to provide to the migration tool later.
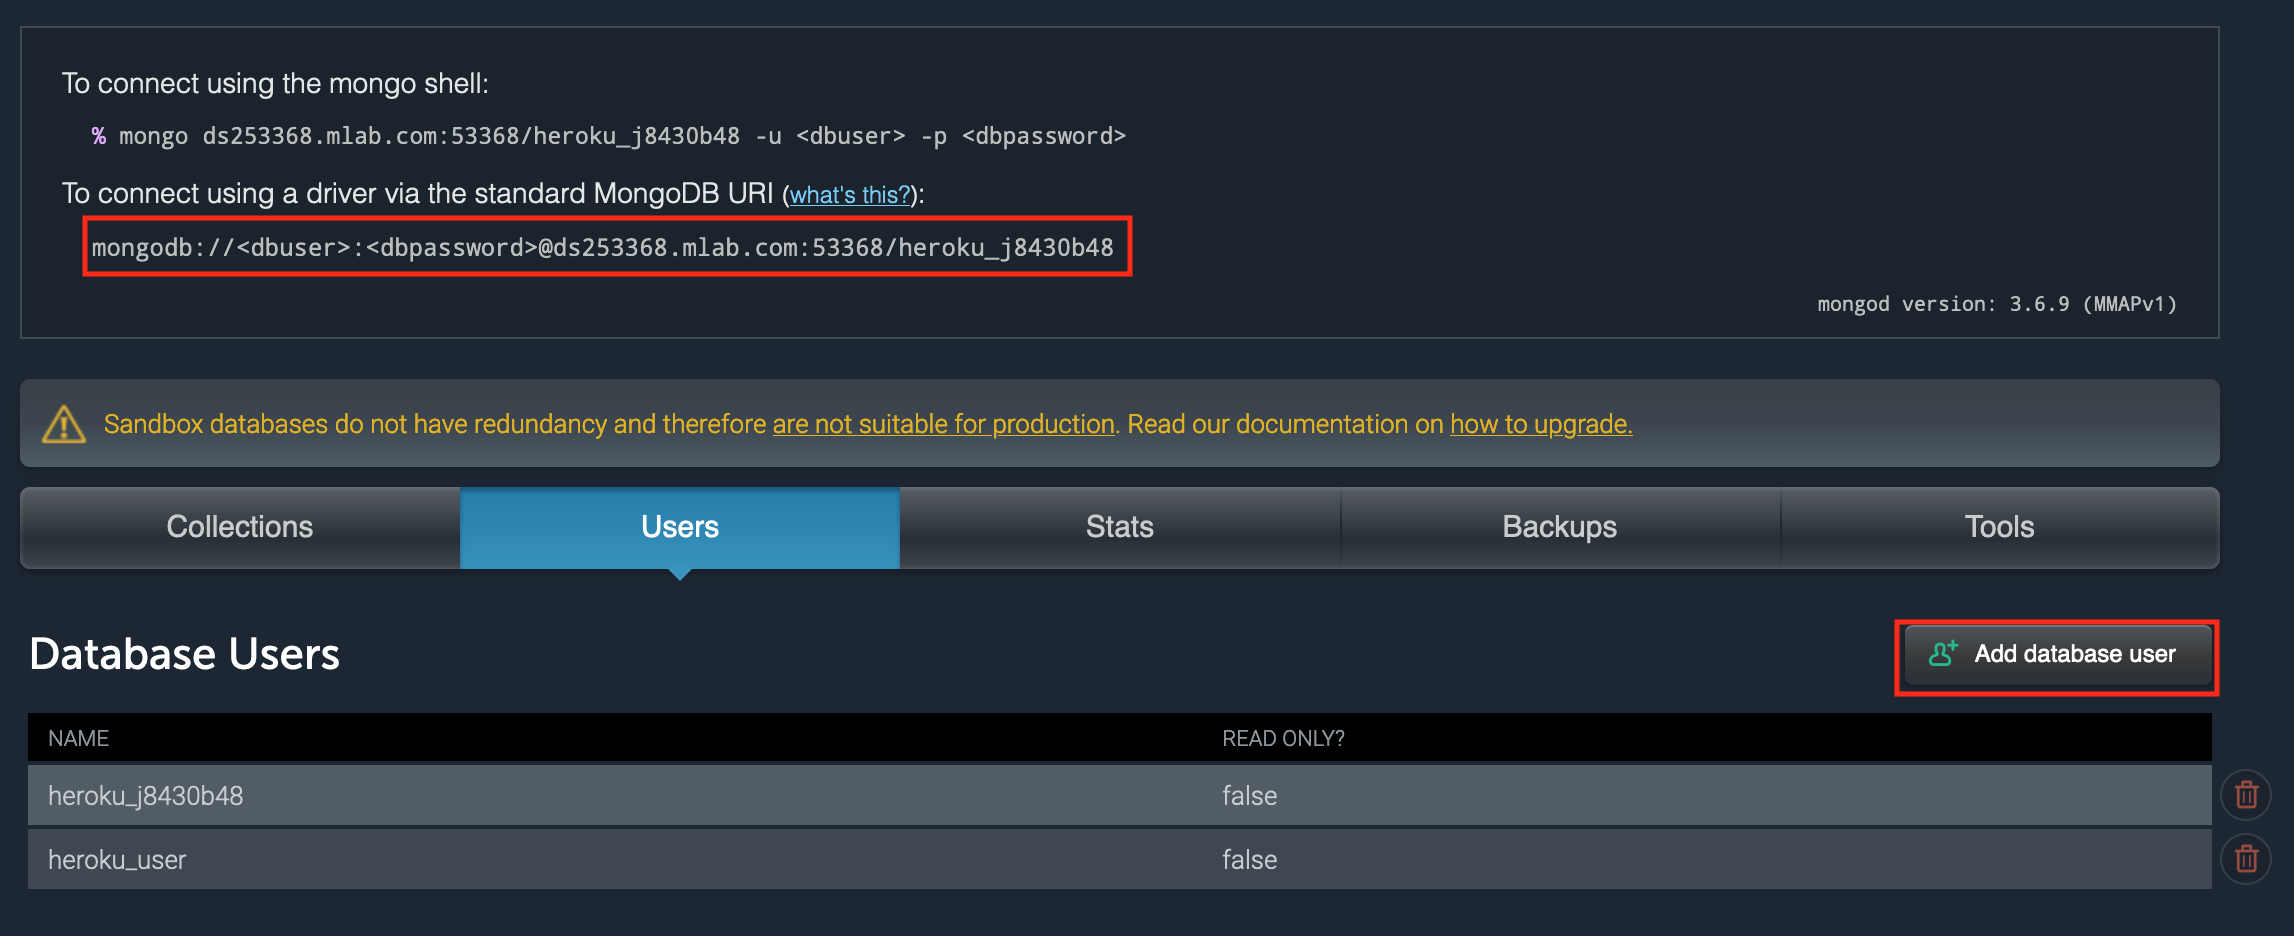
From this screen, also record the URI to use later in the process.
At this point you’re ready to move on to the section titled “Migrate the Instance”
Migrate the Instance
Follow these steps to begin the migration process
To start the ObjectRocket MongoDB migration tool, use your browser to navigate to the ObjectRocket MongoDB Migration Tool.
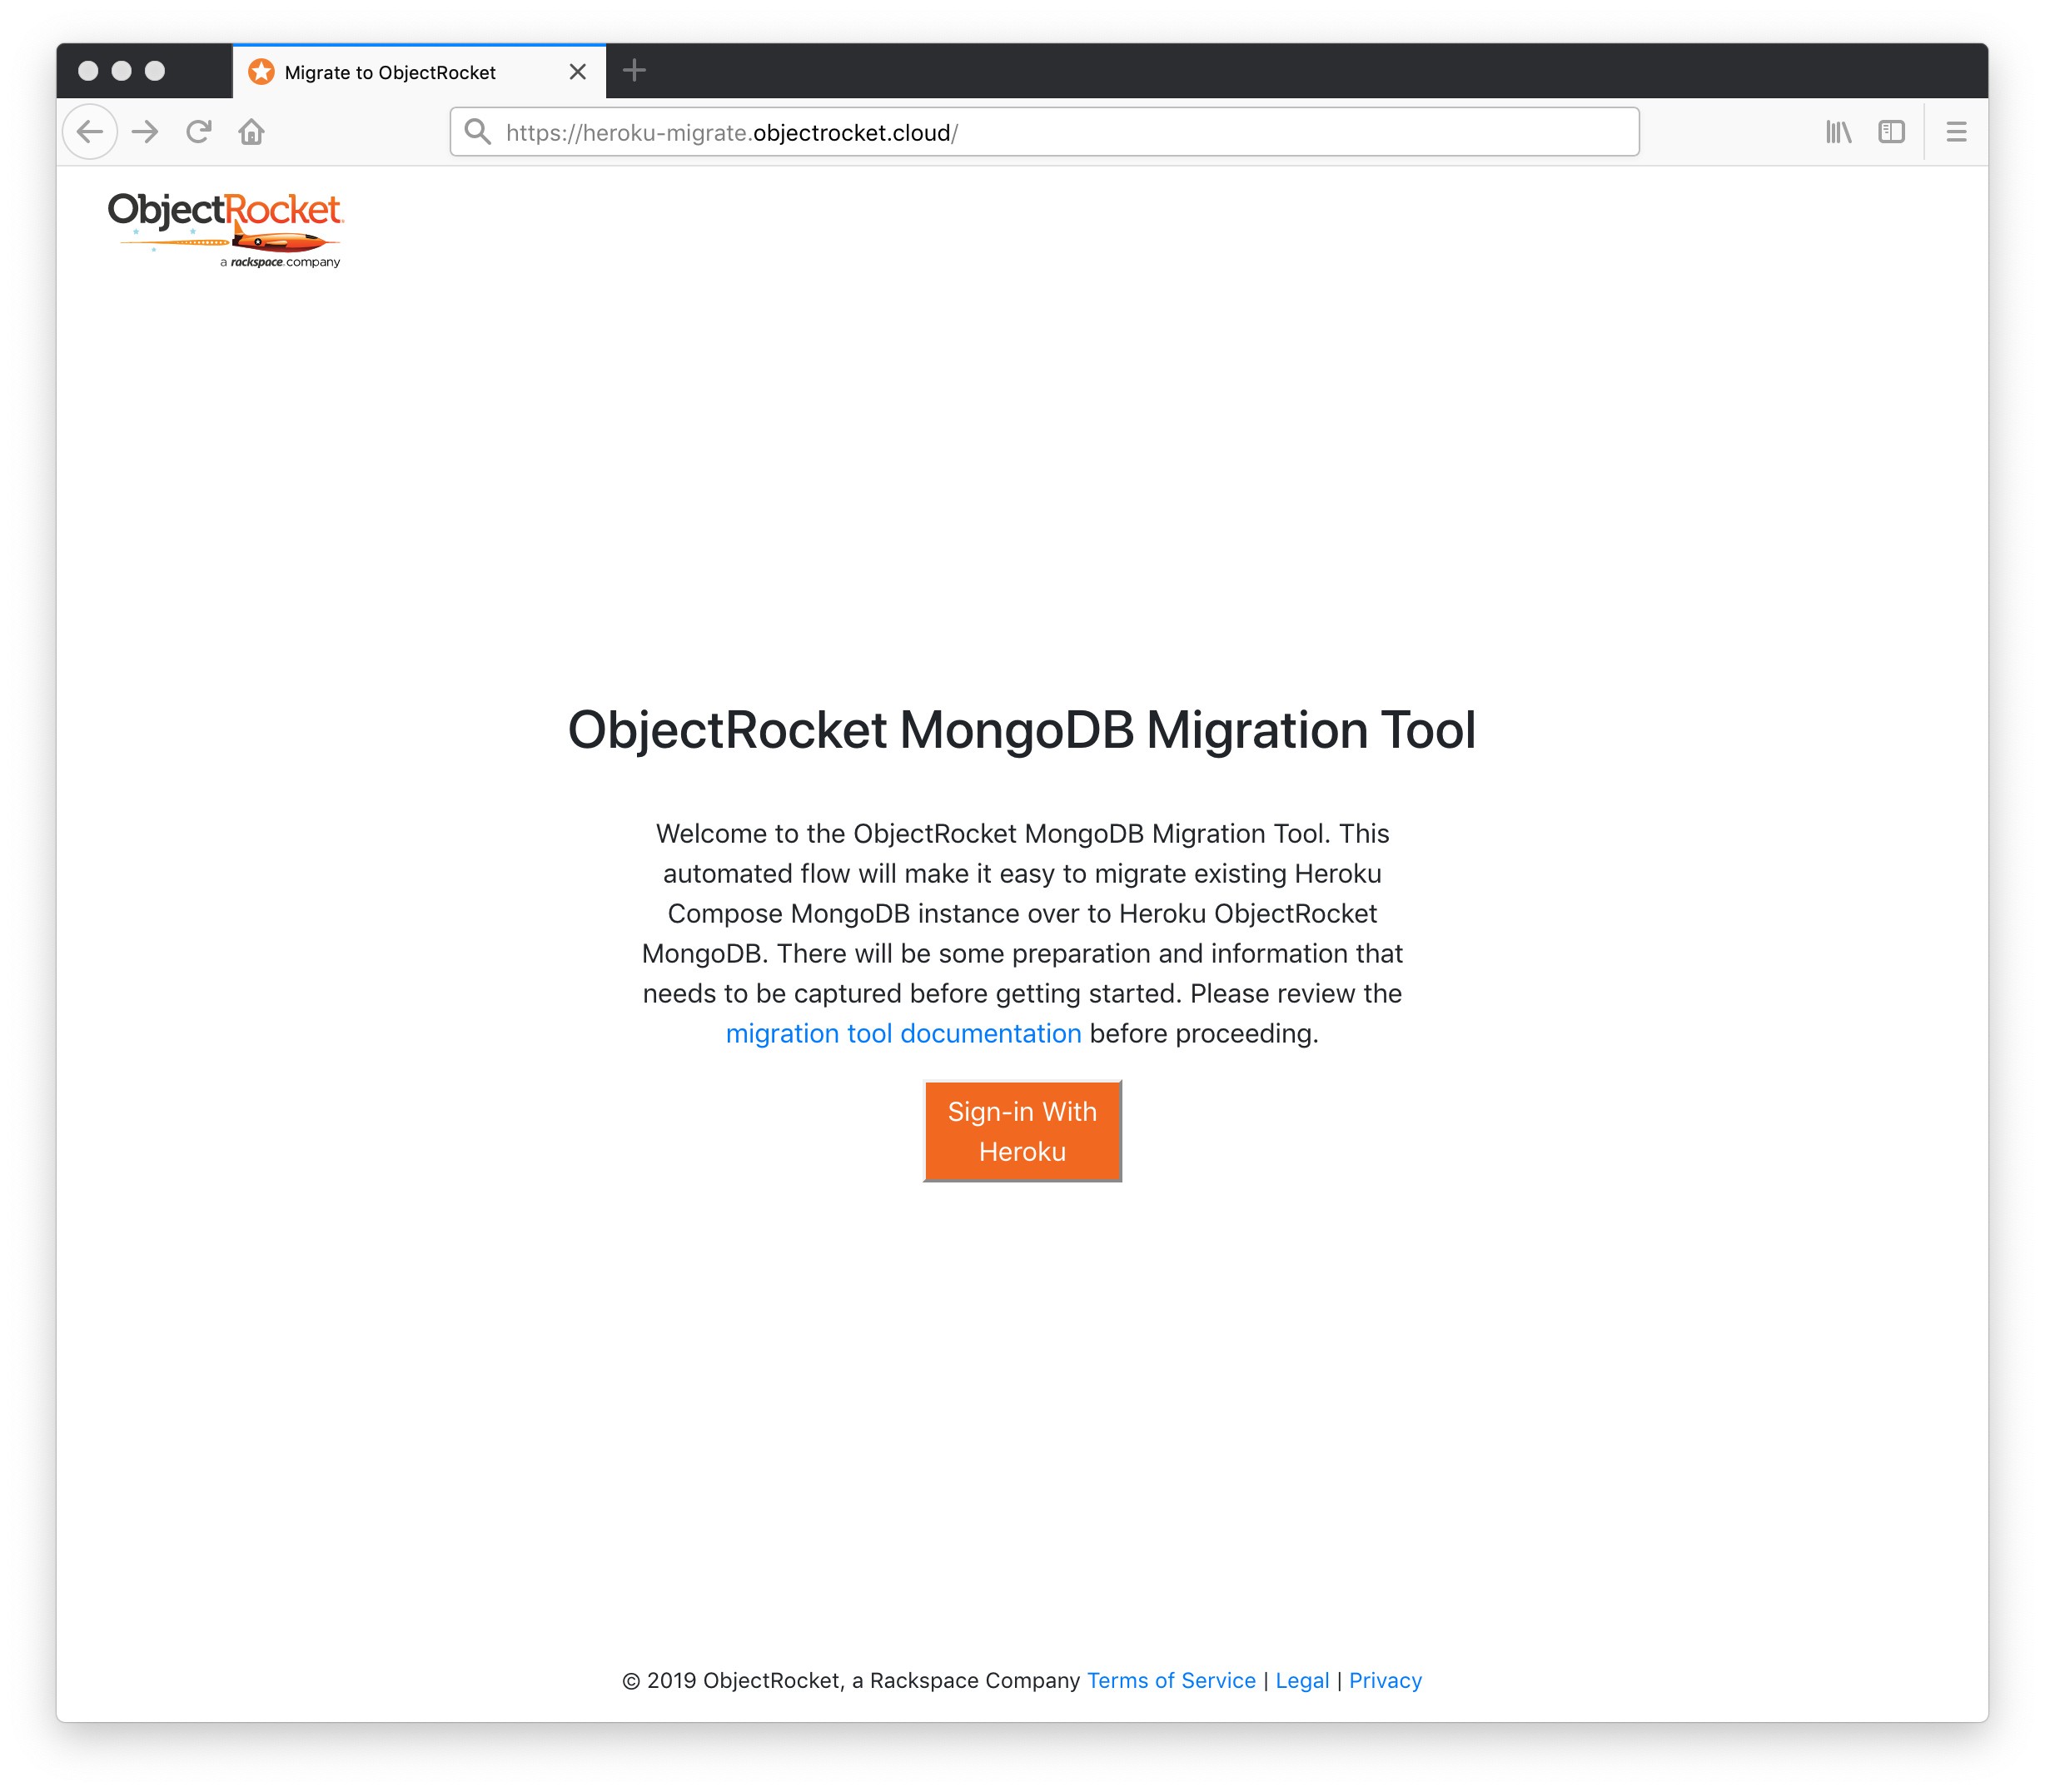
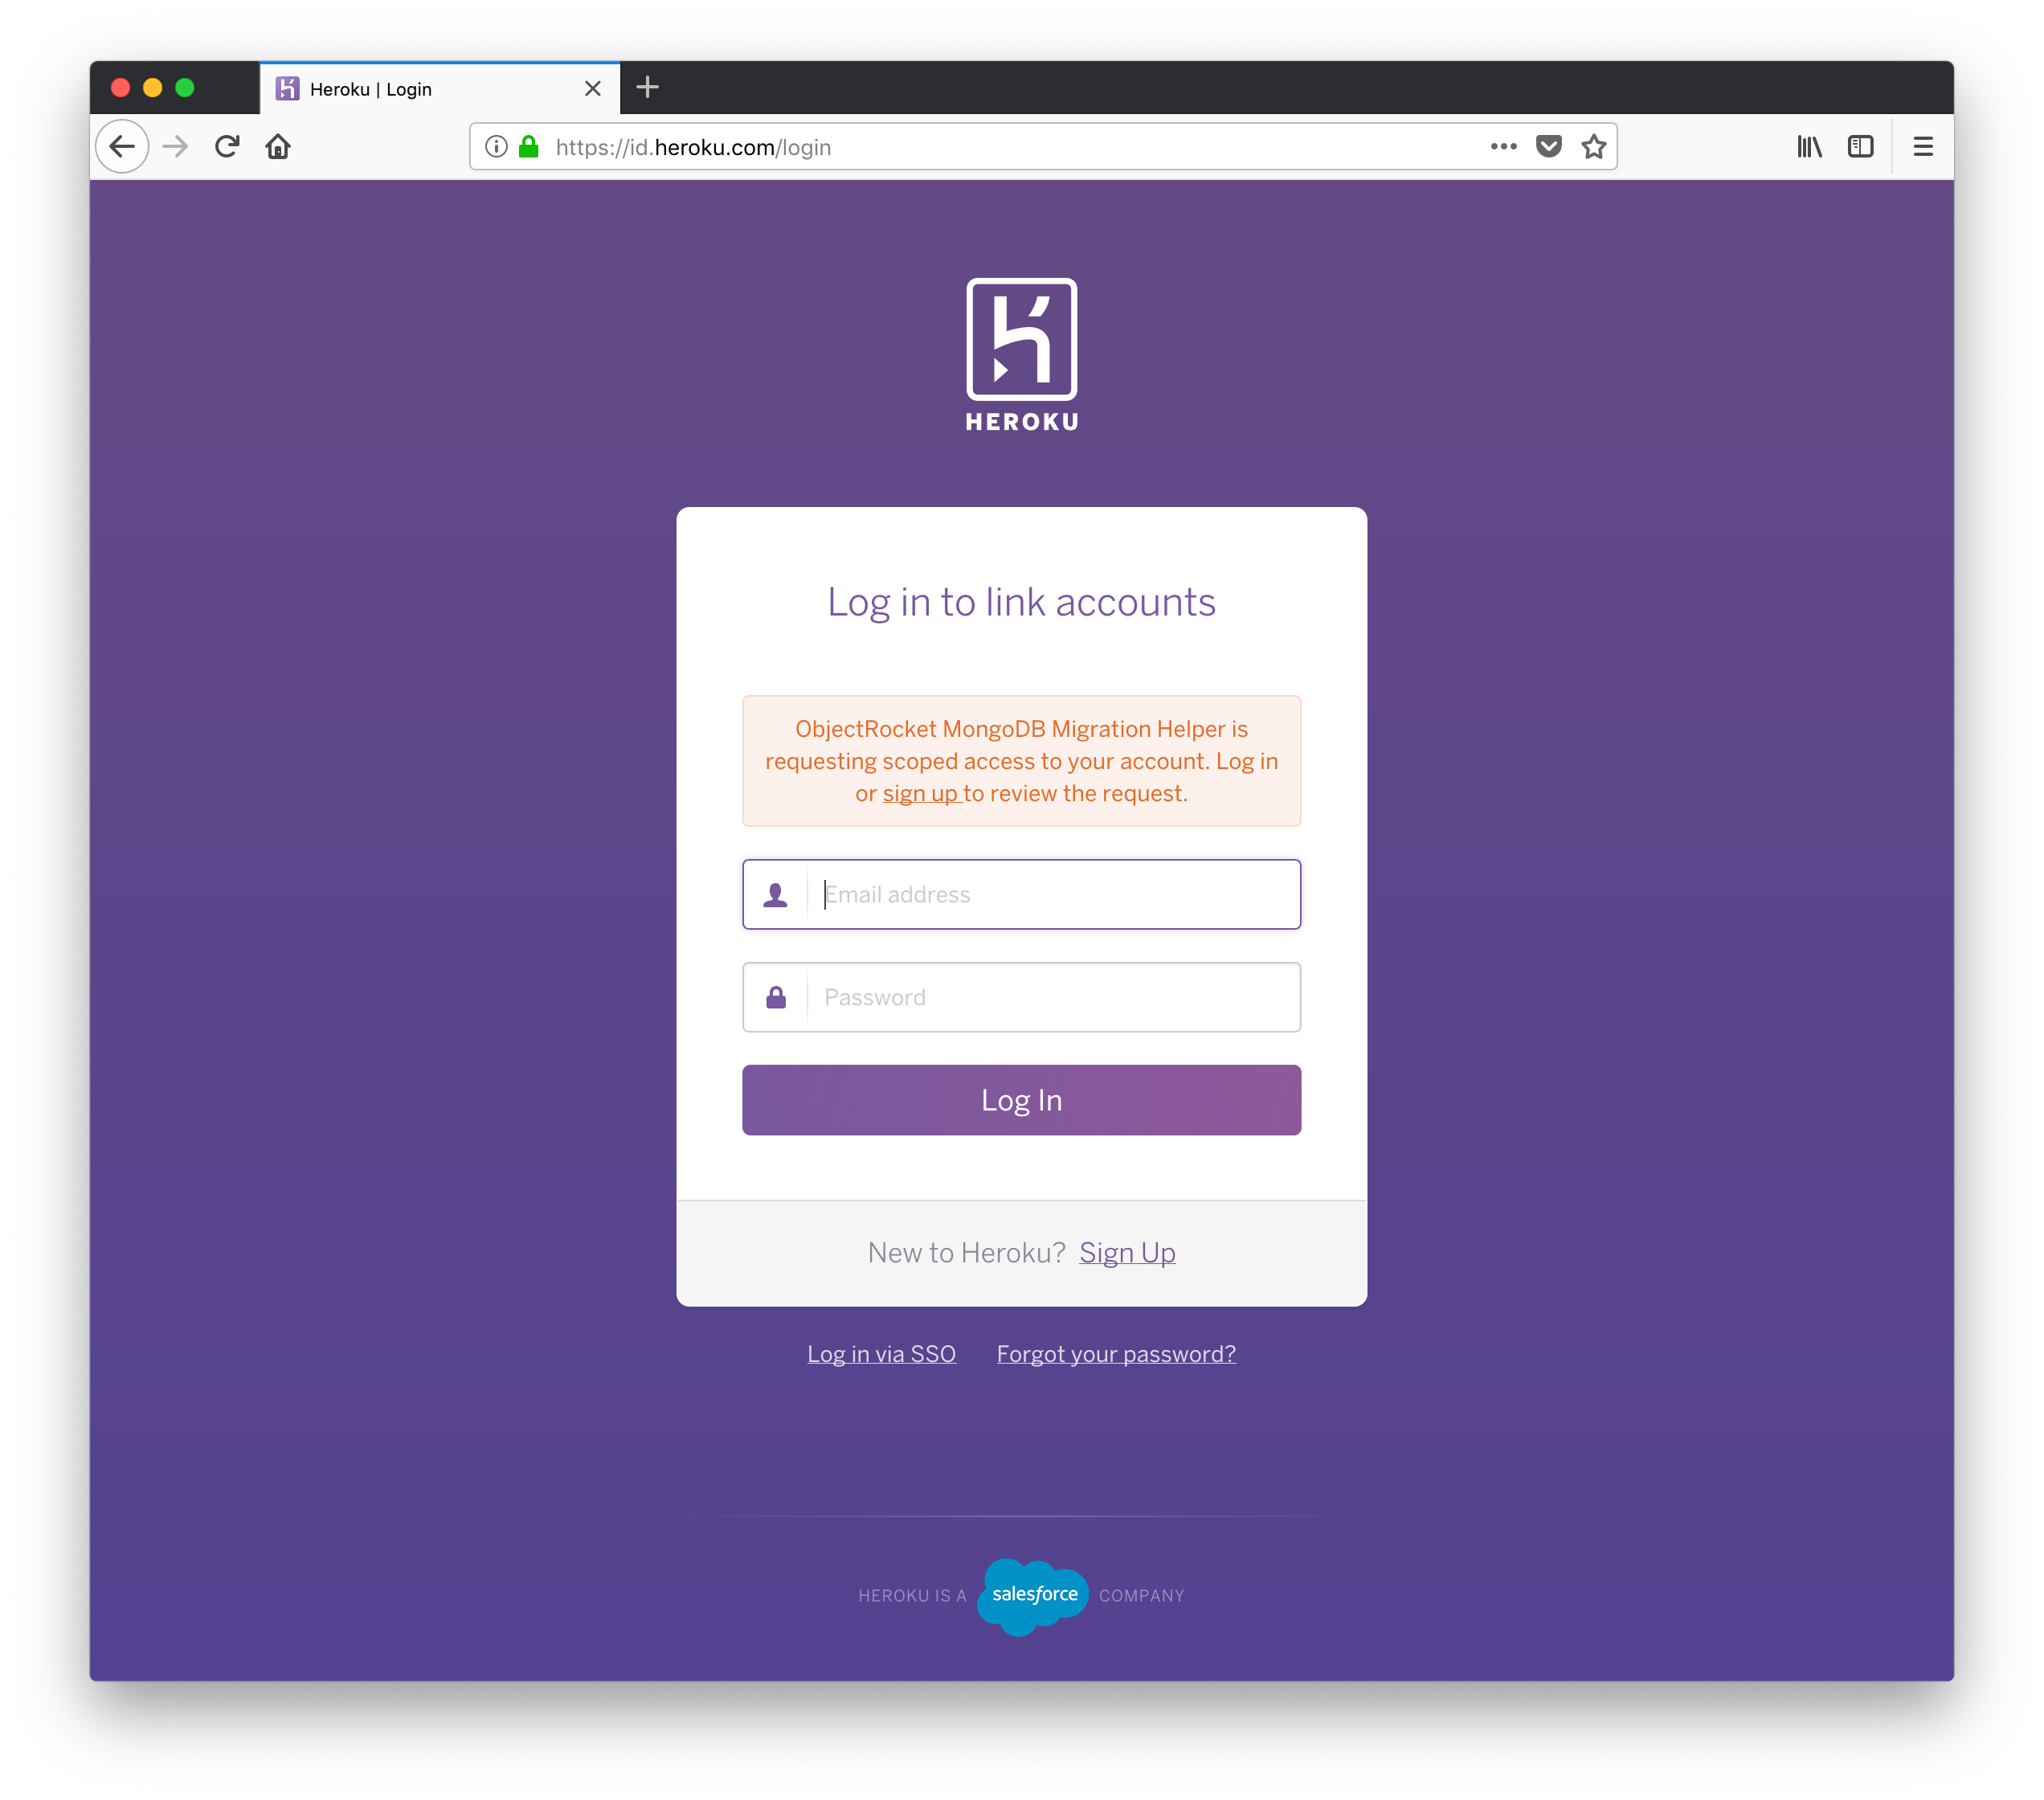
Sign in to the Heroku account that contains the application(s) with a mLab MongoDB add-on that you need to migrate over to ObjectRocket MongoDB.
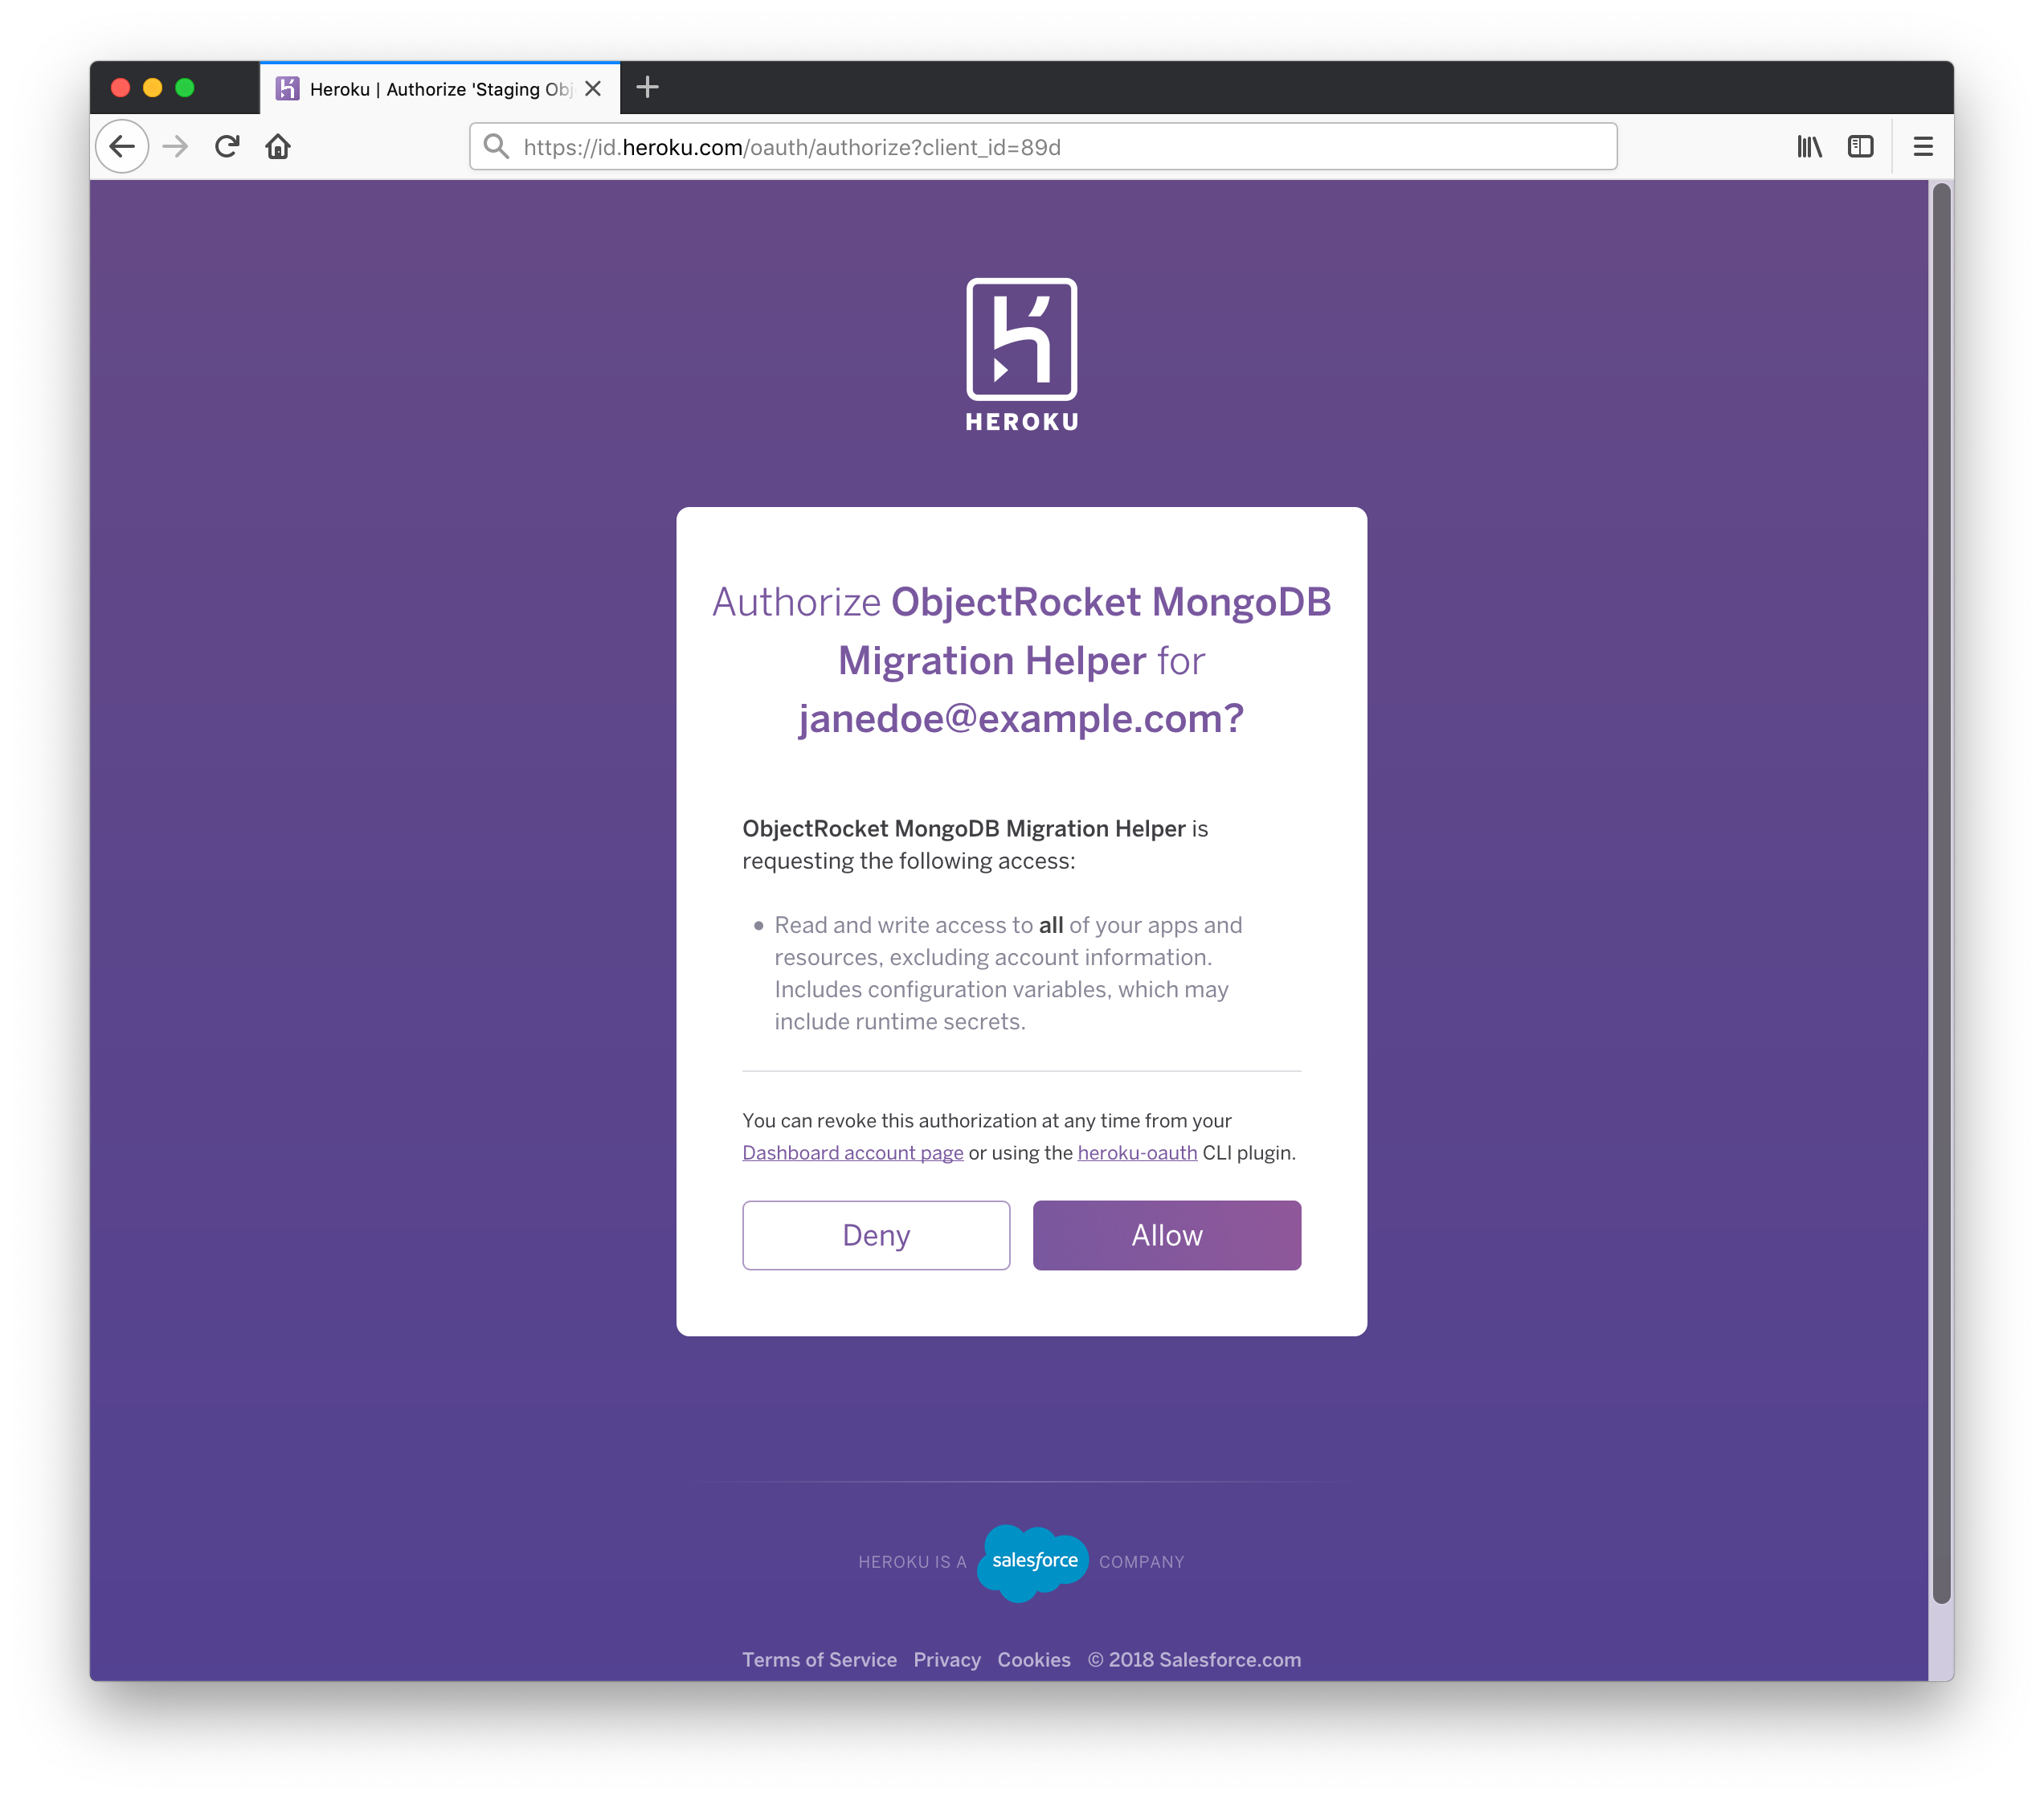
When prompted, authorize ObjectRocket on Heroku account.
This screen will ask you to authorize ObjectRocket to have read and write access to your apps, resources, excluding account information. This is necessary for us to access the mLab MongoDB add-on on the app and provision a new ObjectRocket MongoDB add-on. Both of these will be necessary for a successful migration.
Warning
Without this authorization, you cannot use the ObjectRocket MongoDB Migration Tool for your migration. Once the migration is complete and finalized by you, this access will be removed.
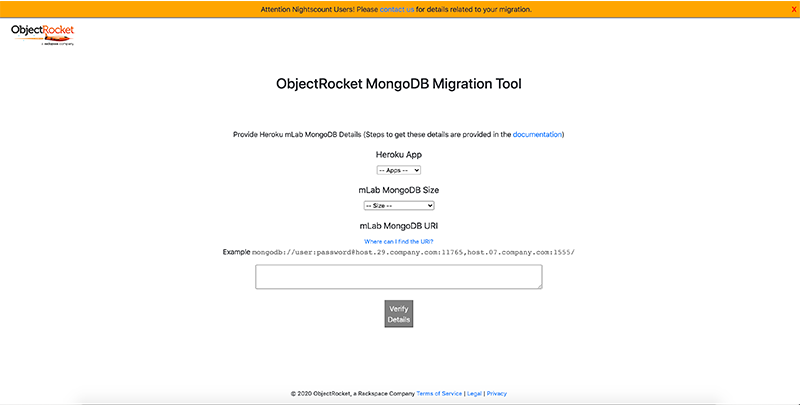
Select the current mLab MongoDB instance size/type from the drop-down list box. Your selection here will help the tool determine which information is needed next.
Enter the mLab information that you captured prior to starting the ObjectRocket MongoDB migration tool (the mLab MongoDB URI, oplog user for shared clusters, and storage engine). If you don’t know or don’t have a preference for storage engine, we can select it for you.
Dedicated clusters : The tool will request URI and validate the formatting of the URI. The migration tool also provides a list of IPs you may wish to add to the “Inbound allow rules” if you decided not to allow all in the section above.
Shared clusters : The tool will request URI and validate the formatting of the URI. The username and password are the database user you collected in the steps above. You will also provide the oplog user name and password that you created in the steps above.
Sandbox instances : The tool will request URI and validate the formatting of the URI.
Note
If your username or password contains any of the following characters:
@,:,/,%you need to percent encode your credentials before adding them to your URI. You do not need to percent encode your Oplog credentials.
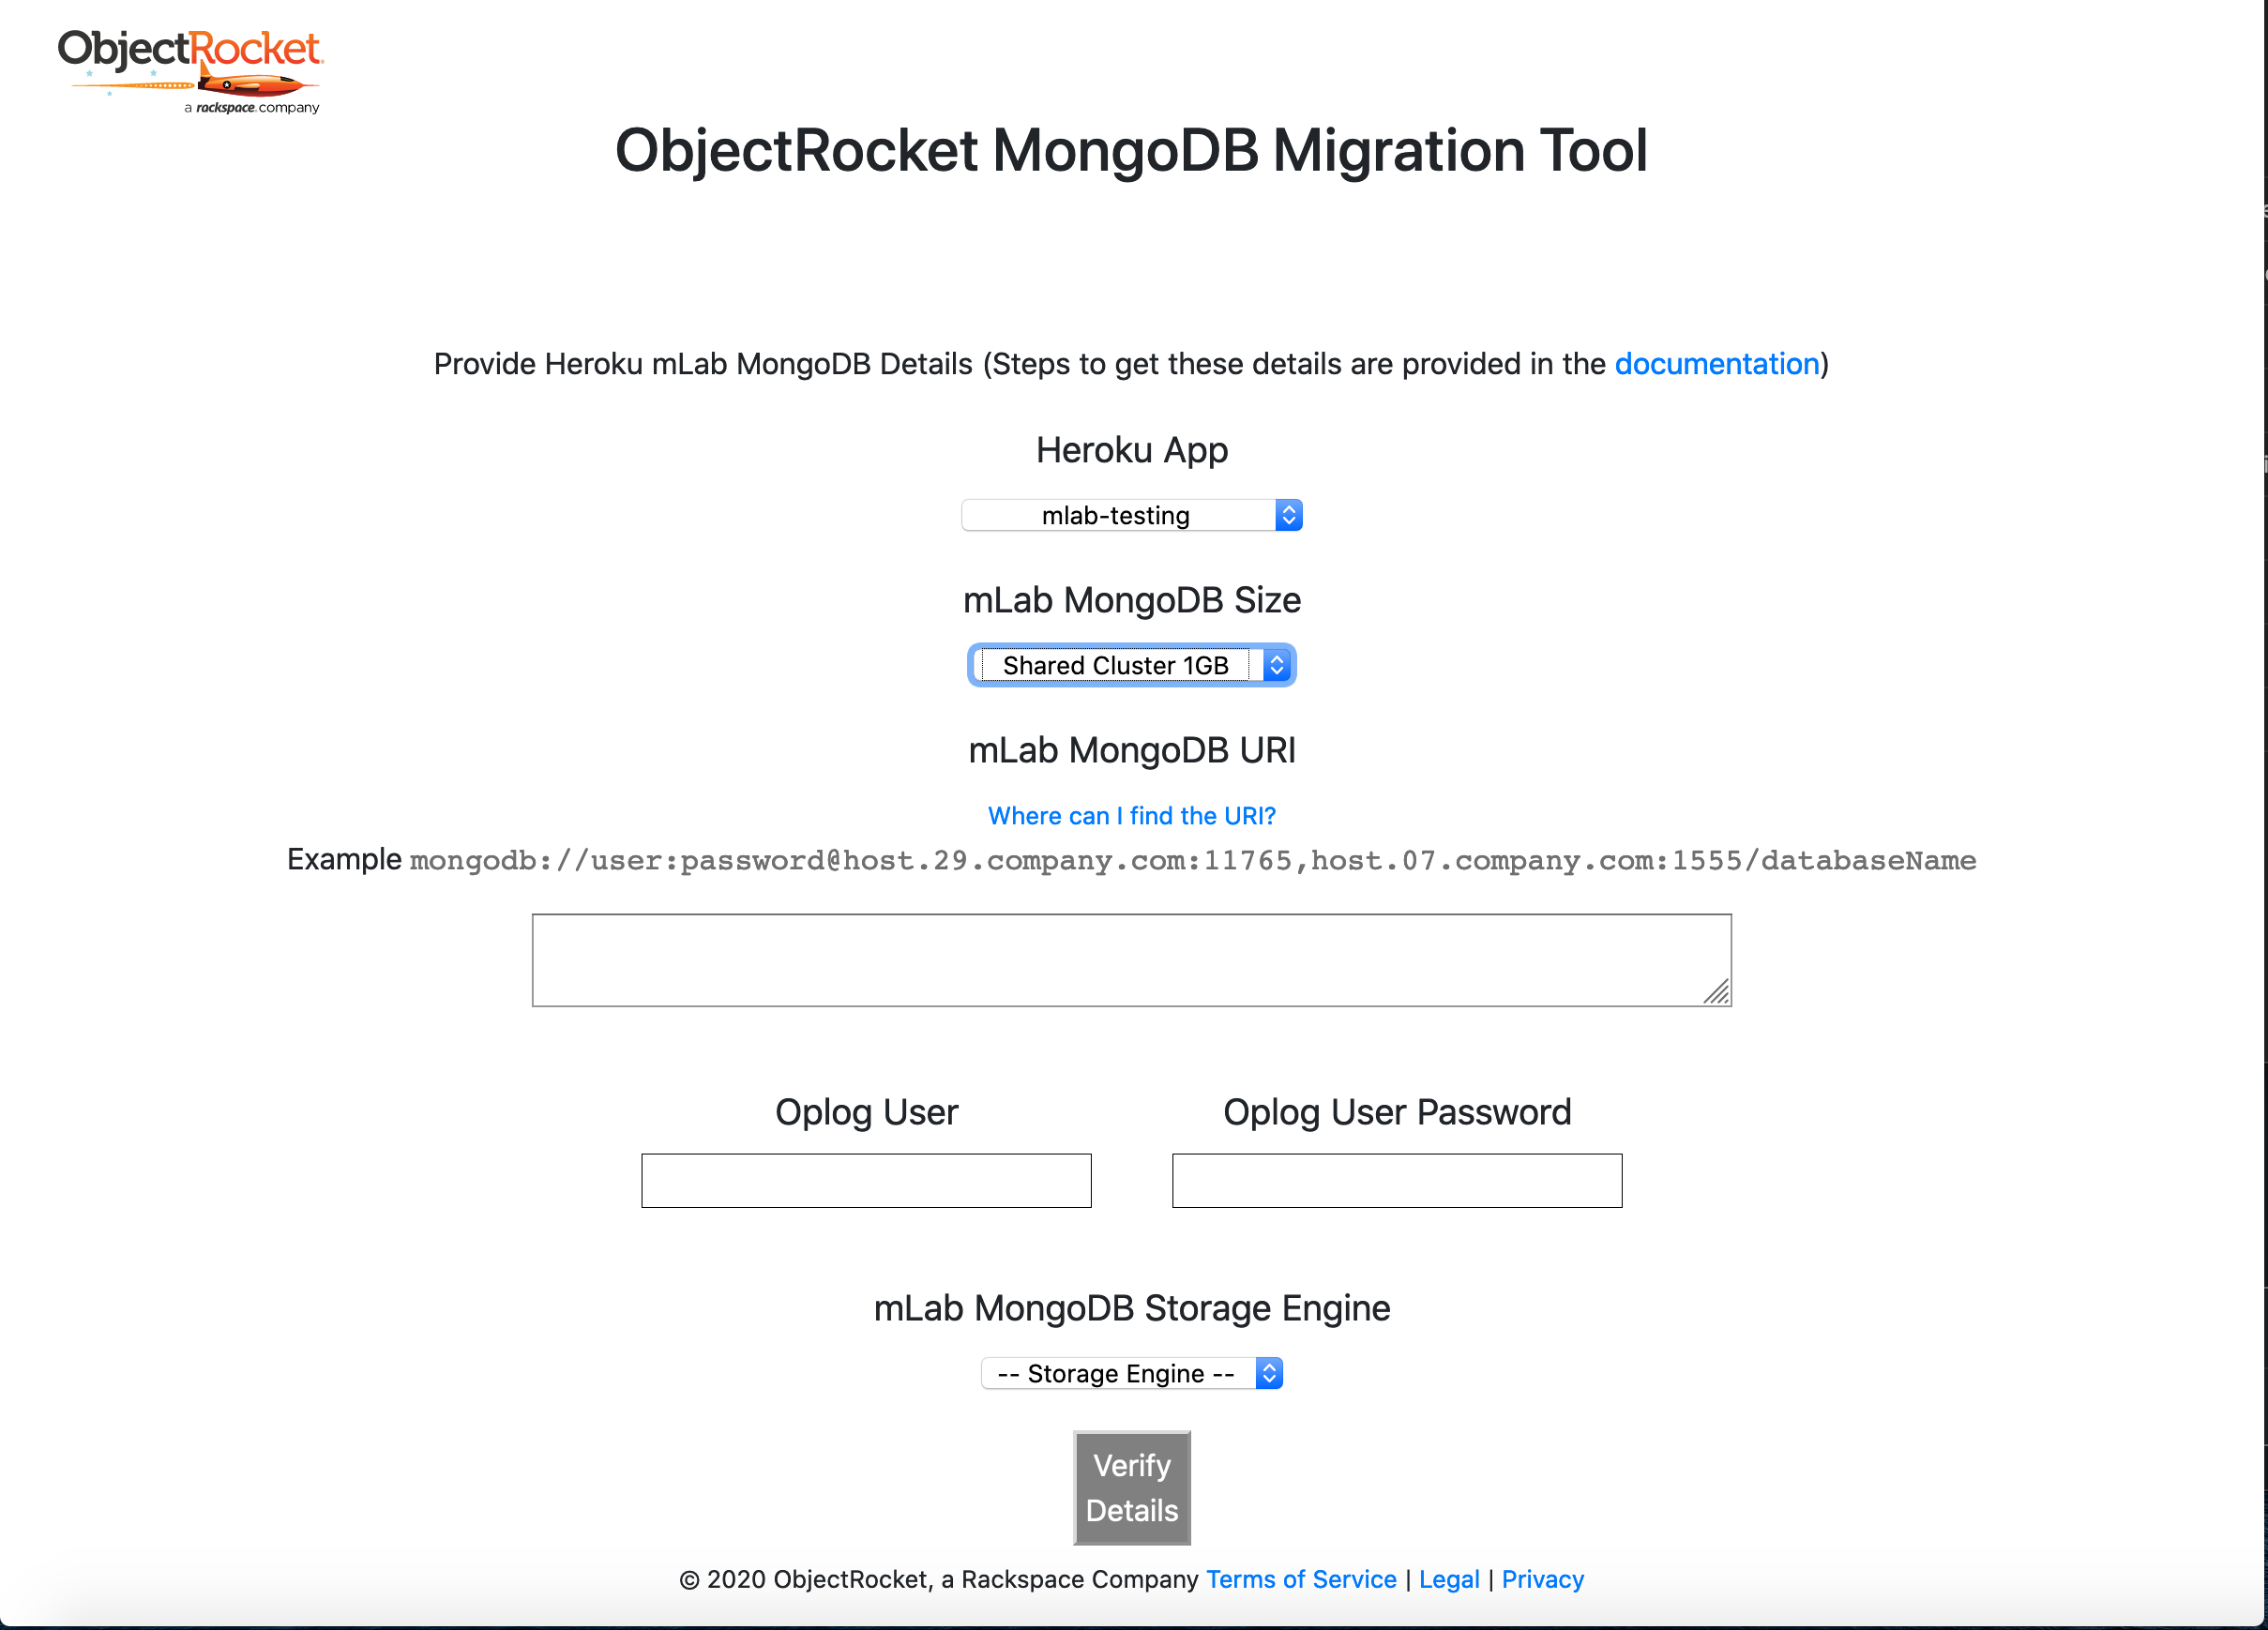
Verify the information you’ve entered, then select Verify Details . At this point the migration tool will attempt to connect to your instance and gather information about size, version, and storage engine.
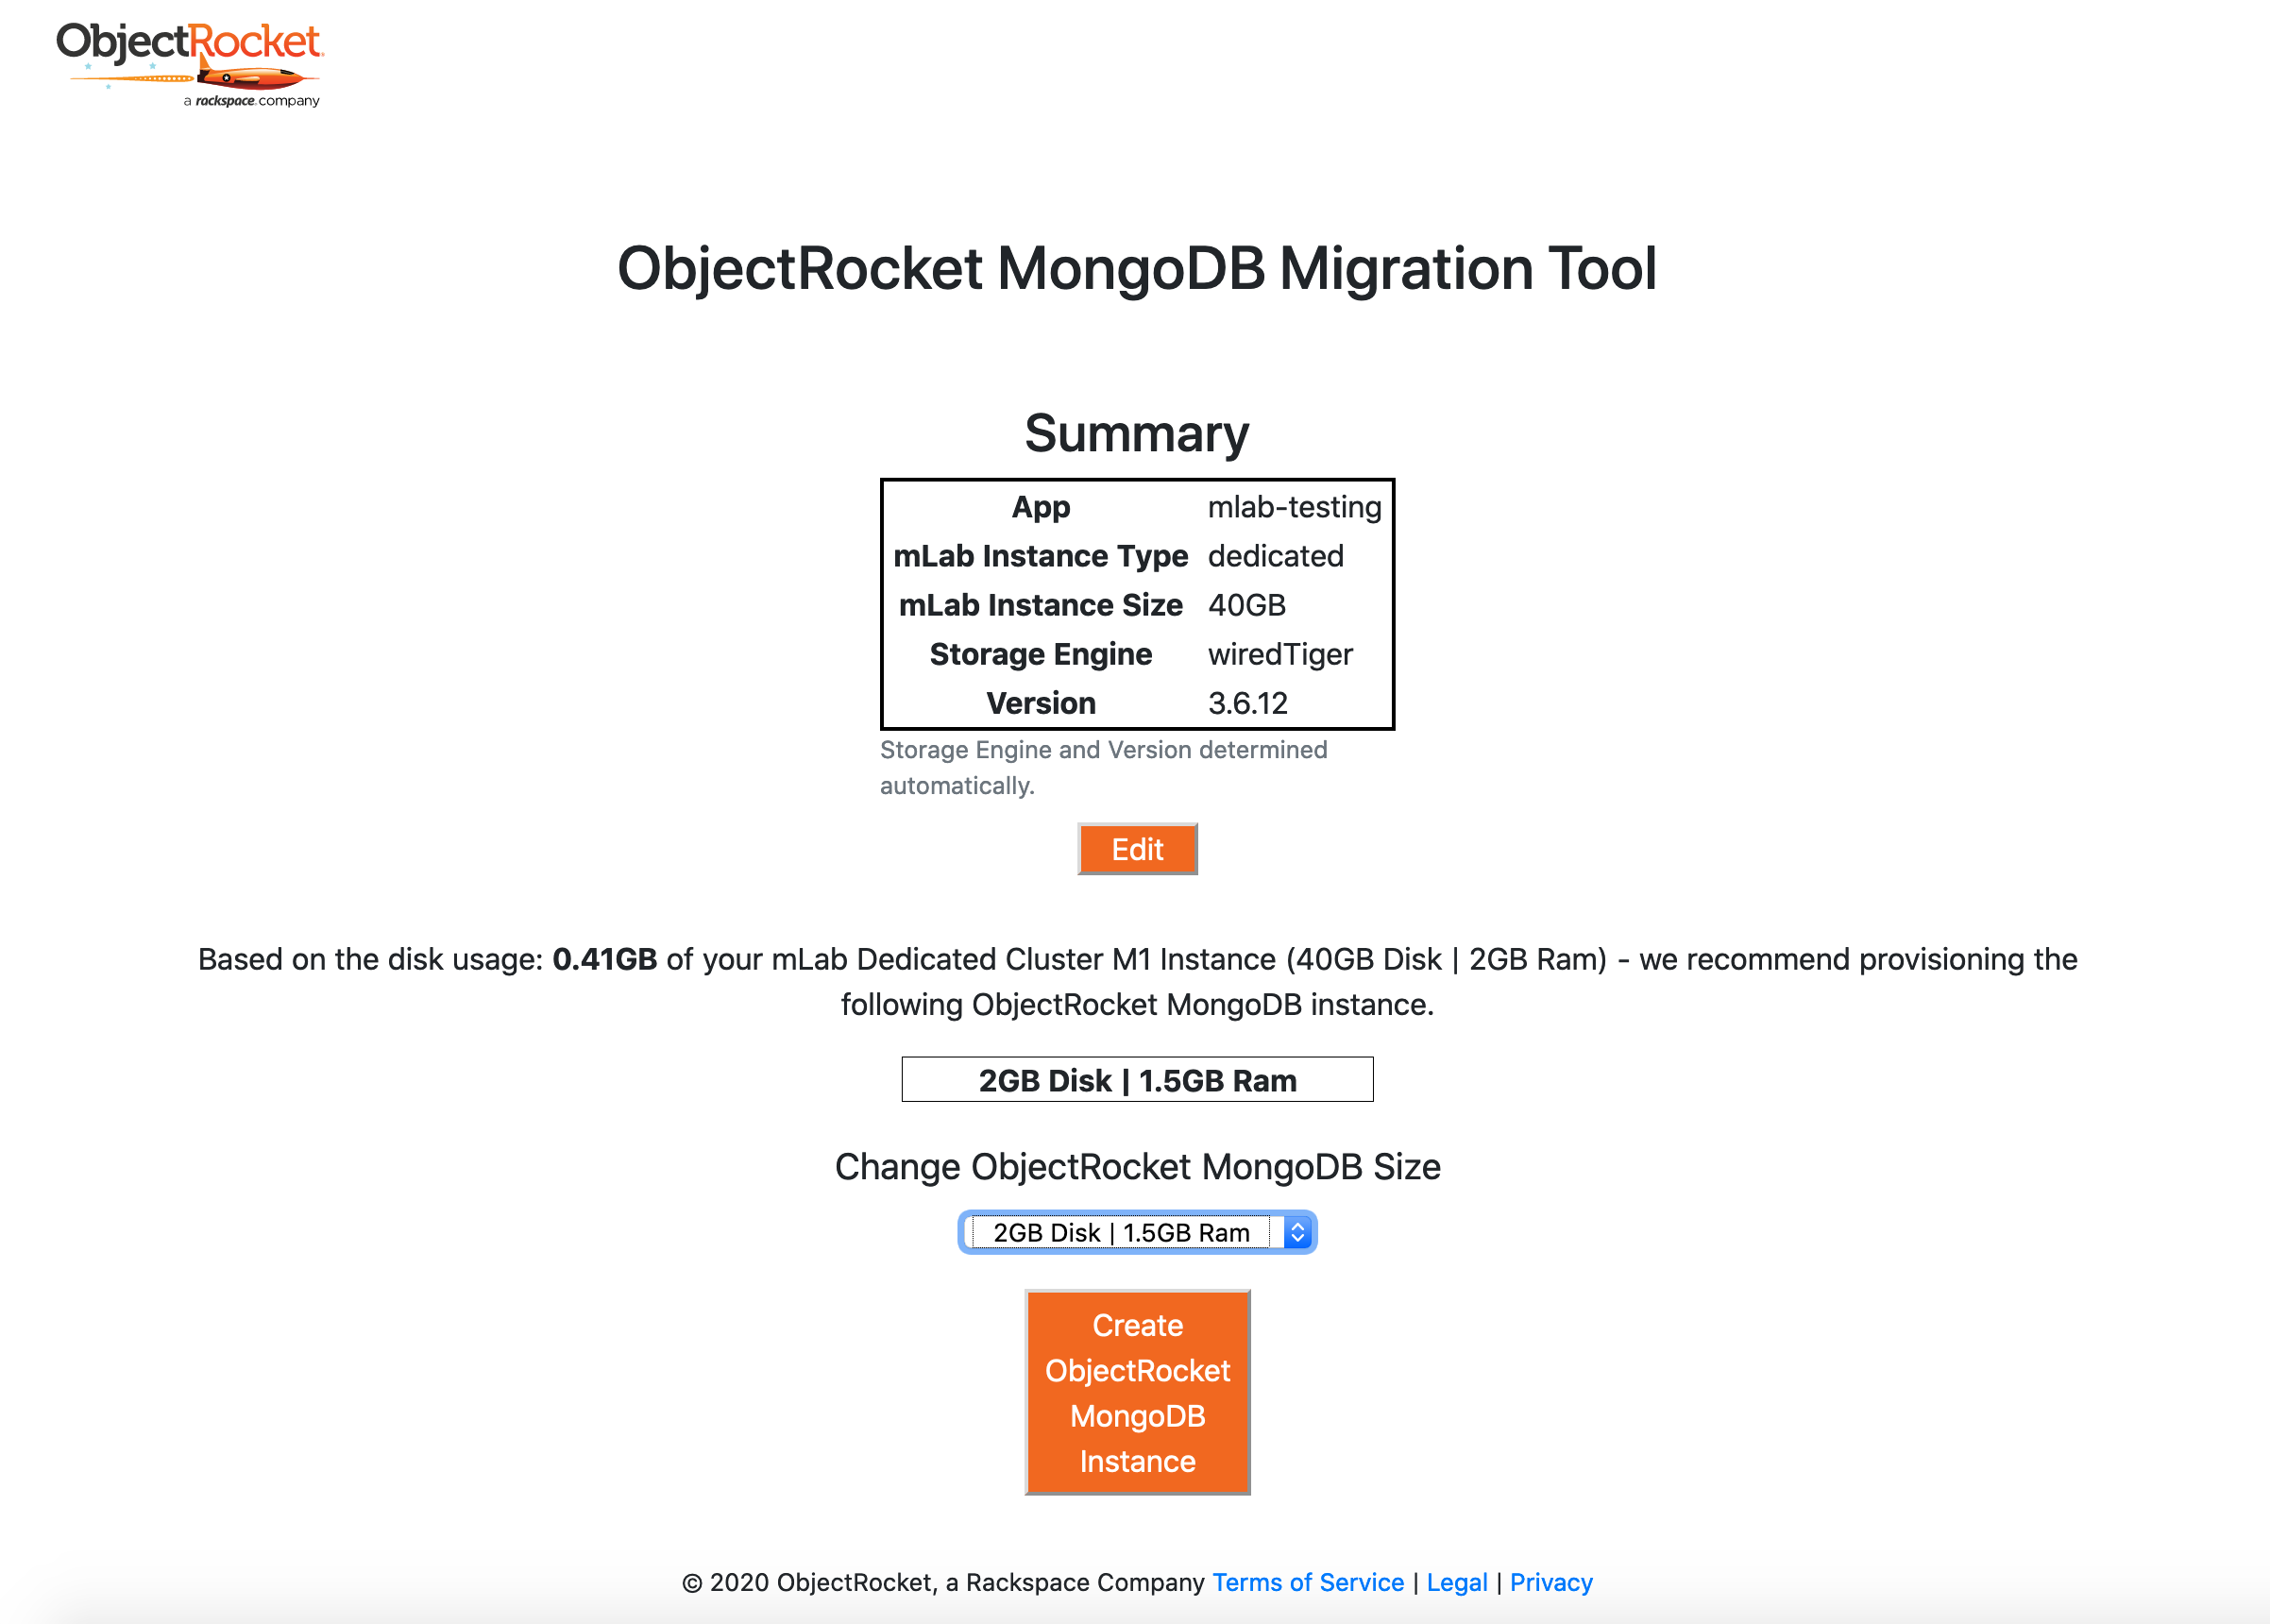
Based upon the information gathered, the migration tool populates the next screen drop-down with recommendations for the ObjectRocket MongoDB instance size to provision. Once you click Create ObjectRocket MongoDB Instance, a new instance will be created in your Heroku account. The current pricing will be listed on this page as well.
Note
The migration tool attempts to select the smallest size instance that will fit your dataset. However, if you’d like extra capacity or RAM, you are free to select a larger size in the dropdown.
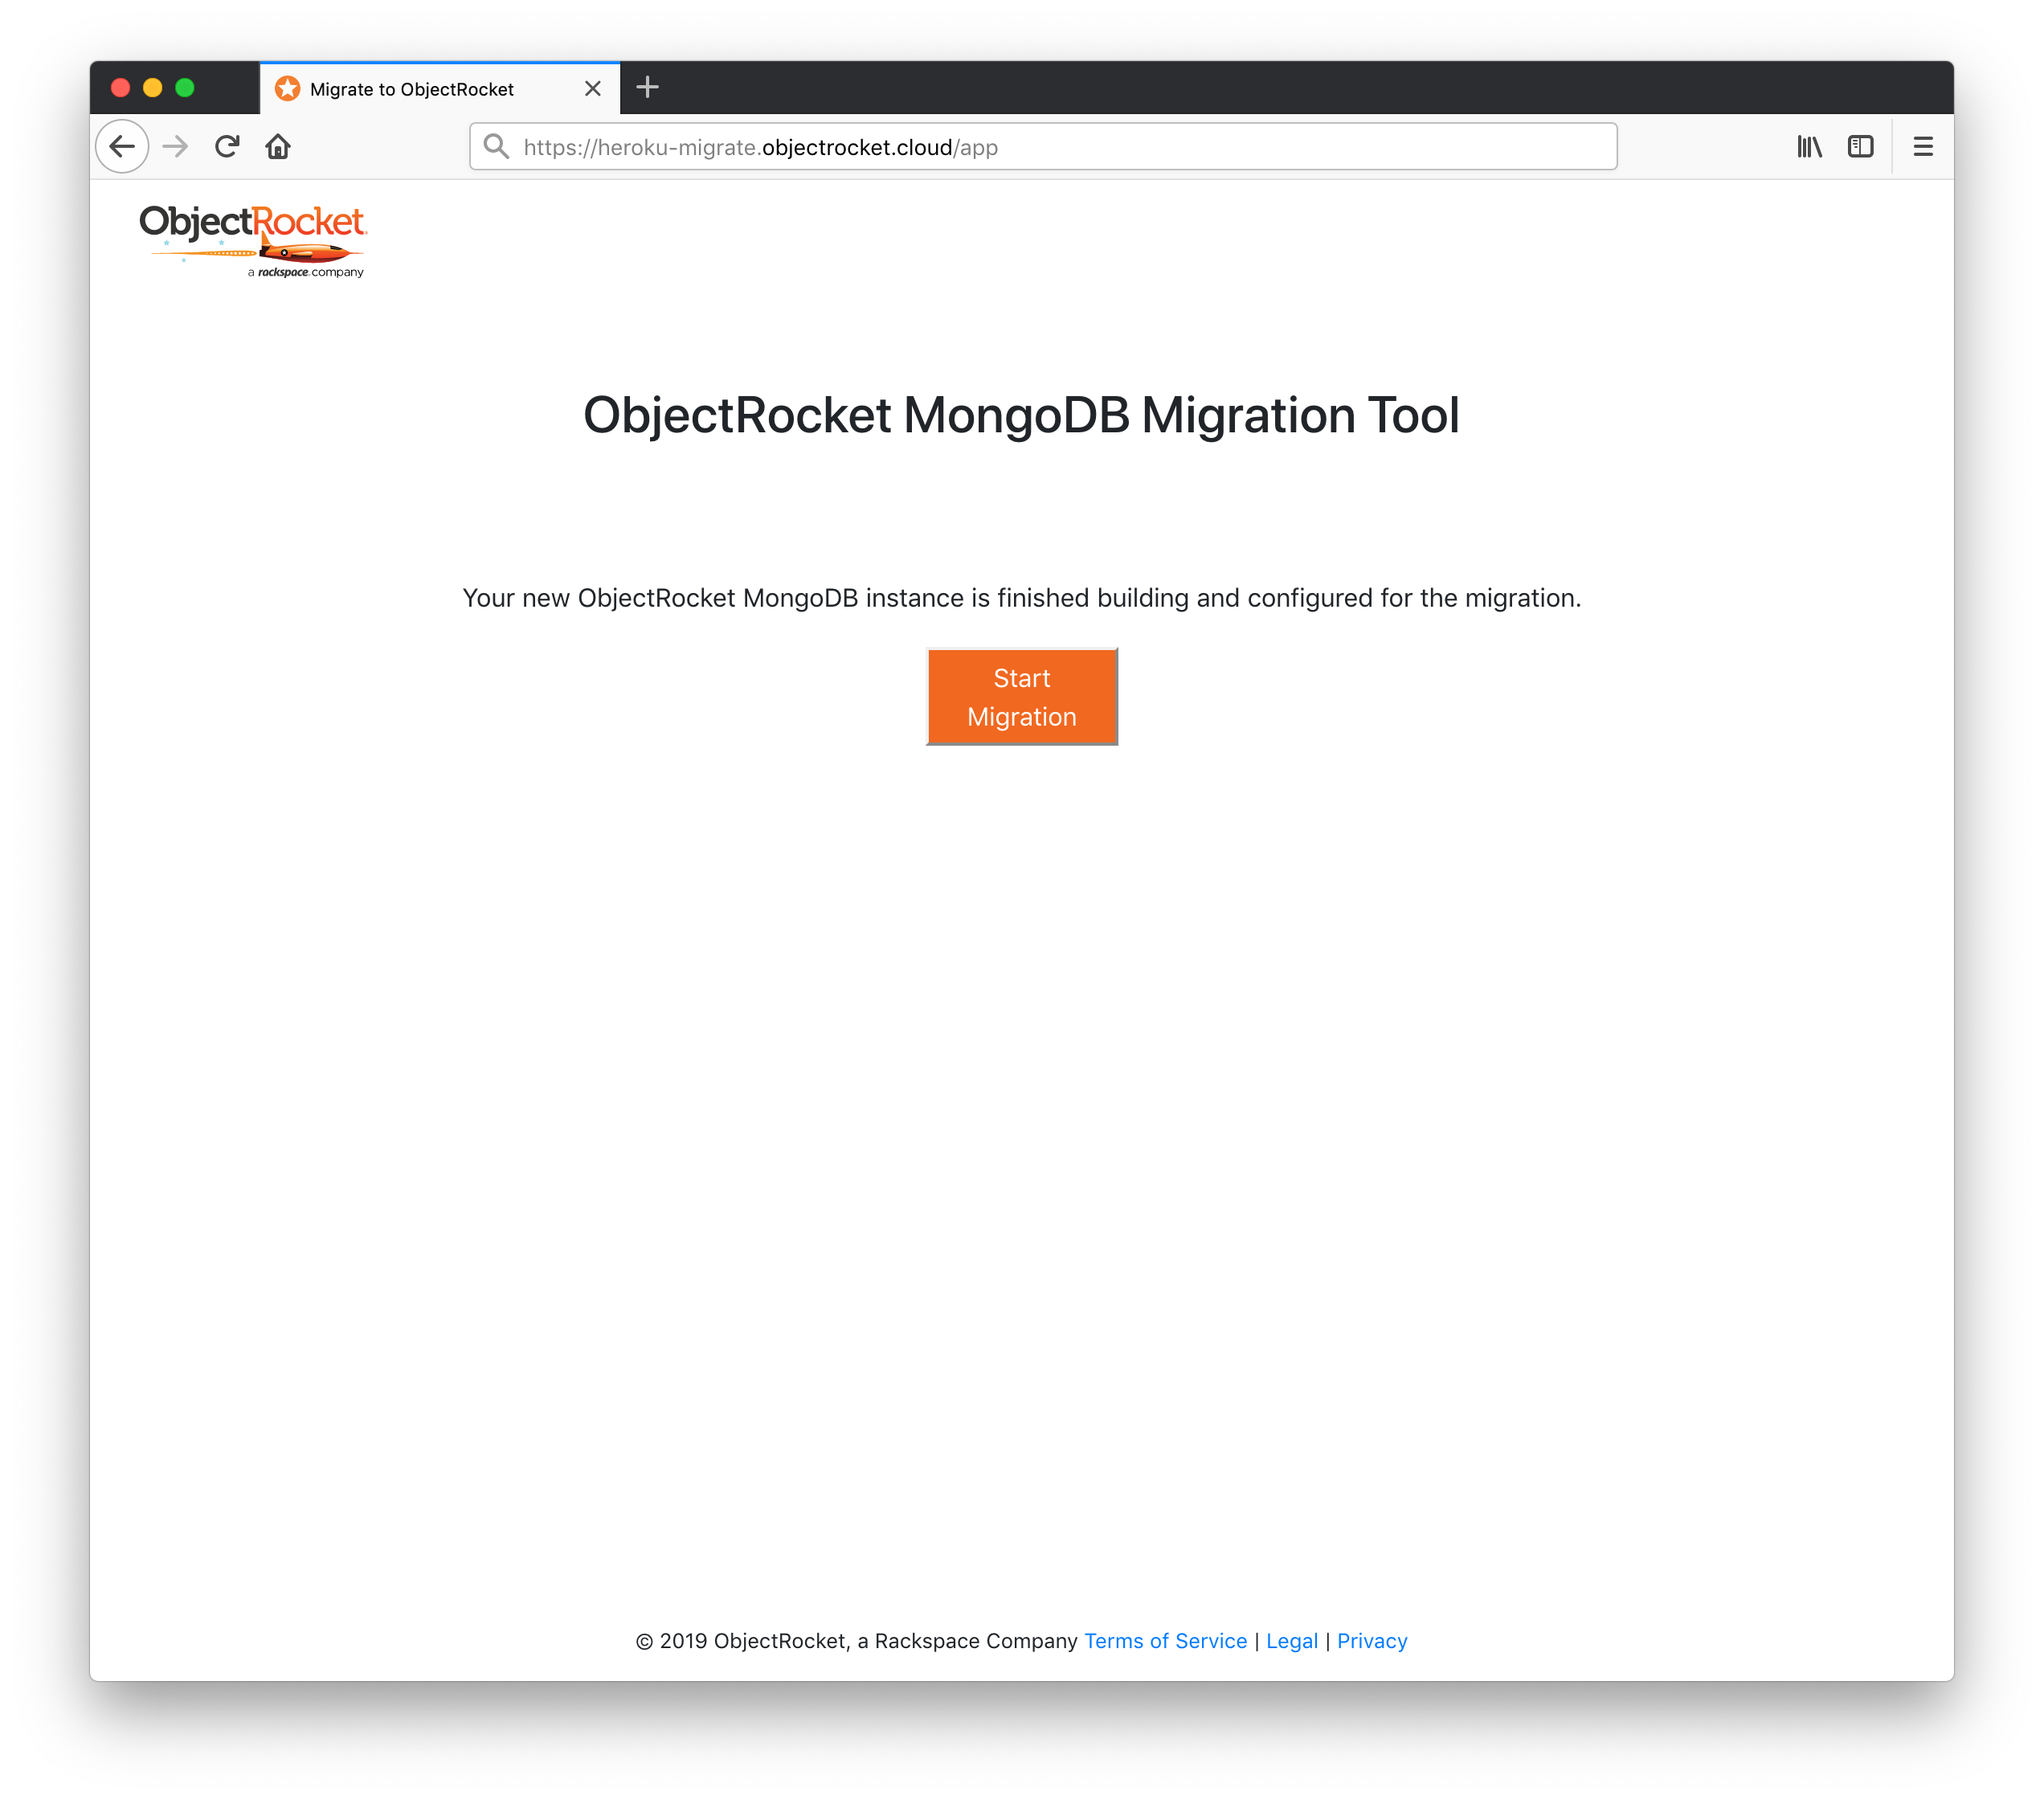
Once your instance has finished the creation process, you will be prompted to start the migration.
Click Start Migration to begin the migration.
This starts the process of copying the existing data from the mLab MongoDB instance over to the new ObjectRocket MongoDB instance. On Shared Cluster and Dedicated Cluster instances, the migration tool keeps track of new writes that occur on the source MongoDB database while the migration is taking place.
Note
If you’re migrating a Sandbox instances, you will need to stop any applications and processes that write to your sandbox instance now. This ensures that writes to the database after migration has started are not lost.
The length of time that the migration takes is dependent upon the size of the source MongoDB instance as well as the traffic that is occurring on the database during the migration. Smaller instances (<10G) with a moderate volume of traffic should take minutes to complete. Larger instances with a large volume of traffic could take hours. You can track the phases (prep, backup, restore, sync) of the migration on this page.
There will be a 24-hour window that the tool allows for a migration to be finalized. If the migration isn’t finalized by pressing the stop sync button within that window, you will need to start over with the migration. Don’t hesitate to reach out to our Support Team if you have questions or run into issues with the 24-hour window.
Note
If you leave this page during the migration and then navigate back to the tool, it will take you back to this page and provide a status on the migration progress.
Finalize Migration
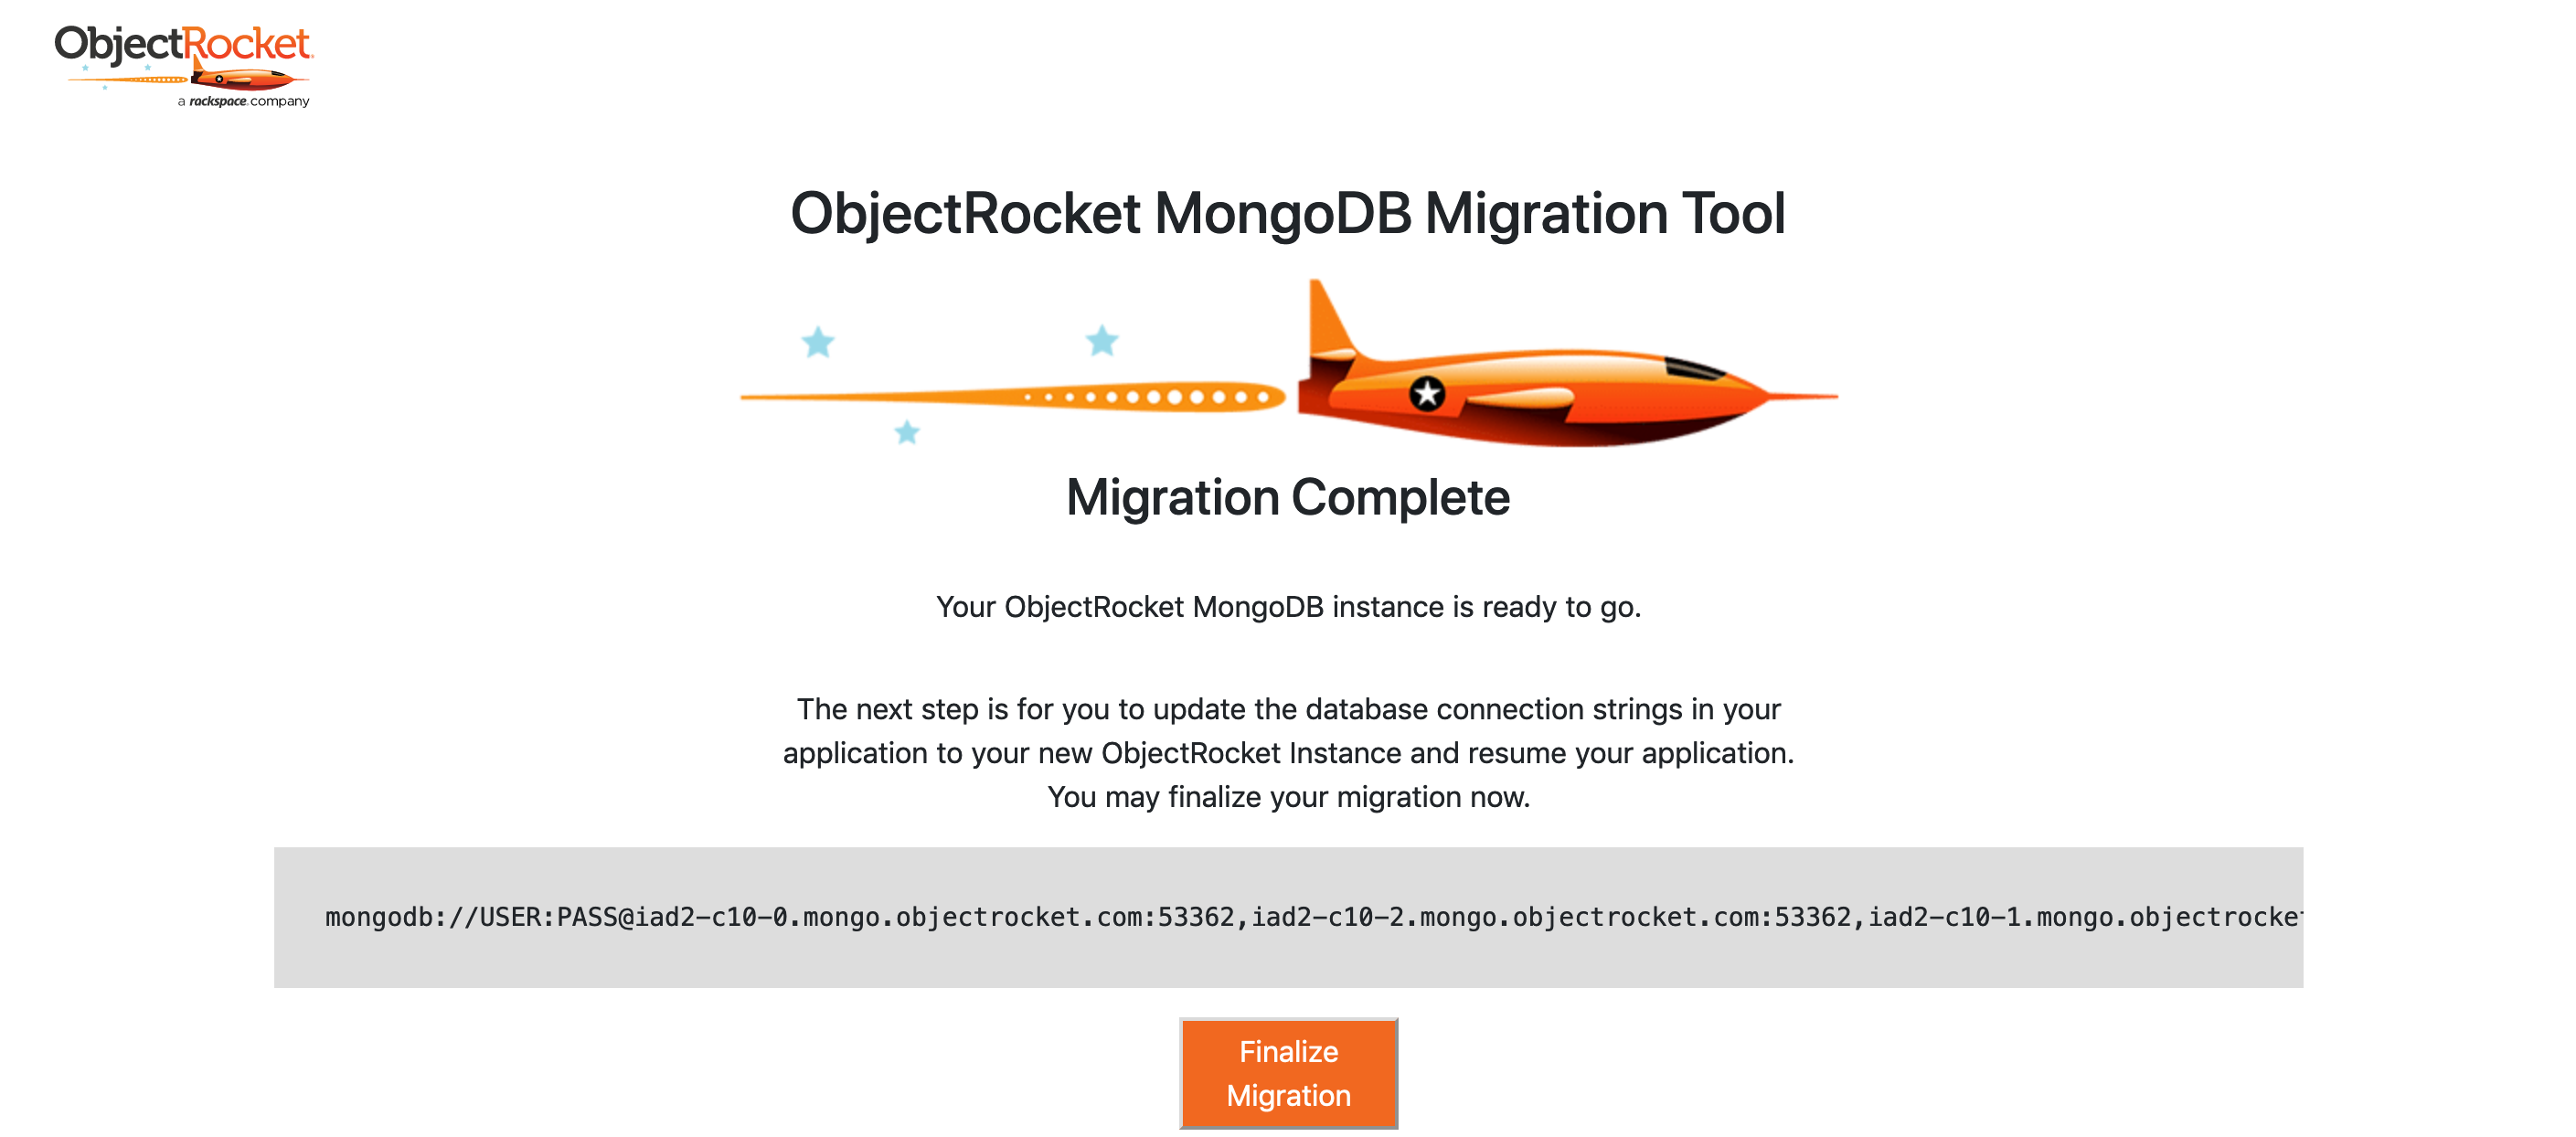
Your ObjectRocket MongoDB instance is now ready to go. All of the data from the mLab MongoDB instance has been copied over and any writes that occurred on the mLab MongoDB instance during the migration have also been written to the new ObjectRocket MongoDB instance.
Note
On Shared Cluster and Dedicated Cluster instances, we will continue to tail these writes for up to 24 hours from the starting time of the migration (when you pressed Start Migration on the previous screen).
Here we provide you with the MongoDB URI to use for your new ObjectRocket instance. As part of the migration process, we’ve also copied over all of your users from the mLab instance. At this point, verify that you can connect to your new instance and update your application to start talking to the new ObjectRocket instance.
Note
Before you click Finalize Migration, you need to change the connection strings in your application and any other processes that were accessing your mLab MongoDB instance. Once you click Finalize Migration, we will disable the tailing of the writes that are occurring on the mLab MongoDB instance.
To finalize the migration, click Finalize Migration.
For Parse Users
If your heroku application runs the parse community server, update your parse server to use your new ObjectRocket database by setting either the DATABASE_URI or MONGODB_URI config var in your heroku app’s settings. Set the config var to be the value of the ORMONGO_RS_URL config var.
If your ObjectRocket database is using the mmap storage engine or if you don’t meet the retryable-writes prerequisites outlined here then you need to append &retryWrites=false to the end of your connection string.
Your connection string should look similar to mongodb://username:password@<host-1>,<host-2>,<host-3>/?replicaSet=<replSetID> or mongodb://username:password@<host-1>,<host-2>,<host-3>/?replicaSet=<replSetID>&retryWrites=false.
Destroy mLab MongoDB Instance
Verify that your application is working as expected with the new ObjectRocket MongoDB instance. Once this is done, you can get rid of your mLab MongoDB instance.
An optional step is to take a recent backup or download the backup file via the mLab Control Panel before you destroy your MongoDB instance. Depending on the type of your mLab instance, you can either perform a mongodump of the data in the instance and/or copy a snapshot of the instance to your AWS acccount.
To delete the mLab MongoDB instance run the following command from the CLI:
$ heroku addons:destroy mlab
Remove Migration Tool Metadata
The migration tool adds a __mongo_connector metadata database to your ObjectRocket MongoDB instance. After you have finalized your migration this database can be safely removed.
For Nightscout Users
If you are a Nightscout user and want to provision a new plan we offer additional assistance via our support team. You can reach us with a support ticket by clicking the link labeled “contact us” in the banner at the top of the page.
The body of the pre-populated email contains information that will help ObjectRocket Support enable the plan. Please do not edit this information.
