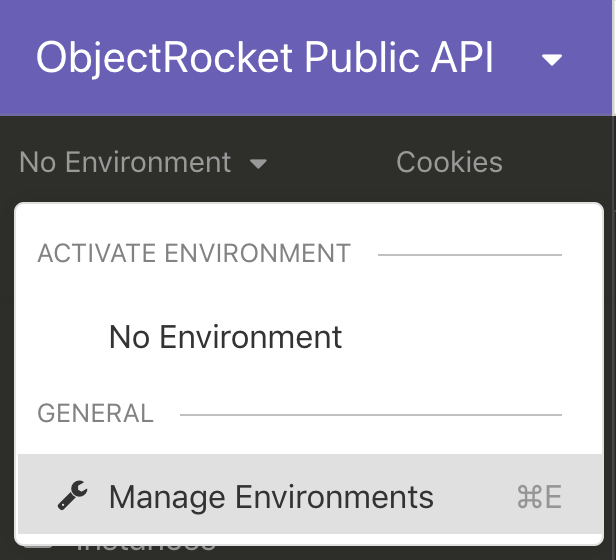
Objectrocket Cloud Platform API Walkthrough
Using the API
As a requirement, make sure you’ve created an account via our Getting Started Guide.
1. Generate an API token
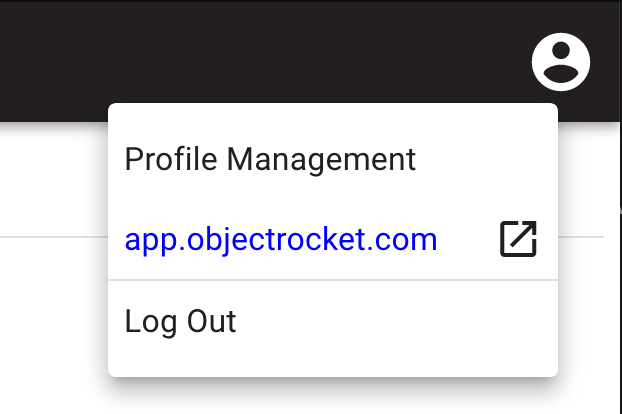
You’ll first need to log into Mission Control and go to the profile management screen to generate a token
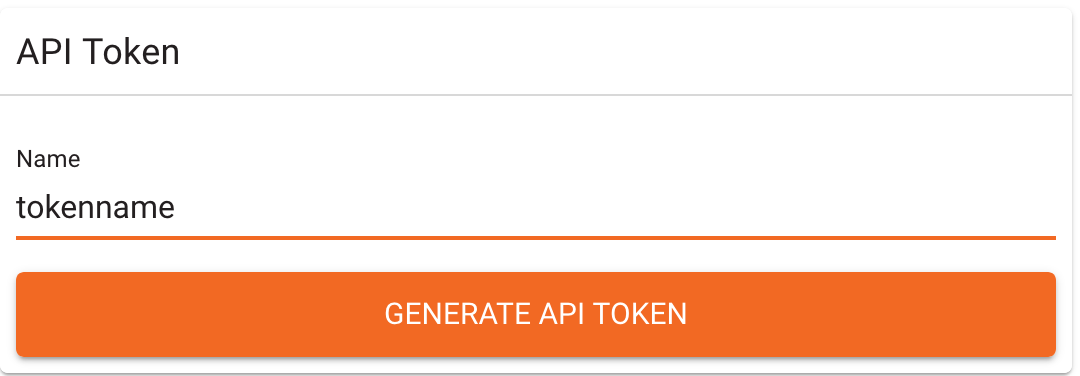
Then enter a token name and press Generate Token
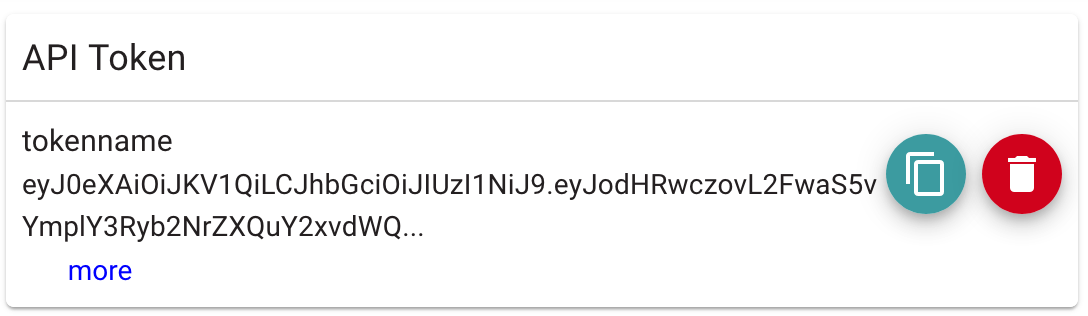
Finally, now that you’ve generated a token, you can copy your token
1. Attach the token to API requests
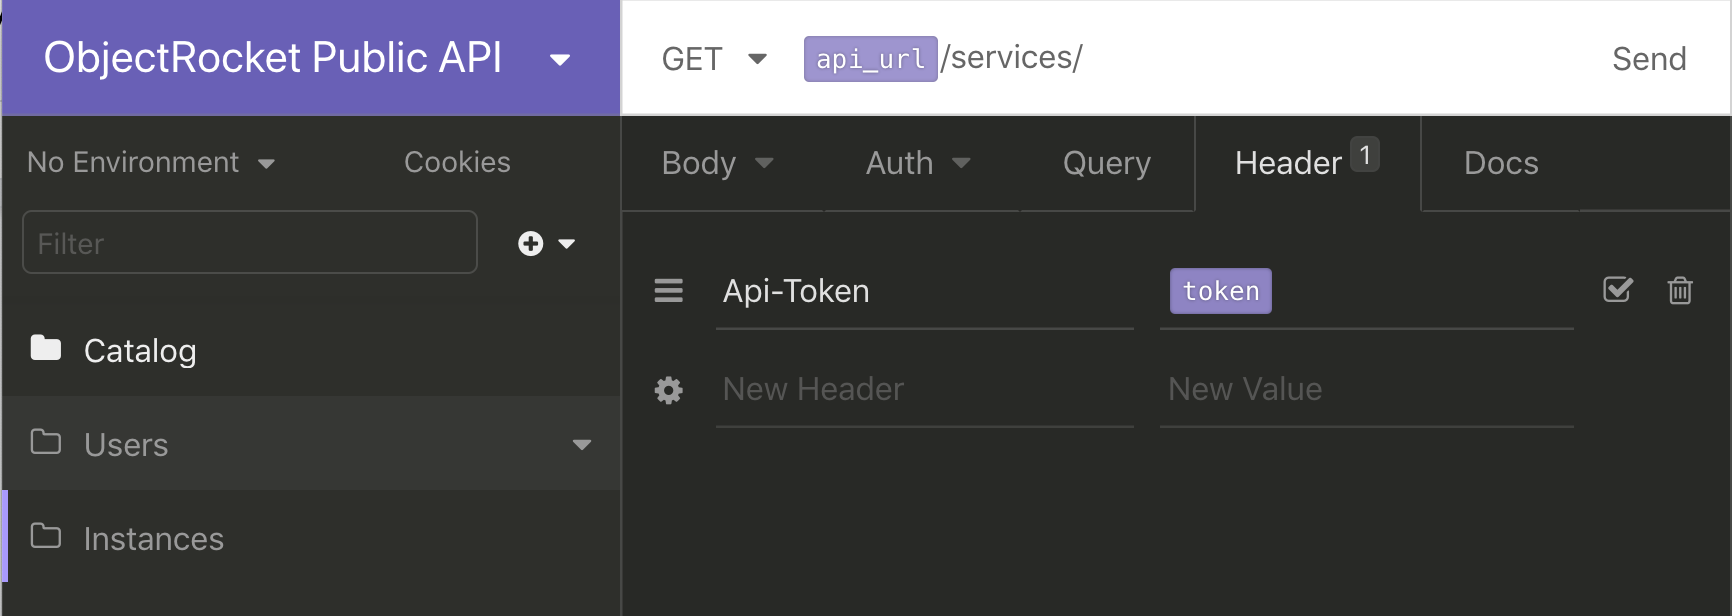
If you’re using Insomnia, you can provide the API Token via an “Api-Token” header, which should work fine, but what we’ve done in our downloadable template is created a token variable that you can set in your environment, like so:
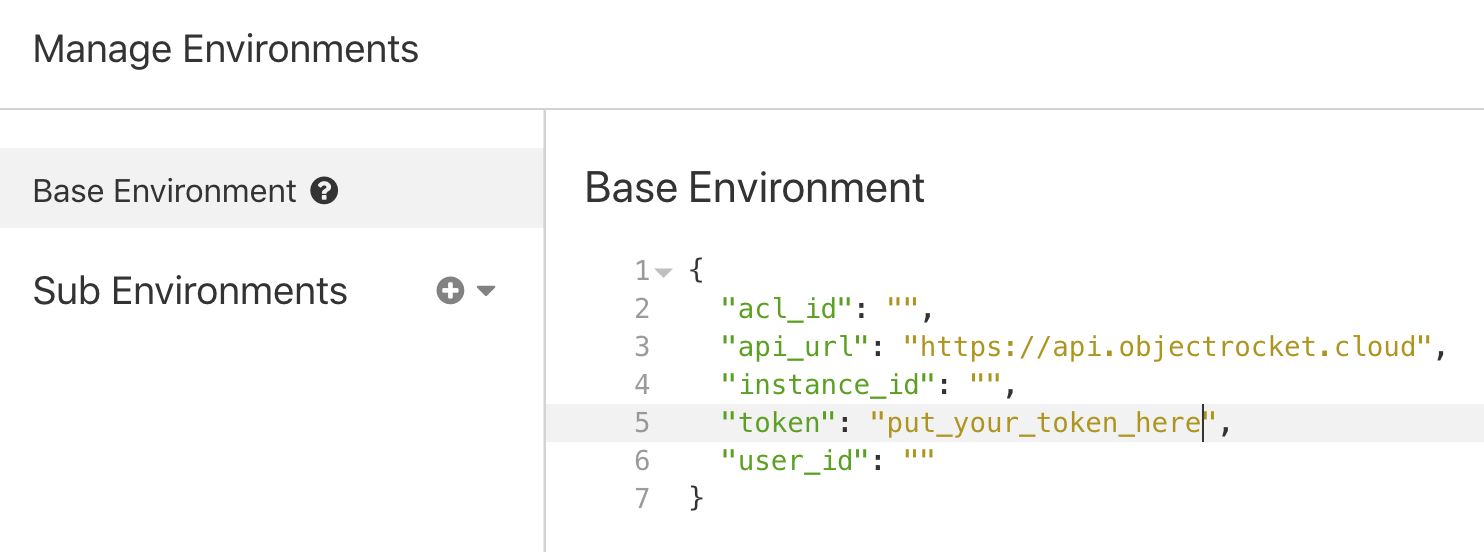
From there, you can use the token throughout insomnia by just typing: {{token}}.
However, if you’re not an Insomnia user, here’s what the header looks like in curl:
curl --header "Api-Token: put_your_token_here" https://api.objectrocket.cloud/instanceslist/
The setup should be similar in other REST clients.
2. View service catalog
The service catalog will tell us what services and options are available. If you just want to jump to creating an instance, you can skip this step and go right to step 3.
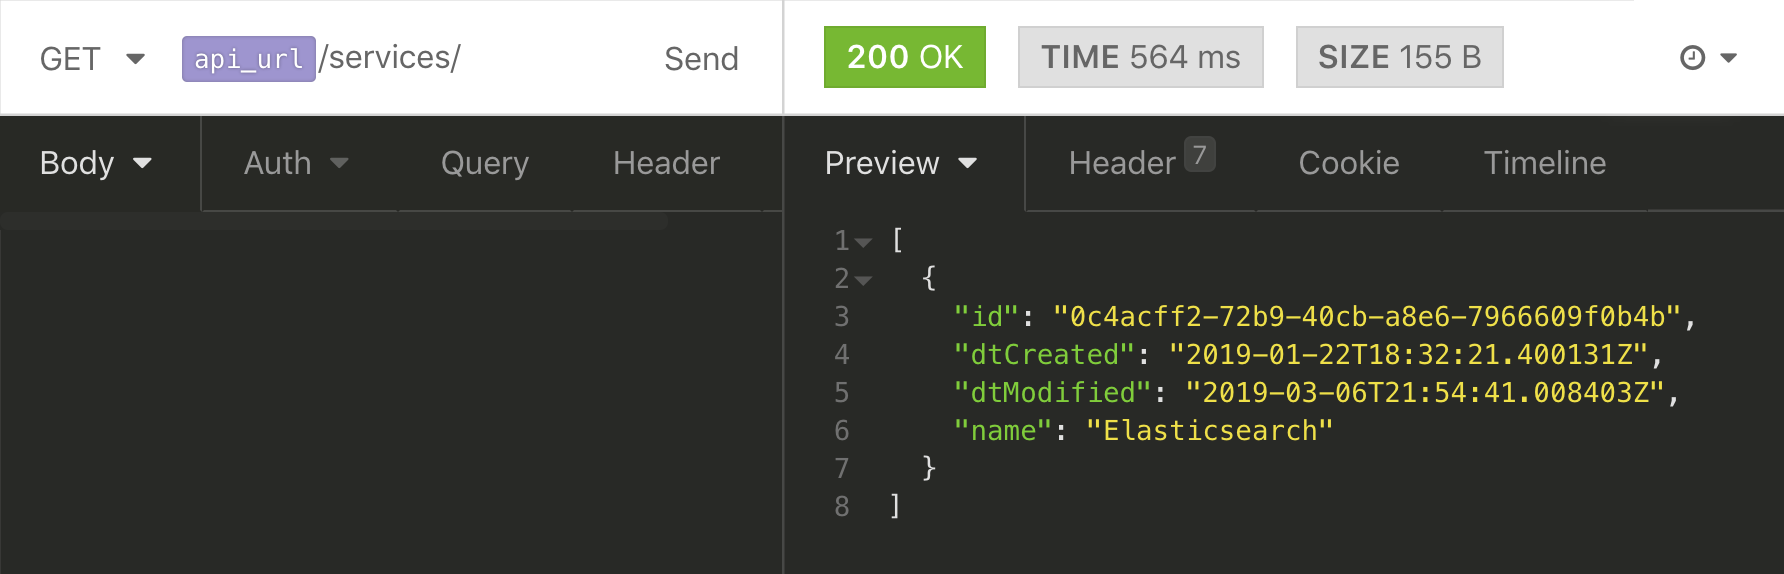
Above you can see the “Elasticsearch” service is available. Let’s see what serviceSubtypes are available for it by using the “service” query parameter to filter:
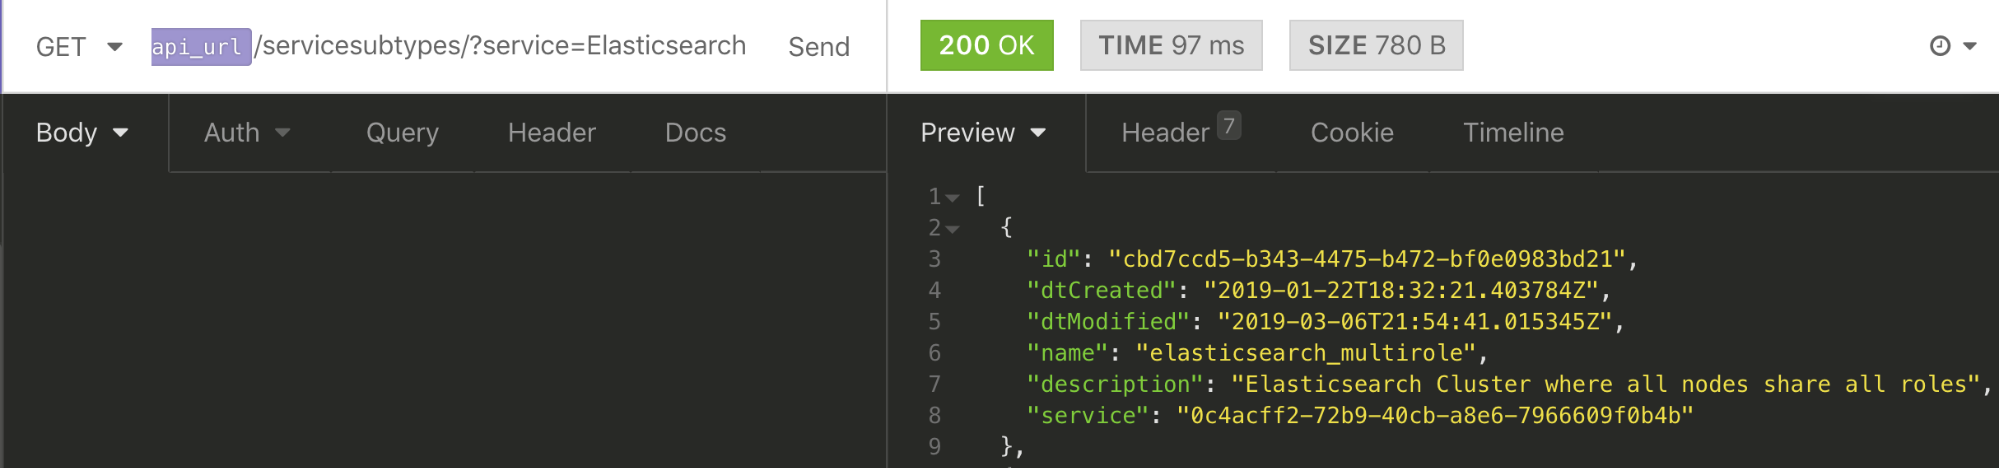
As you can see, there’s one subtype called elasticsearch_multirole.
Finally, let’s look at what versions are available for that service and subtype, once again using query parameters to filter:
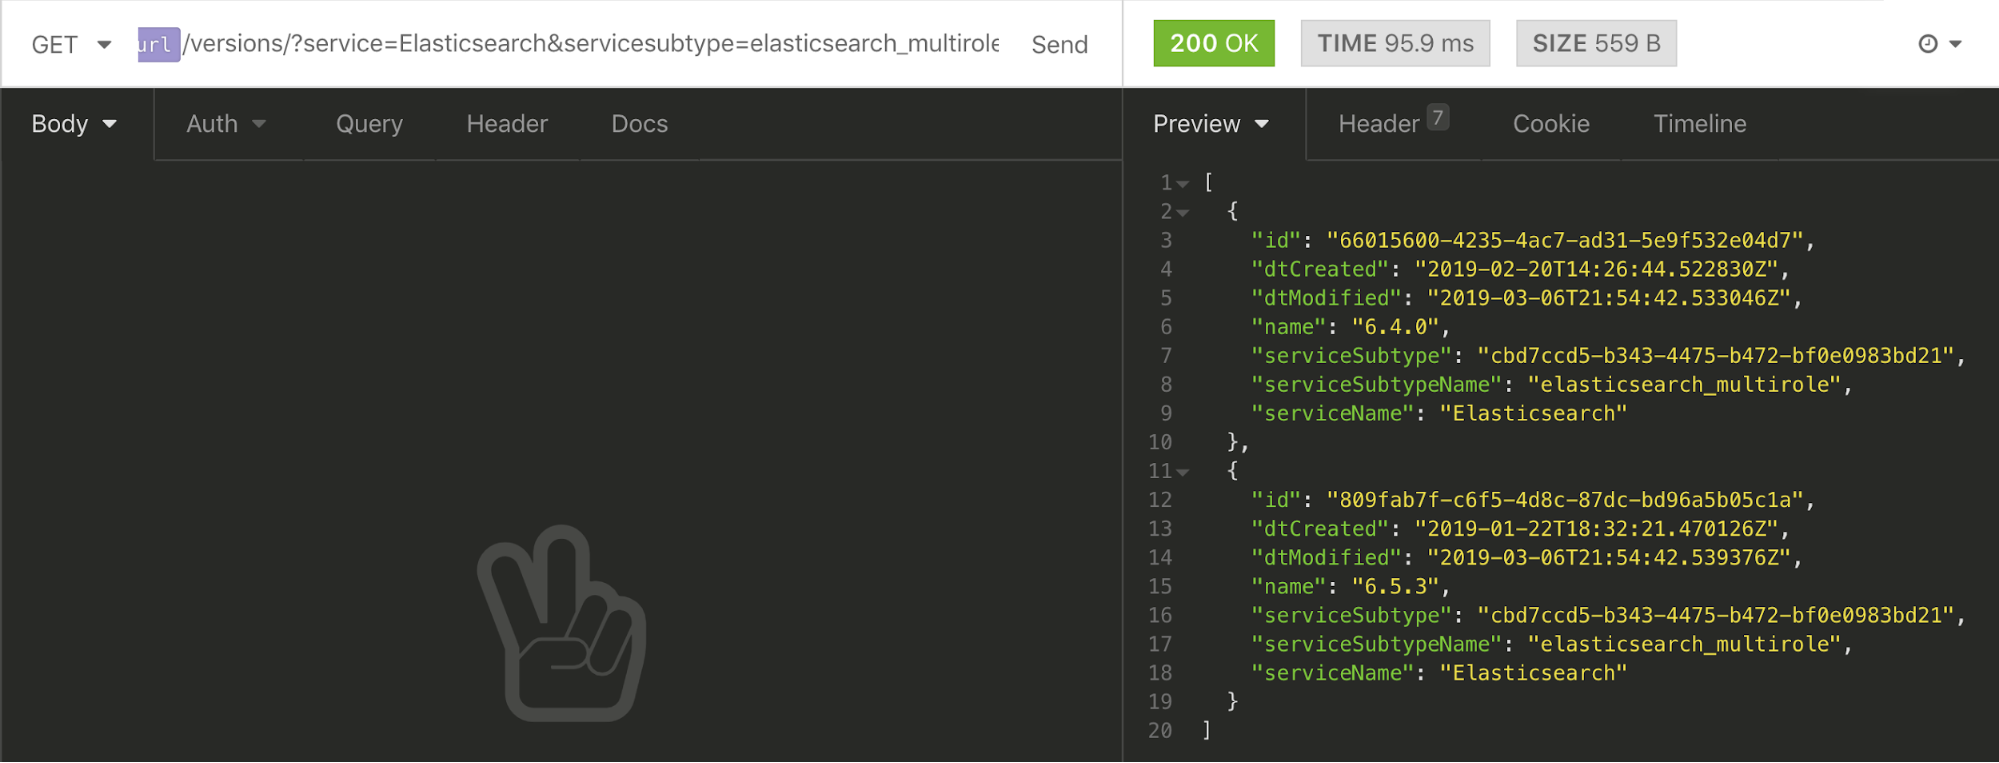
You can see that we have a few versions available at this time and will continue to expand that list. This is generally how the catalog will work when you want to see the options for creating an instance.
3. Create an instance
If you’re using the Insomnia template, you can use the “Create Elasticsearch Instance” call to create, which provides you with a basic configuration. Below is an example of a basic payload for the create call.
POST /instances/elasticsearch/
{
   "plan": "Standard_48GB",
   "name": "my_instance_name",
   "version": "6.5.3",
   "region": "us-east-1",
   "provider": "AWS",
   "service": "Elasticsearch",
   "serviceSubtype": "elasticsearch_multirole",
   "features": {
      "addons": {
         "kibana": true,
         "cerebro": true
      }
   },
   "acls": [{
      "name": "ElasticsearchACL",
      "cidr": "0.0.0.0/32",
      "kind": 2
   }, {
      "name": "KibanaACL",
      "cidr": "0.0.0.0/32",
      "kind": 4
   }, {
      "name": "CerebroACL",
      "cidr": "0.0.0.0/32",
      "kind": 5
   }]
}
Other than the “name”, which can be whatever you want it to be, the whole top section are the options returned by the catalog; You can fill those with whatever catalog selections you want.
Next is the features section. For now, this is used to specify that you want a Kibana and Cerebro dashboard with your instance. In the future, there will be more options.
Add ACLs
Finally, you’ll want to add ACLs to your instance. By default, all access to the instance is blocked, so you must specify which IPs and ranges to allow. Also, note that Elasticsearch, Kibana, and Cerebro all have separate ACLs specified by the “kind” field, so you can limit access to each of those individually. Set these to the IPs that you’ll need to access the service from. If you’re just trying to connect from your local machine, make sure you’re using your external IP address. There are plenty of services that can return this IP for you, or you can just Google “What’s my IP” and the first result should be your IP. You can always add or modify these later, if you wish.
Once your create payload is ready, provide it with a POST to /instances/elasticsearch/ along with your token.
4. View active instances
While our instance is being created, we can check the status and see other active instances via the /instances/elasticsearch/ endpoint.
GET /instances/elasticsearch/

[
{
   "id": "00000000-0000-0000-0000-000000000000",
   "name": "my_instance_name",
   "service": "Elasticsearch",
   "hosts": [],
   "features": {
      "addons": {
         "kibana": true
      }
   },
   "settings": {},
   "acls": [],
   "statusDisplay": "Create Requested",
   "namespace": "00000000-0000-0000-0000-000000000000",
   "url": "/instances/00000000-0000-0000-0000-000000000000/",
   "metadata": {},
   "dtCreated": "2019-03-08T04:17:46.120780Z",
   "dtModified": "2019-03-08T04:17:49.246328Z",
   "dtDeleted": null,
   "provider": "AWS",
   "version": "6.4.0",
   "clusterID": "11111111-1111-0000-0000-000000000000",
   "encrypted": false,
   "requested": "2019-03-08T04:17:49.246344Z",
   "completed": null,
   "stripeSubscriptionId": null,
   "lastTransactionId": "11111111-1111-1111-0000-000000000000",
   "status": 4,
   "organization": "11111111-1111-0000-0000-111111111111",
   "region": "us-east-1",
   "serviceSubtype": "elasticsearch_multirole"
}
]
While waiting for the cluster to build, keep your eye on the the statusDisplay field. The statusDisplay field will report “Ready” when the cluster is done creating.
Once you’re in the “Ready” state, the hosts field will be populated with an fqdn and port for each active service (Elasticsearch, Kibana, and/or Cerebro).
You can connect to any of them by connecting to https://<fqdn>:<port> , but first you’ll need to create a user in Elasticsearch
5. Create a user
In order to connect to any instance on the ObjectRocket service, you’ll need an open ACL and a valid user. We took care of the ACLs in the last step, during the create call, but we’ll create the user with a separate call to the /instances/elasticsearch/<id>/users/ endpoint. You’ll replace <id> with the “id” field returned in the instance list
POST /instances/elasticsearch/<id>/users/
{
   "username": "myawesomeusername",
   "password": "supersecretpassword",
   "roles": ["admin"]
}
This will create an admin user that can read and write all indexes as well as use Kibana. We also have readonly and kibana roles. You should receive a 202 response and now you can connect to your instance.
Wrapping up
That’s a quick primer on using our API and getting an instance going on our new platform. There’s much more to come, but this can get you up and running. You can learn more in our API Docs. As always, feel free to reach out to our support team if you have any questions.