Elasticsearch Connection Basics
When creating a new Elasticsearch instance on the ObjectRocket cloud service ( https://app.objectrocket.cloud ), there are a few things you need to know before you connect to your instance.
Elasticsearch Connection Checklist
In order to connect to your instance, you will need a few things:
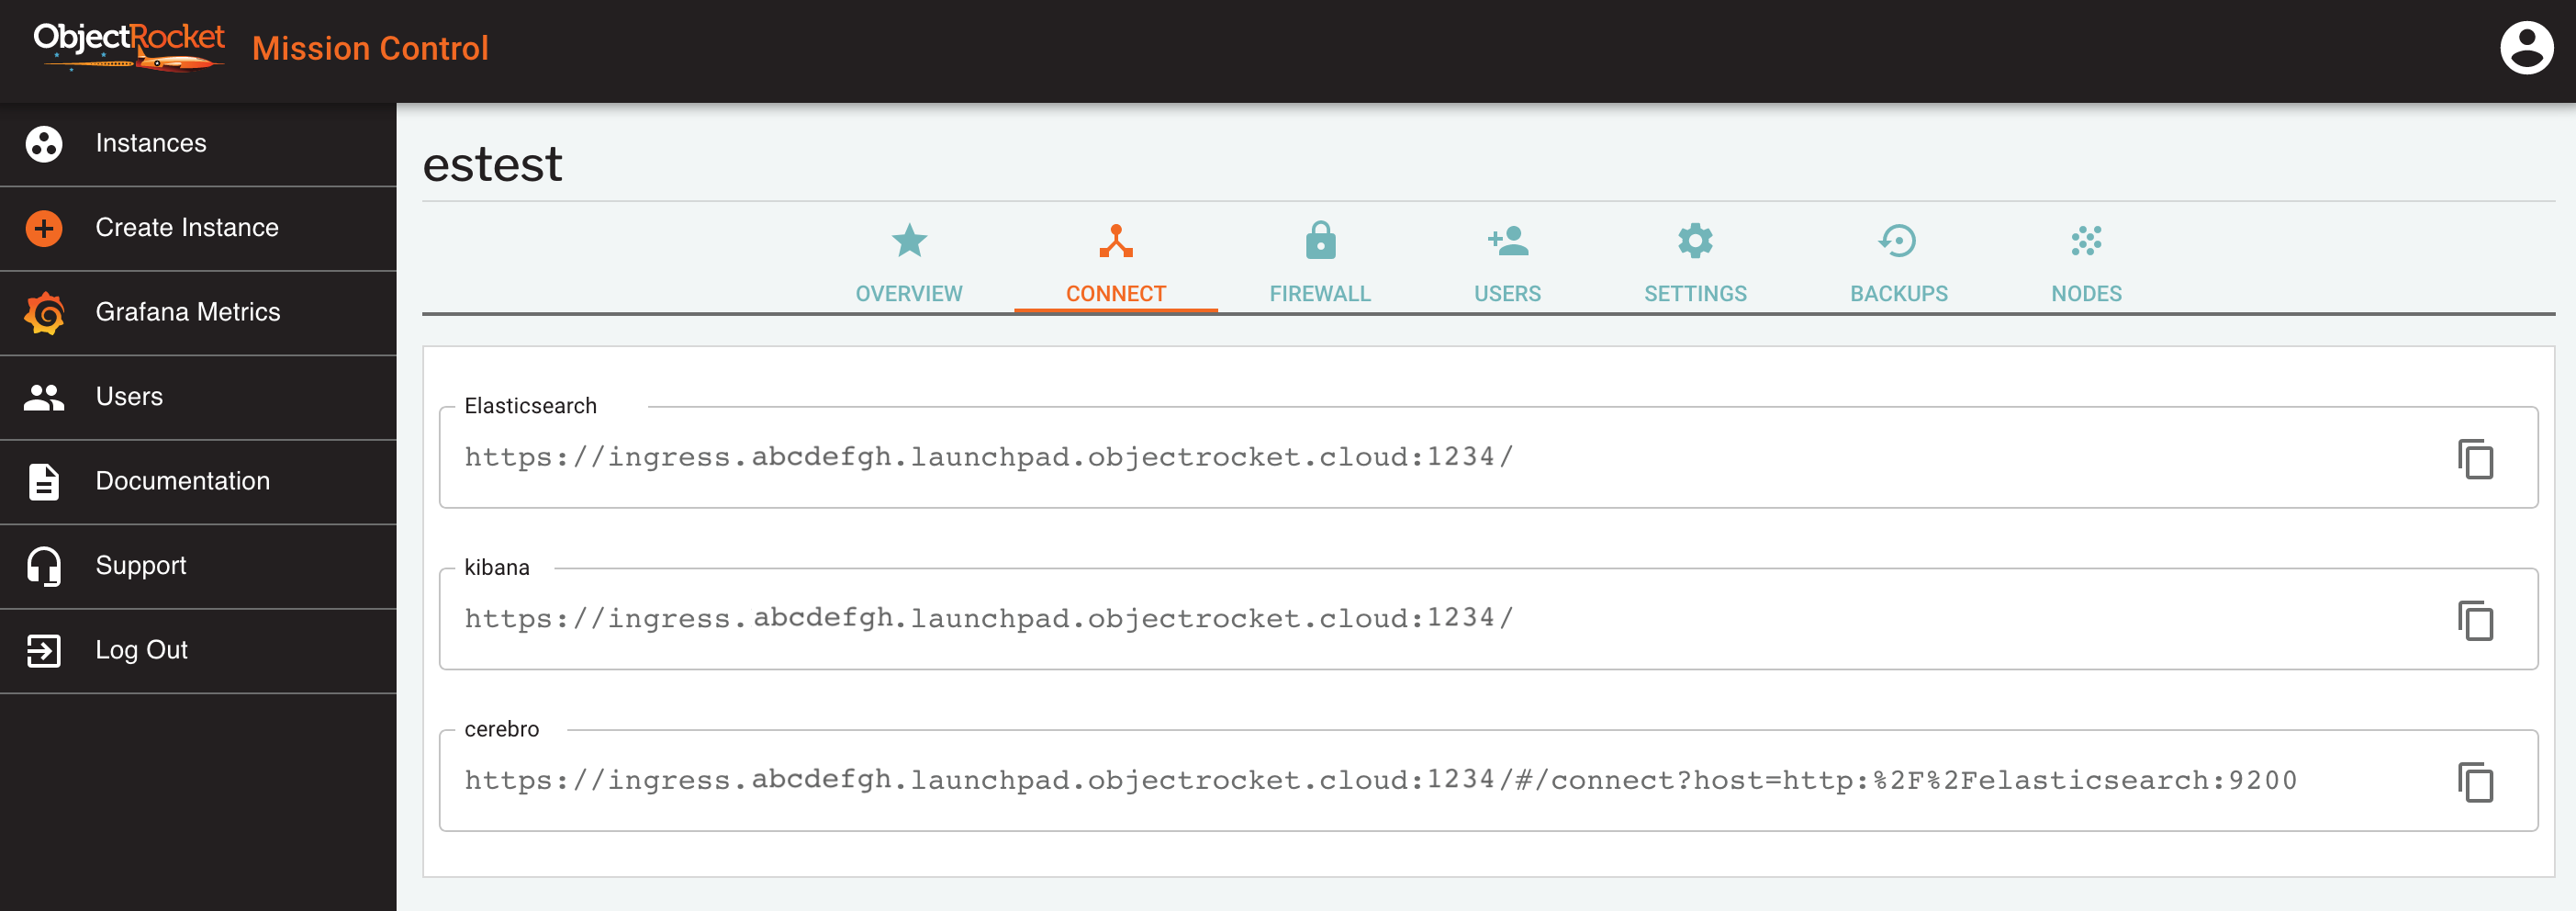
Your Instance Connection String: Each instance is set up with one or more database connection strings. You can find this in the CONNECT tab of the instance details in Mission Control . See the Elasticsearch Connection Strings section below for more information.
Open Firewall IPs: By default all traffic to your ObjectRocket instance is blocked. You must configure your instance to allow traffic from the IPs/CIDRs you will be connecting from. See the Firewall Configuration section below for more information.
A User: By default an ObjectRocket instance is not configured with any customer-usable users, so you must create them via our UI/API. See the Elasticsearch Users section below for more information.
How to Connect
Though each client has a different format, the easiest way is to test your connection is to use a the command line client. Elasticsearch uses an http interface, so you can connect using curl or a web browser. If you’ve completed the steps above, you can test your connection with the following command:
curl -u <your-user-name> https://ingress.<clusterid>.launchpad.objectrocket.cloud:<your-elasticsearch-port>/
Elasticsearch Connection Strings
When your ObjectRocket instance is created, it is given a unique hostname and port combination.
Once your instance has finished building, connection strings can be found in the CONNECT tab of the instance details screen, in Mission Control .

In general, your Elasticsearch connection string will look something like:
https://ingress.<clusterid>.launchpad.objectrocket.cloud:<your-elasticsearch-port>/
Elasticsearch Connection Strings
For all Elasticsearch instances, we provide a connection string for the datastore and separate connection strings for the various managememt utilities we provide:
Elasticsearch: This is the main connection string to use for database connections. It load-balances across all nodes in the cluster.
kibana: Kibana is a visualization tool for your Elasticsearch data and a well integrated part of the Elastic Stack
cerebro: Cerebro is an administrative dashboard that you can use to see status and maintain your cluster.
Elasticsearch Users
Creating your first Elasticsearch user
By default, your Elasticsearch instance on ObjectRocket does not have any users created. You must create users via the ObjectRocket API or GUI.
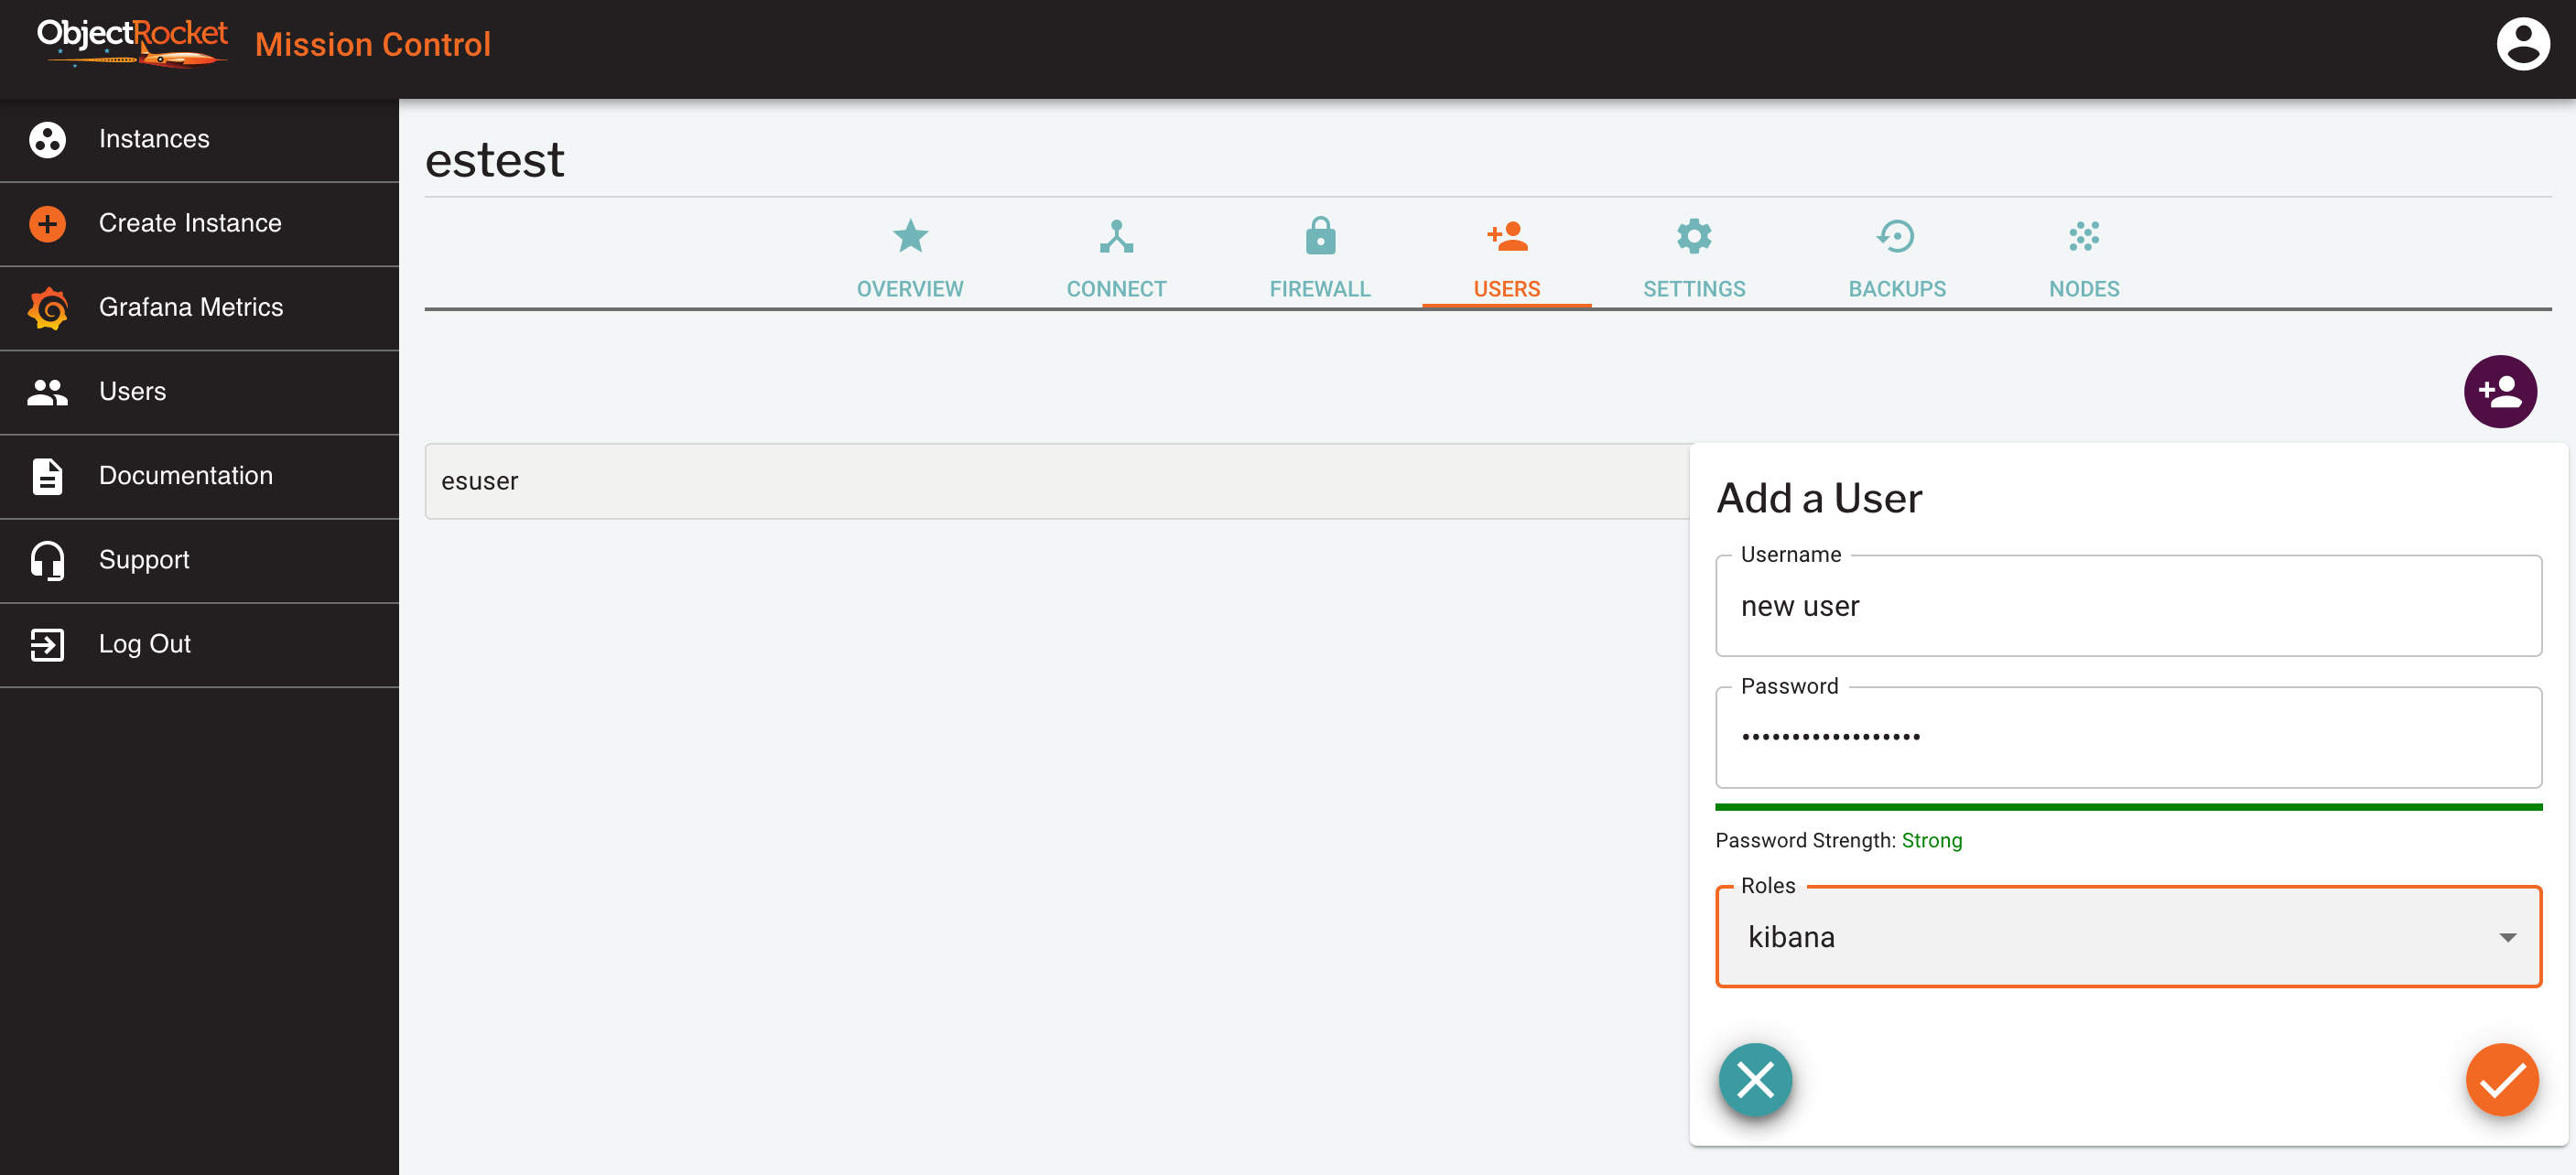
From Mission Control, click Users from the Instances page, or go to the USERS tab of the instance details page.
Enter a username and password for your user and select the admin role
You can verify your user has been created in the USERS tab of the instance details page.
Kibana and Cerebro uses the same users as the database itself, so the users created here can be used in all places, but the role will impact which things they can see and modify.

Elasticsearch User Roles
We currently offer three different roles for Elasticsearch users on our service:
admin: admin users can read and write any information in the instance and perform cluster management tasks
readonly: Can read any data in the instance, but cannot change or delete anything, including kibana dashboards and visualizations
kibana: kibana users are like readonly users in that they can read anything, but they have the added ability to modify kibana visualizations and dashboards
Firewall Configuration
When you create a new Elasticsearch instance, all access to the instance is blocked, except for the IP you accessed the UI from when creating the instance.
At any time you can add and remove additional IP addresses or CIDRs to the Firewall Configuration.
Adding Firewall IPs
To open up additional IPs and CIDRs to access your instance, follow the steps below:
Find your instance in Mission Control Instances page.
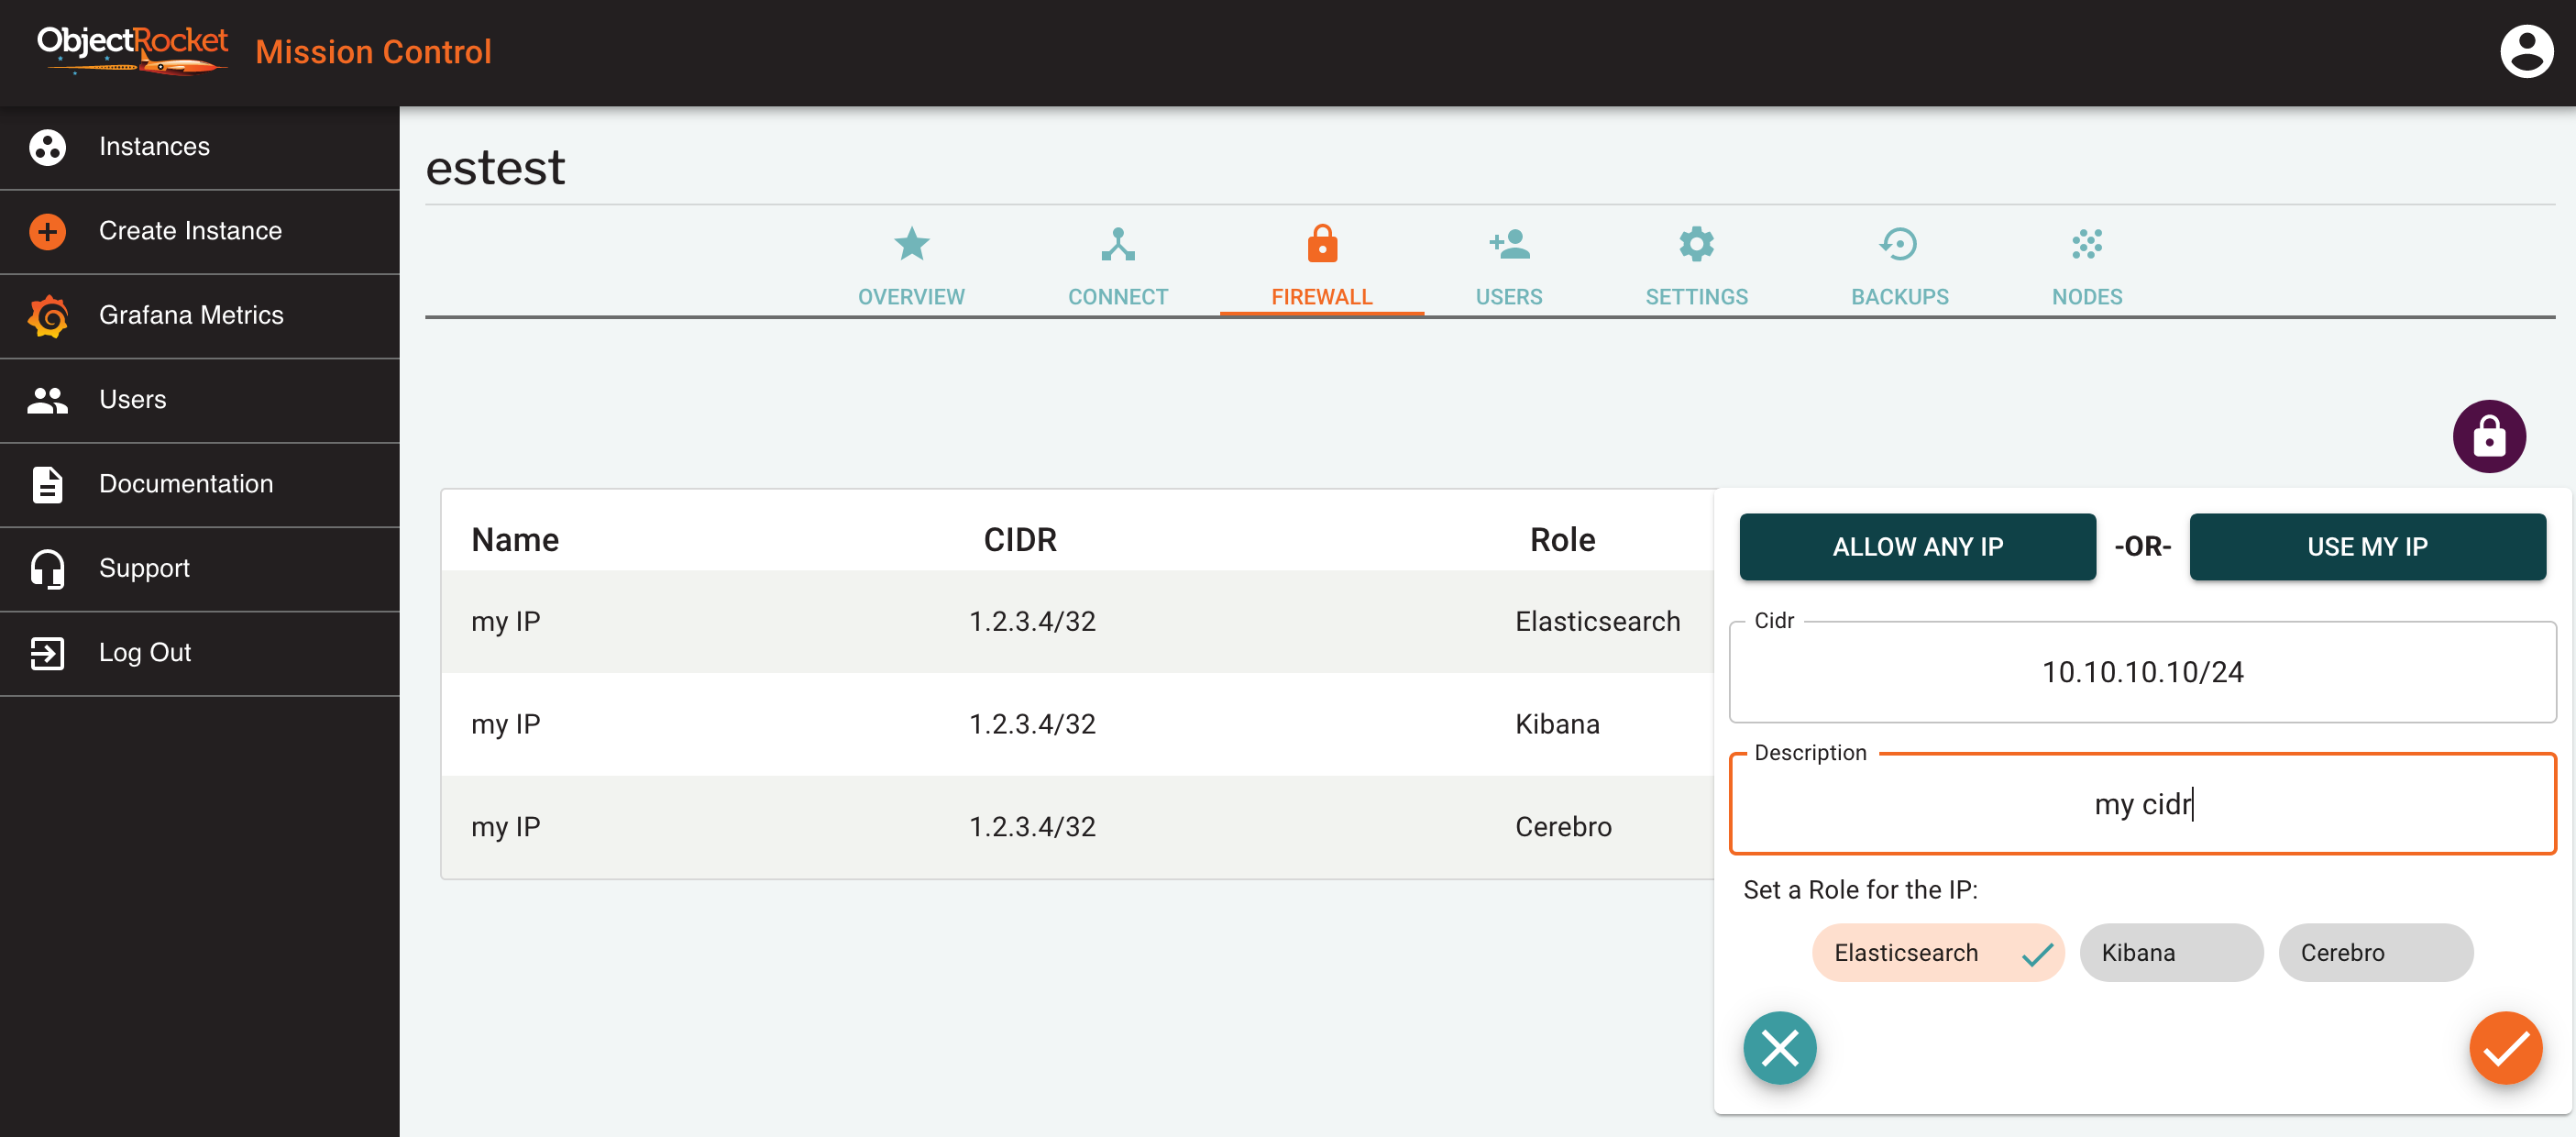
Select Firewall from the instance in the list, or click on the button in the FIREWALL tab of the instance details screen.
In the popout, either directly add an IP (e.g. 1.2.3.4) or CIDR (e.g. 1.2.3.4/24) in the CIDR field, or use one of the ALLOW ANY IP or USE MY IP shortcuts.
Enter a name for this IP so you can identify it later
Select a role for this IP. We allow you to set different IPs for each connection string, so the role determines which connection string the firewall will be opened for.
At any time, you can see the configure Firewall IPs for your instance in the FIREWALL tab of the instance details screen.

Warning
Though we give you the option to allow any IP (0.0.0.0/0) to your instance, we don’t recommend using it long-term. Though your instance is still protected by a username/password, it still poses a risk to the security of your instance since anyone can try to connect.
Removing Firewall IPs
To remove access for existing IPs and CIDRs from your instance, follow the steps below:
Find your instance in the Mission Control Instances page.
Navigate to the FIREWALL tab of the instance details screen for the instance you would like to modify.
Find the IP you would like to remove from the list.
Click on the red trash can next to the instance