Getting Started with Elasticsearch
Create an Instance
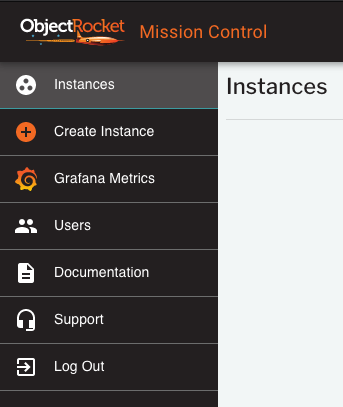
To start, click the Create Instance button in the menu at the top left.
Step 1 - Select the Elasticsearch Service
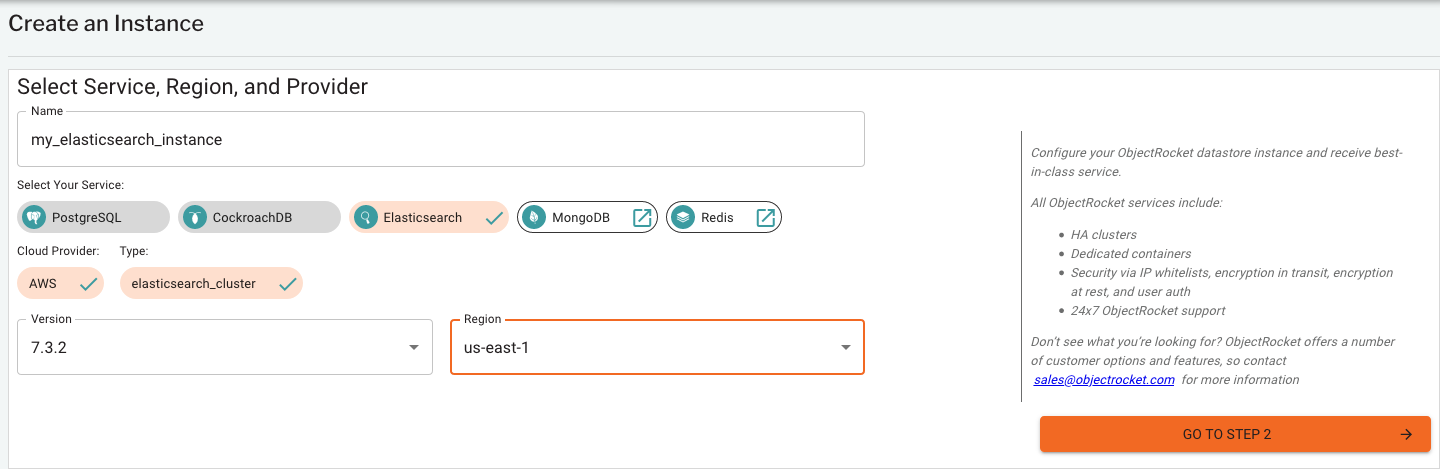
Here, you will select the:
Name of the instance: Enter any name you would like to identify the instance
Service you would like to create: In this case, Elasticsearch
Cloud provider: Which cloud you would like the instance deployed to.
Type: In the future, we may offer different type of Elasticsearch instances, but for now all are
elasticsearch_clusterVersion: The version of Elasticsearch/Kibana you’d like your instance to run
Region: The region of the Cloud provider you selected above to create your instance in
As with everything at ObjectRocket, we offer a number of ways to customize your instance. If you want something not available in the selections above, we’d be happy to work with you to add that option. Please reach out to ObjectRocket Sales
Step 2 - Configure your instance
Once you’ve moved on two step 2, you have the option to customize your Elasticsearch instance.
Here, you can select:
Flavor: Flavors affect the ratio of RAM to Storage and other performance tuning parameters. For most use cases, select the Standard flavor.
Size: The slider will determine the amount of usable storage (before replication) that your cluster will include. The amount of storage you select will dictate the number of nodes in your starting cluster (3-5) and the amount of storage per node.
Add-ons: Some configurations also can accept optional add-ons, like dedicated master nodes. You would select those here.
Step 3 - Add Whitelist IPs
By default ObjectRocket blocks all network access to your cluster. This is to increase security and ensure that only traffic from known address spaces is able to reach your cluster.
In order to enable access to your cluster, you must allow (whitelist) specific IPs or ranges of IP addresses.
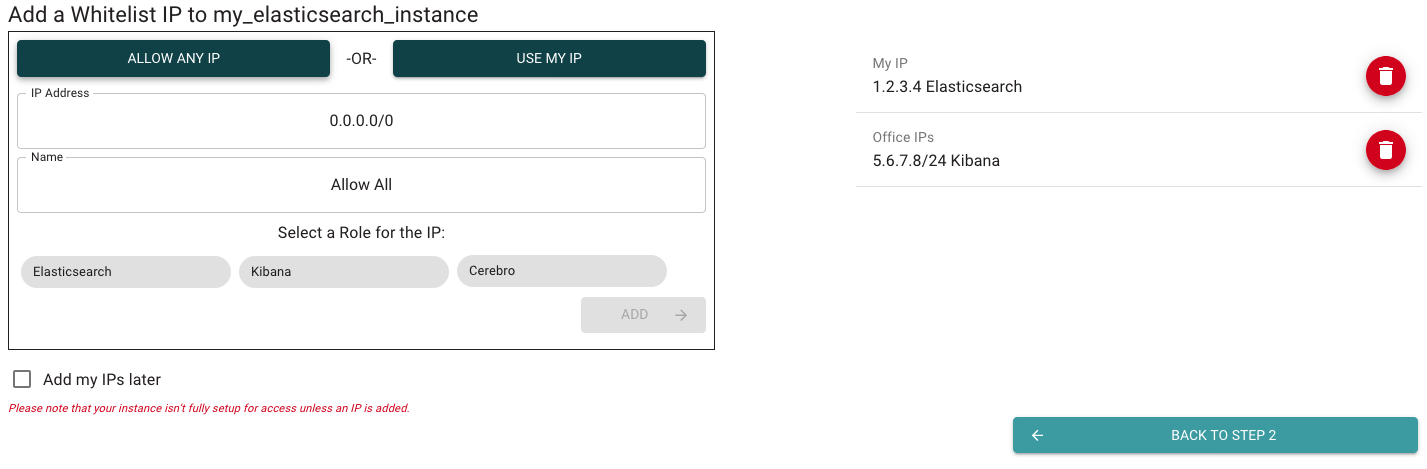
To add an IP, you have three options:
Use My IP: We can detect where you’re logged in to the UI from and populate the IP Address field with that specific IP.
Allow Any IP: Open up the cluster to access from anywhere. This can be dangerous Only open to any IP is you’re testing or have a good reason.
Manually Enter IPs: If you don’t select one of the buttons above, you can else manually enter specific IPs or IP ranges in CIDR format.
For each IP or range that you’d like to open:
Enter an IP address as described above
Name the entry so identify it or its use
Select a role for the IP address. We allow you to limit different parts of the service to different IPs. For example, if you want users on your office network to be able to connect to Kibana, but not be able to connect to Elasticsearch, you can limit that by selecting the Kibana role for the office network IPs.
Click on ADD
Alternatively, if you’re not ready to open up any IPs, you can check the box to add your IPs later.
Create the Instance
The final step is to create the instance. You will be presented with a price and upon clicking CREATE INSTANCE your instance will be created.
If you have not yet registered a credit card with your account, you will be asked for one now. You will need to enter a card, even if you’re using free credits as we’ll need a method to charge you if you use up all of your credits.
After payment info has been entered the instance will start building and you will be directed to the Instances screen.
Add a User
The next step is to create a user to connect to your database. Database users are distinct from Mission Control users in that you must create users that are specific to each database instance.
You can create a user from the Add Users button on the appropriate instance in the instance list, or by clicking into the instance details
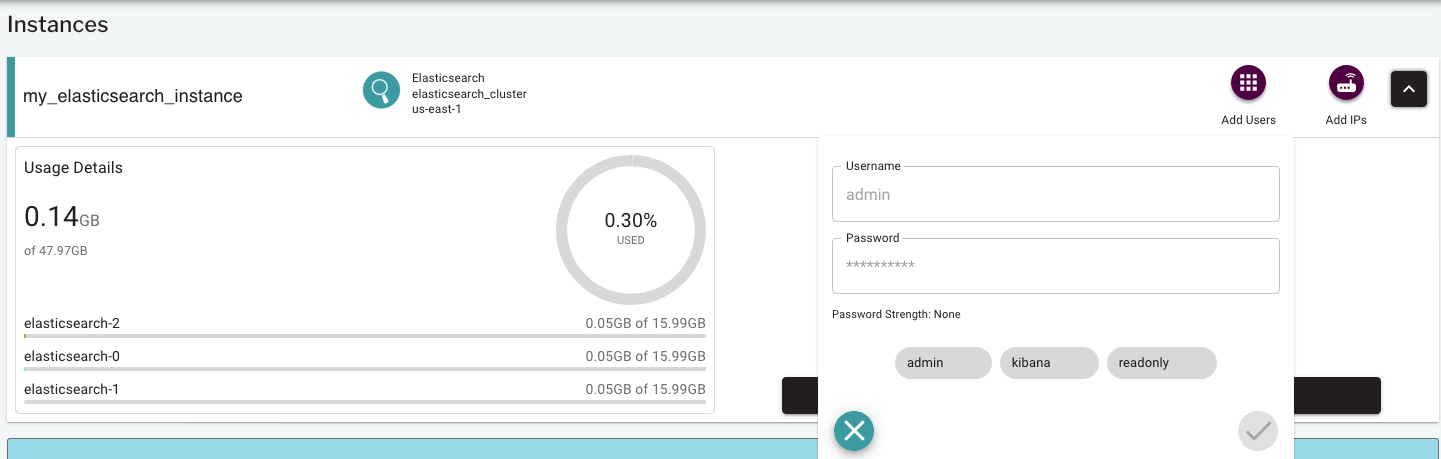
For each user:
Provide a username
Provide a password (we’ll indicate strength)
Select a role - Admins can do everything. Readonly users can read from every index, but not index documents or delete. Kibana users are like readonly, but have the additional ability to create visualizations and dashboards.
Connect to the Instance
Now that you’ve opened access from the IPs of your choice and added a user, you can connect to your instance.
Connection Strings
From the Instances screen, click the black arrow to expand the box and select VIEW MORE DETAILS to go to view details on your instance.
Once there, click the CONNECT tab to view the connection strings for Elasticsearch, Kibana, and Cerebro.
Connect
Now you can use your client of choice or just curl to Elasticsearch using the user that you created earlier and the connection string from the previous Step
curl -u <username> https://ingress.<somecluster>.launchpad.objectrocket.cloud:<yourport>/
Trouble Connecting?
If you have trouble connecting, check the following things
Correct IPs are not whitelisted
When trying a simple curl call, as described above, you could see curl: (52) Empty reply from server or a browser may indicate Problem loading page, Secure Connection Failed, or Can't Open Page. This generally means you have not set up the whitelist IPs correctly.
Remember that the whitelisted IP is not the IP your computer is set to, but instead the IP as seen from outside your network. The USE MY IP button (or Googling “What’s my IP”) will return the correct IP for your current location.
Also, remember that each piece of our Elasticsearch service requires its own ACLs or IPs. If you want to connect to Elasticsearch, Kibana, and Cerebro from the same place, you’ll need to whitelist the IP three times; one for each role.
For testing purposes, you can try the “ALLOW ANY IP” just to rule out IP issues, but this is dangerous to use long term, as IP restrictions are a key component of securing your data.
Incorrect credentials
If you try to connect and Unauthorized or something similar is returned, your IPs are set up correctly, but you may be using the wrong credentials.
Make sure that you use the user you created on the database instance, NOT the user you log into Mission Control with
I still would like some help
We’re happy to offer it! Reach out to our support team and we’d be happy to help you out.